
Finding a good, cheap trail camera isn't about scoring a lucky deal—it's about knowing what truly matters out in the field. You can absolutely find a solid workhorse in the $50 to $150 price range. These cameras offer a great balance of essential features, like clear 12-20MP photos and dependable motion detection, without the added expense of cellular plans.
They're the perfect starting point for hunters on a budget, landowners keeping an eye on their property, or anyone just curious about the critters in their backyard.
Your Quick Guide to Budget Trail Cameras
You don't have to settle for blurry photos and dead batteries just because you're shopping for an affordable trail camera. The trick is to separate the must-have features from the nice-to-have bells and whistles. Think of this as your cheat sheet for making a smart, fast decision. Good cheap trail cameras are all about function over frills.
They focus on the core components that simply get the job done, allowing you to capture crisp images without breaking the bank. At a minimum, you should be looking for:
- Reliable Detection: A sensor that actually triggers when an animal walks by. This sounds basic, but it's where the cheapest cameras often fail.
- Sufficient Image Quality: You need enough detail to identify what you're looking at. 12 megapixels is a solid baseline for clear shots.
- Decent Battery Life: The last thing you want is a camera that dies after a week. Look for models that can last several weeks or even months on a single set of batteries.
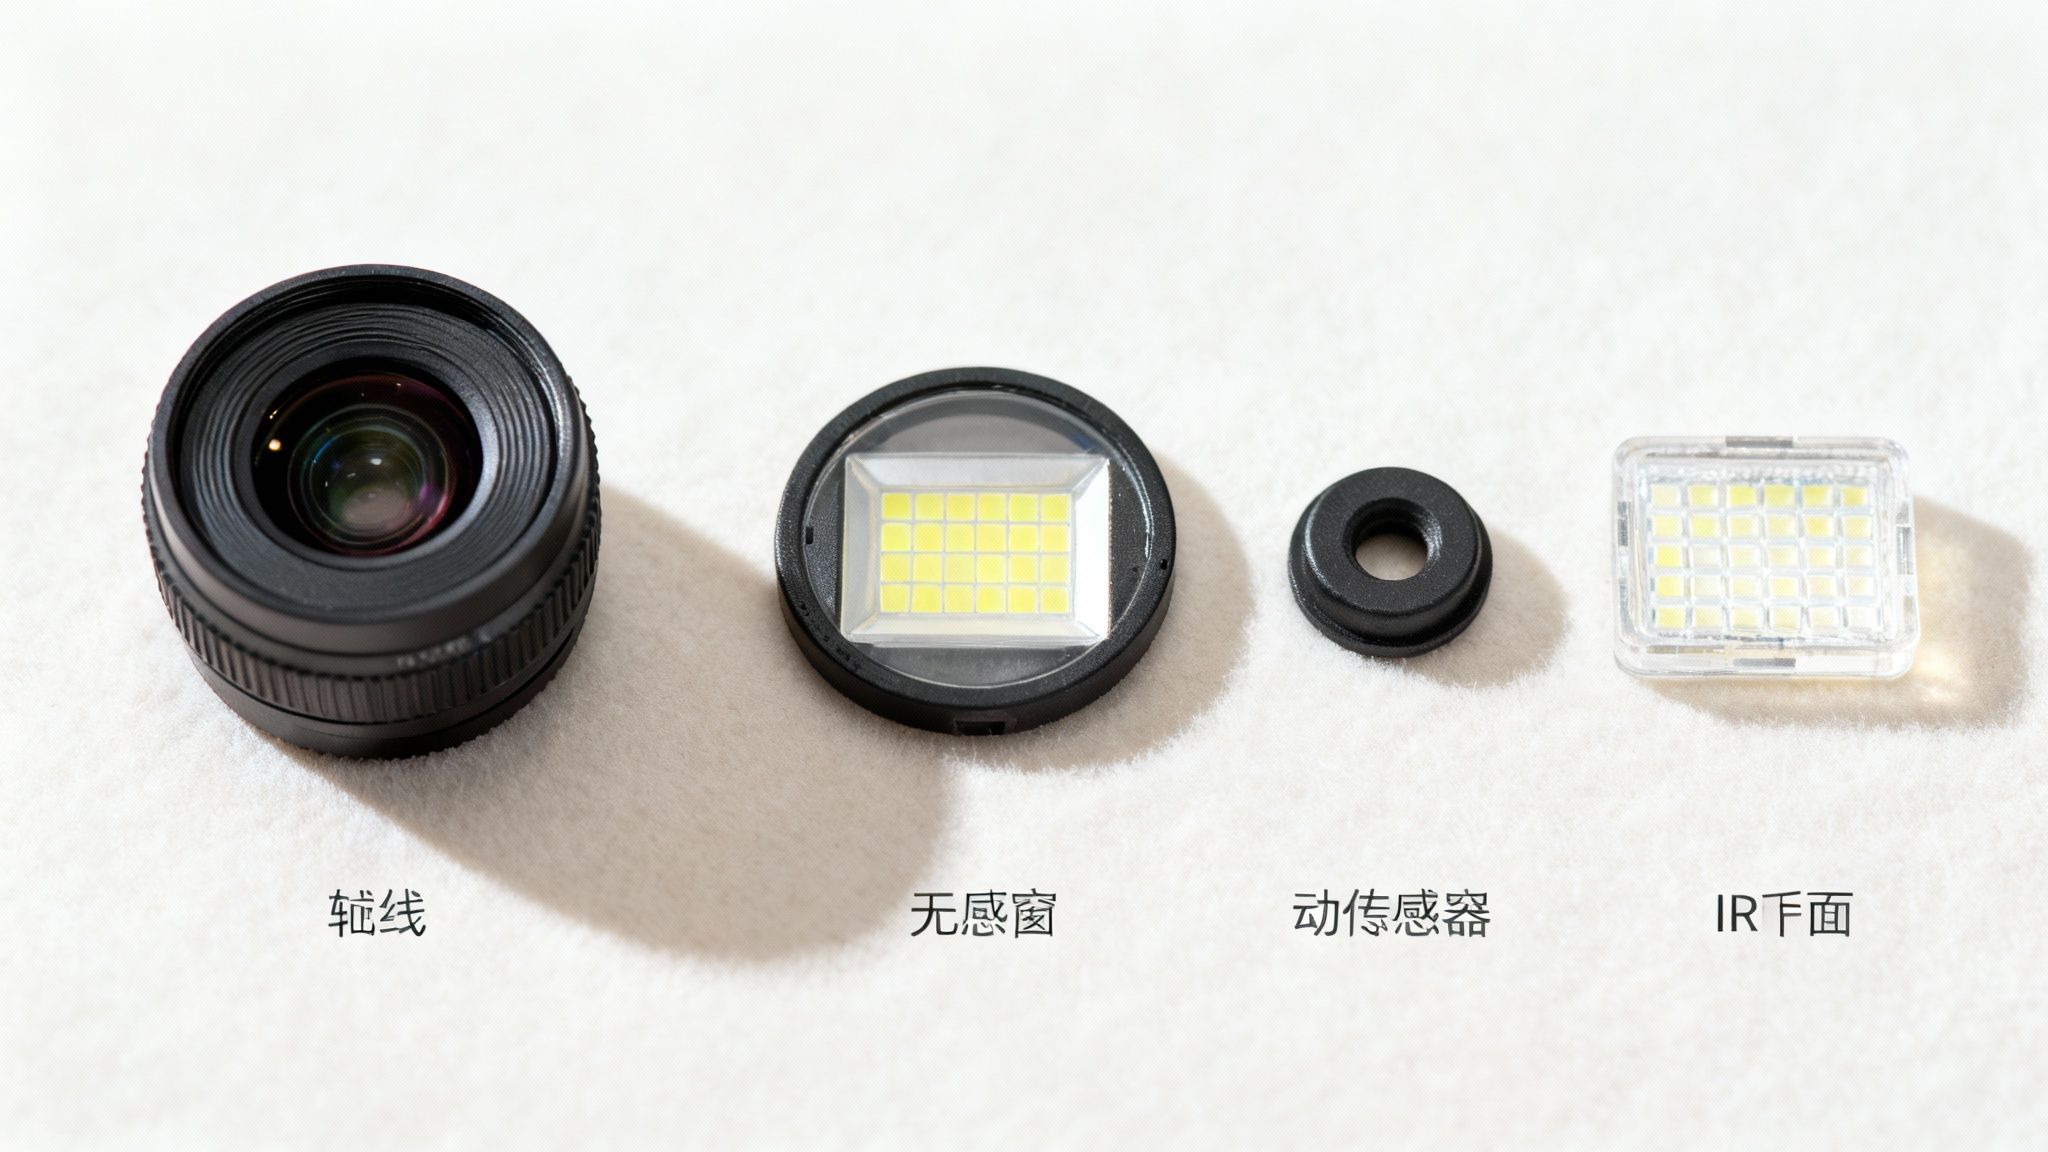
Below is an image of an early trail camera, showing its core components.
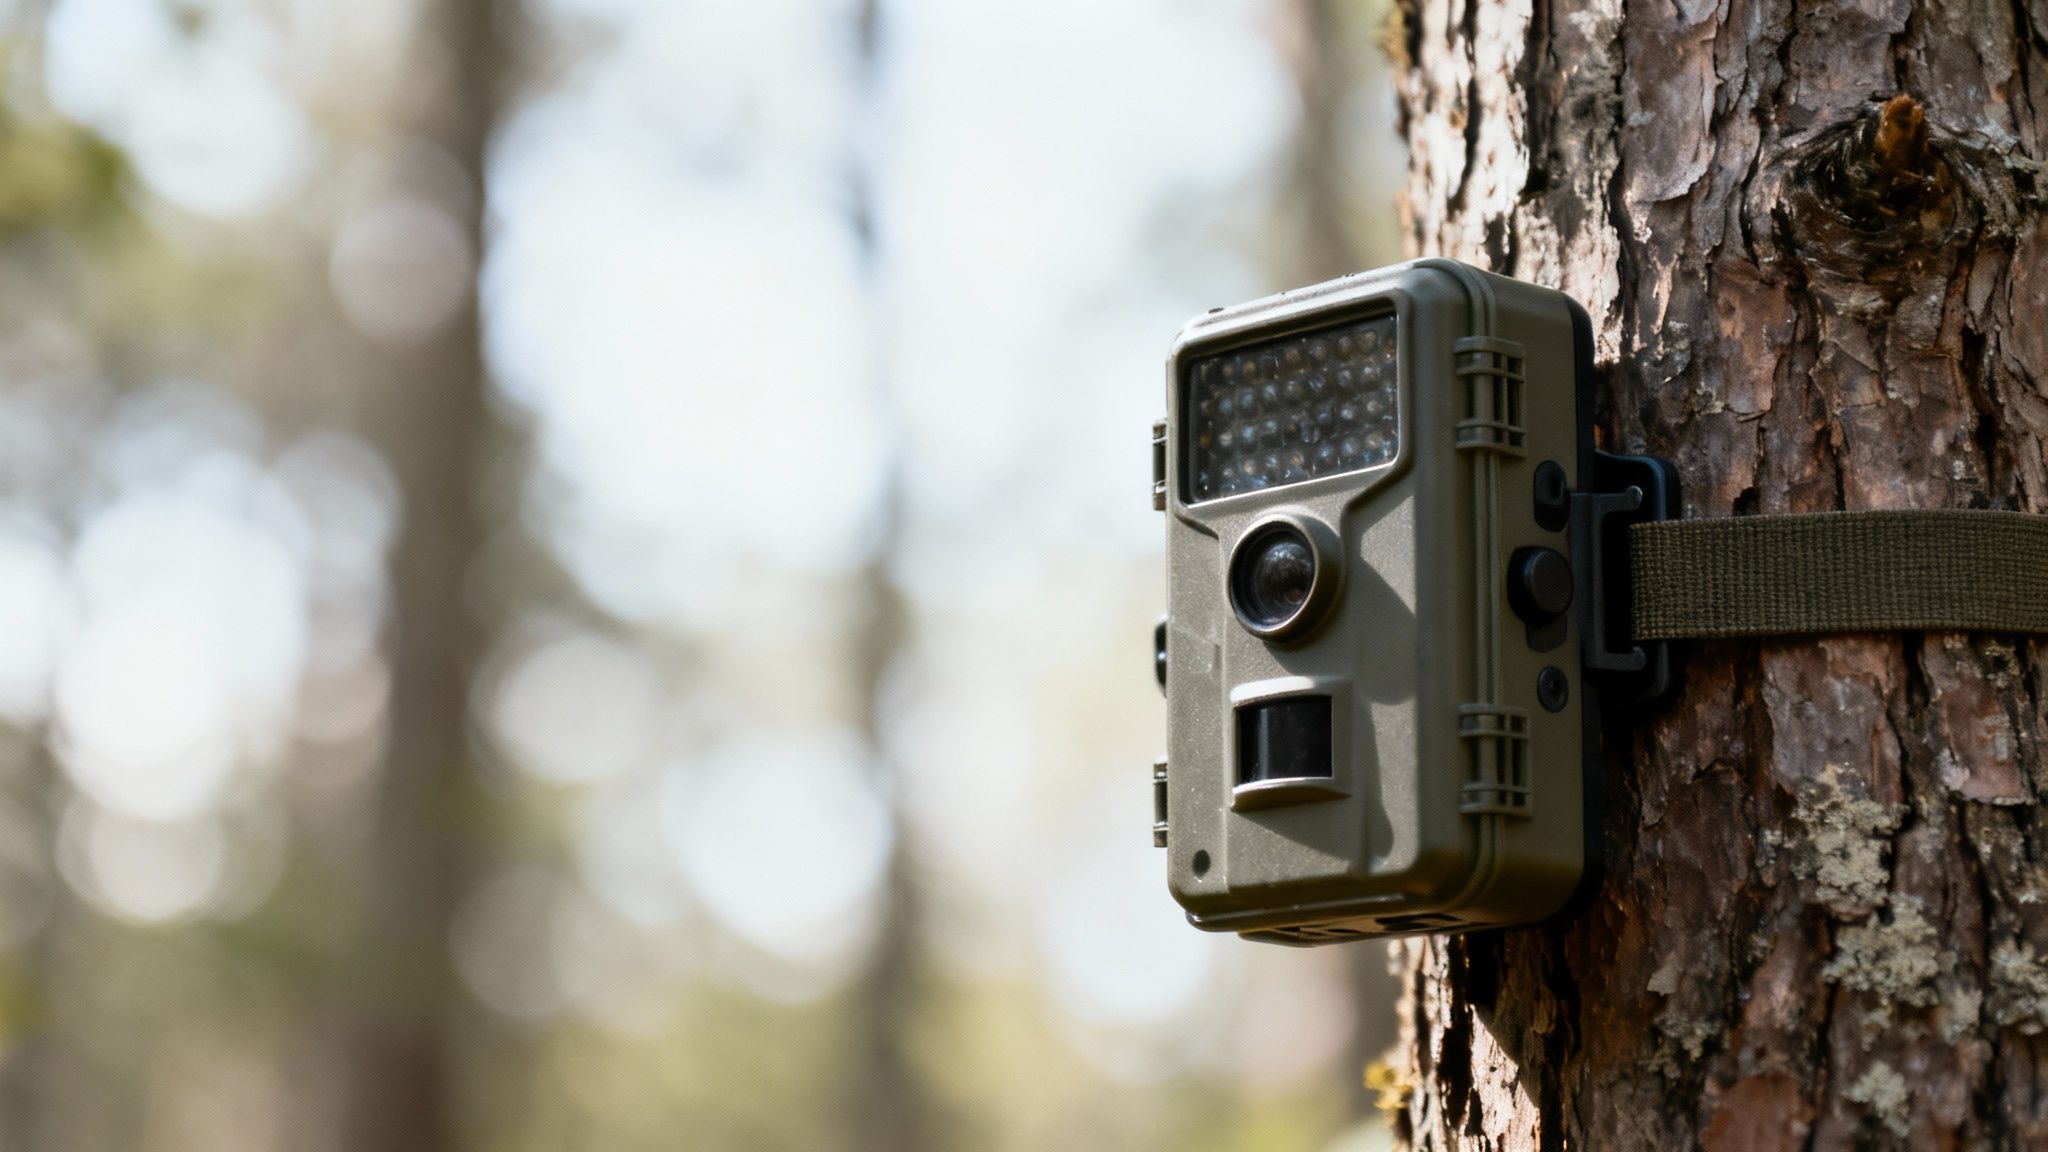
Sure, today's cameras are smaller and more advanced, but the fundamental parts—a motion sensor, a lens, and a tough, weatherproof case—are still the same, even in the most budget-friendly options.
Budget Trail Camera Quick Comparison
To make it even simpler, here's a quick look at what you can expect at different price points. This table breaks down the common tiers to help you match your budget with your needs.
| Price Tier | Typical Resolution | Expected Battery Life | Best For |
|---|---|---|---|
| $40-60 | 12-16MP | 3-6 months | Backyard wildlife watching, basic property monitoring |
| $60-100 | 16-24MP | 6-10 months | Deer scouting, hunting on a budget, general outdoor use |
| $100-150 | 24-32MP+ | 8-12+ months | Serious hunters, research projects, high-traffic security areas |
Ultimately, a higher price usually gets you better night vision, faster trigger speeds, and longer battery life. But as you can see, even the most affordable cameras pack enough punch for most common situations.
What Makes a Trail Camera Tick?
To find a genuinely good deal on a trail camera, you need to look past the marketing hype and understand what’s going on under the hood. Think of your camera as a tiny, patient scout you leave in the woods. Its only job is to see, react, and record.
How well it performs those three simple tasks comes down to a handful of core specs. Getting a handle on these terms is the key to telling a true bargain from a dud. Don't worry, you don’t need to be an engineer to figure this out.
The Brains and Reflexes of Your Camera
The most critical function of any trail cam is its ability to react to movement. This whole process is governed by two features that work hand-in-hand: the detection circuit and the trigger speed.
- Detection Range: This is simply how far away the camera's sensor can pick up on motion. A longer and wider range is great for monitoring a big, open food plot or a long sendero.
- Trigger Speed: Once that motion is detected, this is how fast the camera snaps a picture. Think of it like a baseball catcher's reflexes—a blazing-fast trigger speed (under 0.5 seconds) freezes the action and gets you a clear shot of the animal, not just its tail as it disappears out of frame. Slower speeds around 1 second are perfectly fine for less dynamic spots, like a feeder where deer hang around.
A camera with a huge 80-foot detection range but a sluggish trigger is a classic mismatch. It might sense a buck way out there, but by the time the shutter clicks, he’s already moved on. Finding the right balance is everything.
If you want to get deeper into the tech, our guide on how cellular trail cameras work breaks it all down.
The Passive Infrared (PIR) sensor is the unsung hero here. It isn't "seeing" movement in the traditional sense. Instead, it detects the difference in heat between a warm-bodied animal and the cooler background, which is why it works just as well in total darkness as it does in broad daylight.
The Eyes of the Camera, Day and Night
After the camera triggers, the whole effort is wasted if the picture is junk. The quality of the image comes down to the camera's lens, its image sensor, and—most importantly for night shots—its flash.
- Resolution (Megapixels): It's easy to get caught up in a megapixel war, but honestly, anything in the 12-20MP range gives you more than enough detail to identify a specific buck or see what’s lurking around your property.
- Flash Type: In the budget-friendly world, you'll mainly see two options: low-glow (which produces a faint red glow from its LEDs) or no-glow (which uses completely invisible infrared). No-glow is the king of stealth and is far less likely to spook a wary old animal, but that stealth often comes at the cost of slightly shorter flash range at night.
Finding the Smartest Buys Under $150
Let's be clear: navigating the trail camera market under $150 isn't about making sacrifices. It’s about being smart. This price range is the sweet spot where you find incredible performance without shelling out cash for high-end features you might never use.
Think of it like packing for a weekend camping trip. You grab the tent and sleeping bag first—the essentials. You don't worry about the portable espresso maker until the critical gear is covered.
For affordable trail cameras, those "essentials" are a reliable motion sensor, decent night vision, and solid battery life. These are the non-negotiables, the foundation of a camera you can actually depend on. Anything extra, like cellular connectivity or 4K video, is a bonus. Nice to have, but not critical for basic scouting or keeping an eye on your property.
Must-Haves Versus Nice-to-Haves
When you’re sorting through budget-friendly trail cams, it helps to separate the core functions from the bells and whistles. This tells you where your money is really going. If you prioritize the must-haves, you’ll end up with a camera that excels at its primary job: capturing clear images of wildlife, day or night.
- Must-Have: A PIR motion sensor with a detection range of at least 60 feet. This is the trigger finger of the camera. If it can't sense an animal walking into its zone, nothing else matters.
- Must-Have: Low-glow or no-glow infrared flash. This is absolutely crucial for getting clean nighttime photos without spooking every deer in a ten-mile radius.
- Nice-to-Have: 1080p video with audio. Video is a great tool, but it’s a battery hog. Still photos are usually more than enough for patterning game.
- Nice-to-Have: Cellular Connectivity. A game-changer, for sure, but a feature you’ll almost never find under $150. It also comes with recurring data plan costs. For a deeper dive on what makes a camera a great value, check out our guide on the best game cameras for the money.
This screenshot shows a typical feature rundown you might see on a product page.
Notice how specs like resolution and trigger speed are front and center? That's because they're the most important drivers of performance.
Aligning Your Budget with Your Needs
Your mission dictates which features matter most. A hunter watching a remote scrape needs stealth and battery longevity above all else. Someone keeping tabs on a backyard bird feeder can get by with a lot less.
The key is to invest in the features that directly support your goal. Don't pay a premium for 4K video if you just want to pattern a whitetail buck with still photos. A solid 16MP camera with a 0.4-second trigger speed will serve you far better than a feature-packed but sluggish alternative.
To help you find the smartest buy, here’s how features typically stack up across different budget tiers.
Feature Comparison Across Budget Tiers
This table breaks down what you can realistically expect at each price point. As you move up from entry-level, you’re not just getting more megapixels; you’re paying for faster triggers, better night vision, and tougher construction—all things that make a real difference in the field.
| Feature | Entry-Level (Under $50) | Mid-Tier ($50-$100) | Premium Budget ($100-$150) |
|---|---|---|---|
| Resolution | 12-16MP | 16-24MP | 24-32MP+ |
| Trigger Speed | 0.7-1.0s | 0.4-0.7s | 0.2-0.4s |
| Night Vision | Low-Glow (50-65 ft) | No-Glow option (65-80 ft) | Enhanced No-Glow (80+ ft) |
| Build Quality | Basic plastic housing | Weather-resistant, better seals | Ruggedized, improved latches |
Ultimately, the best camera is the one that reliably does the job you need it to do. Use this as a guide to ensure you're putting your money toward the specs that count.
Where Budget Cameras Make Compromises
Shopping for a good cheap trail camera isn't about finding some mythical unicorn with zero flaws. It's about making smart, informed compromises. Think of it like buying a truck—you can get incredible towing power or great gas mileage, but it's really tough to get both in the same package. Budget trail cams operate on the exact same principle of give-and-take.
To hit that attractive price tag, manufacturers have to make strategic cuts somewhere. These aren’t necessarily deal-breakers, but you absolutely need to know where those cuts were made. Understanding these trade-offs is the key to managing your expectations and picking a camera that sacrifices the features you care about least.
Image Quality and Night Vision
One of the first places you'll see a compromise is nighttime image quality. A camera might boast a high 20MP resolution for crisp daytime photos, but its nighttime shots can come out looking grainy or blurry. This usually happens because cheaper models are built with smaller, less powerful infrared flash units.
A camera's flash range is a critical spec to watch. A model with an advertised 80-foot detection range but only a 50-foot flash range will trigger on a distant buck but fail to light him up, leaving you with a dark, useless photo.
The image sensor itself is another area. Premium cameras use higher-quality sensors that soak up more light and capture richer detail, especially when the sun goes down. Budget models rely on more basic sensors that, while perfectly functional, may produce less vibrant colors and softer details when you zoom in.
Speed and Component Durability
Performance specs like trigger and recovery speed are also frequent areas for compromise. A budget camera might have a trigger speed of 0.8 seconds. That's perfectly fine for a deer standing still at a feeder, but it’s likely too slow to reliably catch a buck chasing a doe across a clearing. Recovery time—how fast it can snap a second picture—is often a step slower as well.
You'll also notice differences in the physical build. To keep costs down, manufacturers might use:
- Thinner plastic housings: These are just less resistant to extreme cold, baking sun, or a curious bear.
- Less robust latches: Flimsier clips and weaker seals are more prone to breaking or letting moisture creep in over a few seasons.
- Simpler mounting straps: They get the job done, but they might not hold up as long as the heavy-duty nylon straps that come with pricier models.
Once you understand these trade-offs, you can pick a camera whose compromises line up with your actual needs. That’s how you get the best possible performance for your money.
Matching Camera Specs to Your Mission
The word "best" gets thrown around a lot, but what does it really mean? When it comes to trail cameras, the best one is simply the one that’s right for your specific job. Buying a good, affordable trail cam isn't about chasing the highest specs on the box—it's about investing in the right tool.
Think about it this way: a camera that’s perfect for one task might be completely mediocre for another. A hunter trying to pattern a ghost-like mature buck has a totally different set of needs than a homeowner hoping to catch a raccoon raiding the bird feeder. Pinpointing your main goal is the single most important step. It’s how you find a camera that feels like it was built just for you, without wasting money on features you’ll never touch.
Ideal Specs for Whitetail Hunters
For hunters, it all boils down to two things: stealth and speed. Pressured whitetails are incredibly jumpy and tuned in to every little change in their environment. A camera that spooks a deer is worse than having no camera at all.
- Flash Type: A no-glow infrared flash is non-negotiable here. This type of flash is completely invisible to the animal (and human) eye, so you won’t be announcing your camera’s location to that trophy buck.
- Trigger Speed: Look for a trigger speed of 0.5 seconds or less. Deer don't usually stand around and pose. A fast trigger means you get a crisp, centered photo instead of a blurry picture of a tail disappearing out of the frame.
- Battery Life: Your best hunting spots are probably a decent hike from the truck. Long battery life is crucial because every trip you make to swap batteries leaves human scent behind, potentially ruining the spot.
This decision tree gives you a good visual of the trade-offs you'll likely face when picking a camera for your specific needs.
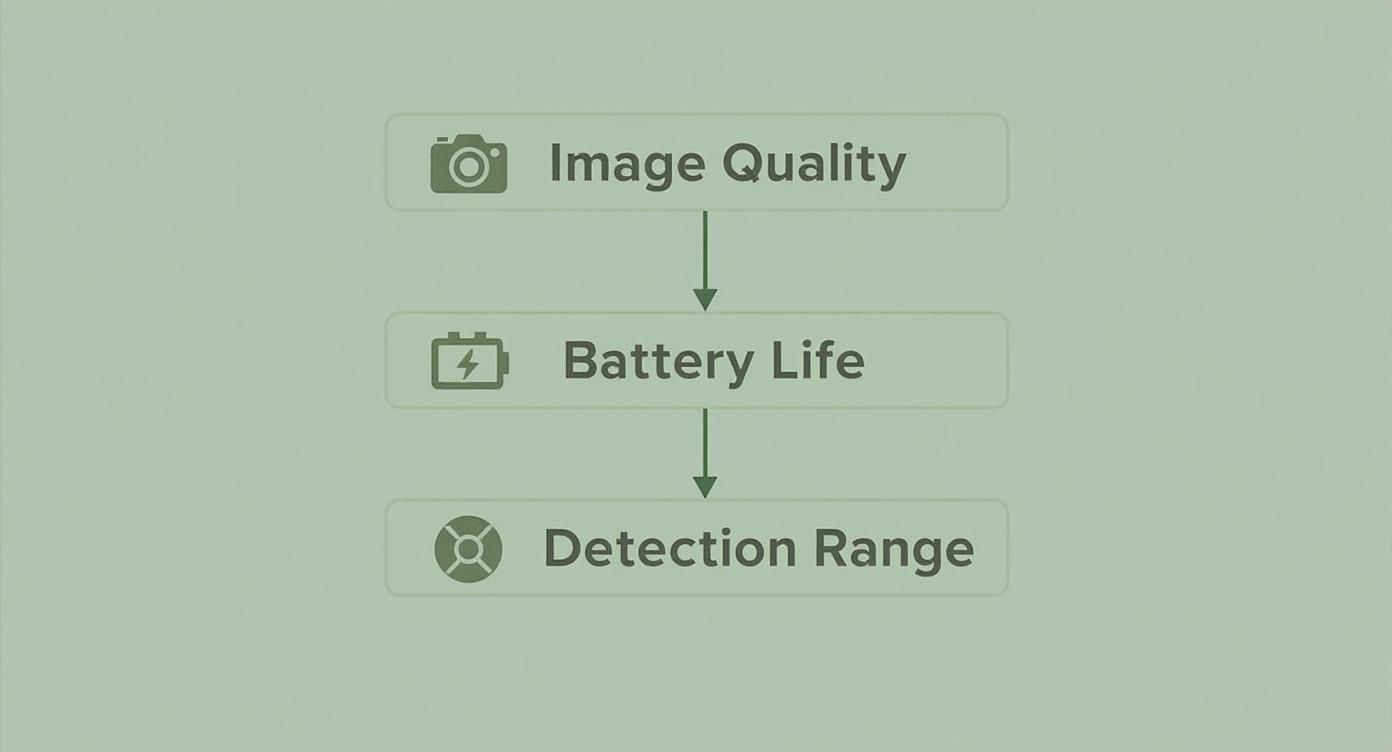
As you can see, if you decide to prioritize something like phenomenal image quality, you might have to live with shorter battery life or a less impressive detection range. It’s all a balancing act.
Top Features for Property Security
When you’re setting up a trail cam for security, the game changes. Your priorities shift from pure stealth to wide coverage and crystal-clear images. The goal is simple: capture undeniable evidence of any activity on your property.
For security, video almost always beats still photos. A short, clear video clip tells a much bigger story—what a person was doing, where they came from, and how long they stuck around. That context is priceless.
Here are the key features to focus on:
- Video Resolution: You’ll want at least 1080p video. This resolution gives you enough detail to make out faces or license plates, which is especially important for clips shot in the dead of night.
- Detection Angle: A wider detection angle (think over 60 degrees) is a huge plus for monitoring broad areas like a driveway, a gate, or the entrance to your backyard.
- Night Vision Range: Look for a powerful flash with an 80-foot or greater range. This ensures your camera can light up subjects even if they’re far away, giving you complete coverage after dark.
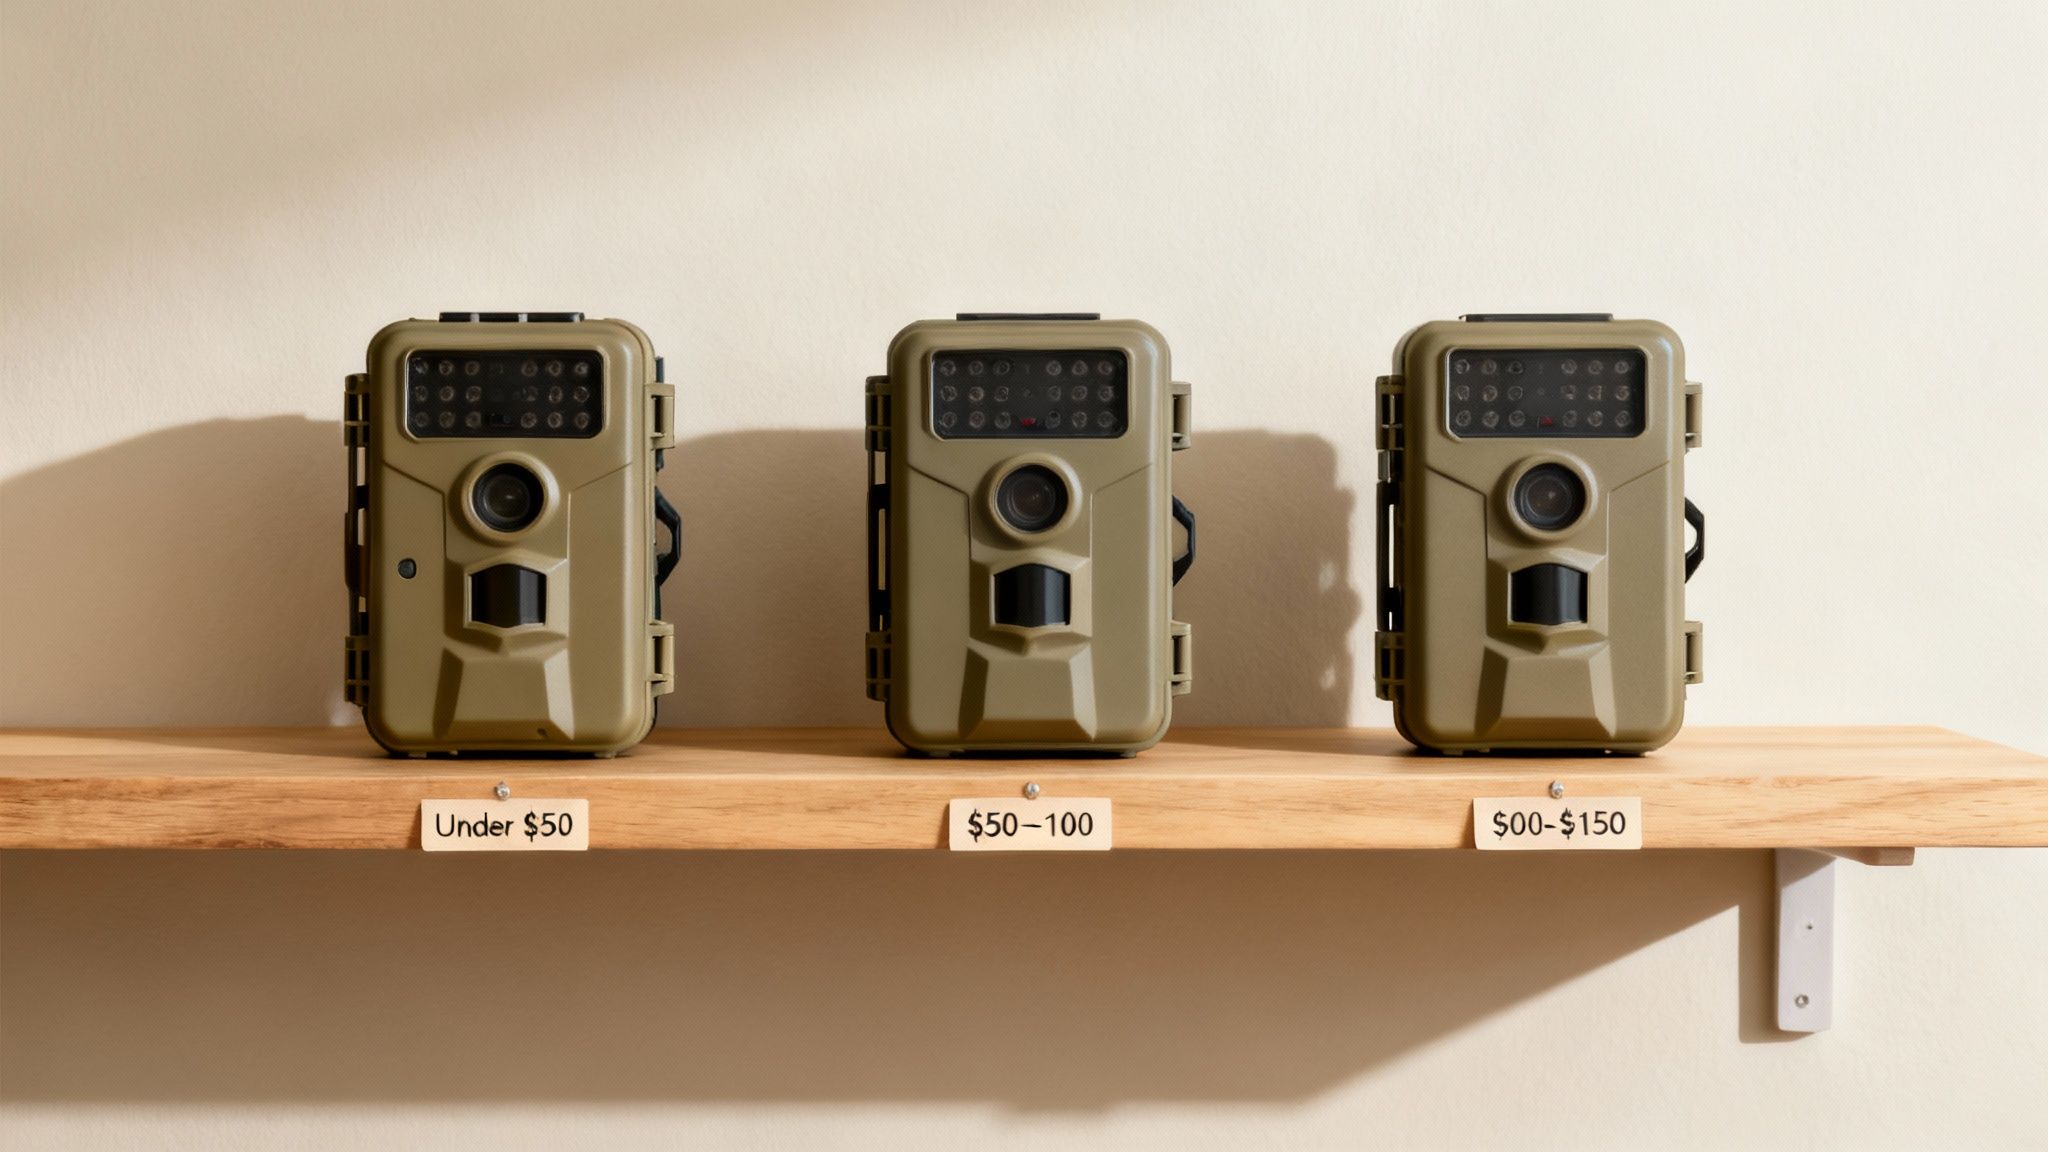
Real-World Examples at Every Price Point
Picking out a trail camera can feel a lot like ordering from a menu—what you get depends on what you're willing to spend. For under $50, you’re in the "basics" section. Jump up to the $50–$100 tier, and the pictures get noticeably sharper. And for those who really get into it, the $100–$150 range starts adding the serious features that can make all the difference.
To put it in perspective, a truly entry-level camera will give you clear shots out to about 30 feet, but it's probably housed in a simple plastic case. Mid-range models can push that flash distance to 60 feet and often toss in handy modes like time-lapse. Once you're in that premium budget zone, you’re looking at invisible night vision that reaches up to 100 feet and trigger speeds that catch even the quickest movements.
It's no surprise that the demand for these affordable cameras has exploded. The segment priced below $100 accounted for nearly 45% of total unit sales in 2024, which tells you a lot about what people are looking for. On top of that, online retailers saw a 20% jump in sales for these budget units last year compared to the year before. Learn more about these trail camera market findings.
Entry-Level Models
In the under-$50 bracket, you'll find cameras like the basic GameScout Mini. It's straightforward, no frills. You get 12MP images, and it’ll run for about 3 months on a set of batteries. The detection angle is a bit tighter at around 45°, making it perfect for monitoring a narrow trail or a specific bait site.
- Affordable plastic housing
- 12MP resolution
- 30-foot night flash
- Basic 0.8 second trigger speed
“Entry level cameras give first timers reliable results without mystery features,” says outdoor gear tester Sam Hayes.
Mid-Tier Examples
Once you step into the $50–$100 zone, you start seeing models like the FieldWatch Ultra 100. The build quality gets a noticeable upgrade, ready for rougher conditions. They'll typically deliver 16MP photos and feature a no-glow infrared flash that won't spook game. Battery life often extends to 6 months, and you get more control with features like time-lapse and burst modes.
- Enhanced build for rugged use
- 60-foot flash range lighting up distant game
- 0.5 second trigger speed to freeze quick movements
- Optional photo stamping with date and temperature
This tier really hits the sweet spot for most people. It's got the performance you need for serious deer scouting or backyard security without breaking the bank.
| Price Range | Resolution | Flash Range | Battery Life | Trigger Speed |
|---|---|---|---|---|
| Under $50 | 12MP | 30 ft | 3 months | 0.8 s |
| $50–$100 | 16MP | 60 ft | 6 months | 0.5 s |
Premium Budget Options
When you're ready to invest between $100–$150, you’re looking at cameras like the TrailGuard Pro NX. This is where you get the good stuff.
- Invisible infrared flash that reaches out to 100 ft
- Ruggedized metal mounts and better weather seals
- Faster recovery for multi-shot bursts (up to 3 shots per trigger)
These cameras are built for people who depend on their gear—researchers tracking elusive wildlife or hunters trying to pattern a buck over a large property. They offer the best bang for your buck before you start getting into professional-grade price tags.
Ultimately, choosing the right tier comes down to your goal. Whether you're just dipping your toes in with a sub-$50 model or investing in a robust $150 camera, understanding these real-world differences will help you find a cheap trail camera that's actually a good trail camera.
Happy hunting.
Getting the Most from Your Budget Camera
Picking up a good, cheap trail camera is a smart first step. But it’s the simple maintenance and smart strategy that turns a good deal into an incredible long-term scouting tool.
Think of it like any piece of essential gear—even the most dependable hunting rifle needs a good cleaning to perform flawlessly. A few simple habits will dramatically boost your camera’s performance and lifespan, making sure you get reliable intel season after season.
It can be as simple as wiping down the lens and motion sensor with a microfiber cloth before you walk away. That one tiny step can be the difference between a crisp, clear shot of a lifetime buck and a blurry, fogged-up image that leaves you guessing.
Power and Placement
When you’re out in the field, two things have an outsized impact on your camera's performance: its power source and where you point it. Getting these right costs you nothing but a few minutes of your time, but the payoff in picture quality and quantity is huge.
One of the single best upgrades you can make is switching from standard alkaline batteries to lithium batteries, especially if you hunt in colder climates. Alkaline batteries can lose up to 50% of their juice in freezing temperatures, which means your camera might die right when the action picks up. Lithium batteries, on the other hand, are built for the cold, ensuring your camera stays awake and alert all winter long. Our complete guide on how long trail camera batteries last digs way deeper into this.
Placement is just as critical. Before you leave a camera set, take thirty seconds to clear away any dangling branches or tall weeds swaying in front of the sensor. This simple cleanup job prevents the wind from triggering hundreds of "false positives"—those empty pictures of nothing that drain your battery and fill up your SD card.
A classic rookie mistake is pointing the camera due east or west. The rising or setting sun will blast directly into the lens, giving you washed-out "whiteout" images and triggering the camera constantly as shadows shift.
Simple Maintenance Checklist
Run through these quick tips every time you set a camera. It'll keep your gear in prime condition.
- Check the Seals: Before you close the door, give the rubber gasket a quick inspection. Look for any dirt, debris, or cracks that could compromise its waterproof seal.
- Format Your SD Card: Always, always format your SD card in the camera it's going into before you leave. This wipes it clean, prevents file corruption, and guarantees it's ready to work with that specific device.
- Update Firmware: Every once in a while, hop on the manufacturer's website and check for a firmware update. These updates can squash bugs, improve trigger speed, and sometimes even add new features.
Common Questions About Budget Trail Cameras
Diving into the world of affordable trail cameras can feel a little overwhelming. Let's cut through the noise and tackle some of the most common questions we hear from folks looking for a solid, cheap trail camera.
What Are the Most Critical Features?
When you're shopping on a budget, it’s easy to get lost in a sea of specs and marketing jargon. So, what really matters?
The absolute foundation of a dependable camera comes down to three things. You need a reliable motion sensor that actually catches the action, at least 12MP resolution so you can tell a buck from a doe, and battery life that lasts for months, not weeks. If you nail those three, you’ve got a workhorse scouting tool.
How Can I Make Batteries Last Longer in Winter?
Cold weather is the arch-nemesis of batteries. Your standard alkaline batteries can lose a huge chunk of their power when the temperature plummets, leaving your camera dead right when the big bucks start moving.
The best fix is simple: switch to high-quality lithium AA batteries. They’re built to handle extreme cold without giving up. You can also stretch your battery life by shortening your video recording length and reducing the number of pictures it takes every time something walks by.
Pro Tip: The easiest way to check your photos is by swapping SD cards. Keep a spare in your pack, swap it with the one in the camera, and look at your pictures on a computer back at home. This keeps your time and scent at the camera site to a minimum.
Can I Use a Budget Camera for Home Security?
Absolutely. They might not have all the bells and whistles of a dedicated security system, but their core function is perfect for keeping an eye on specific areas. Their motion detection and surprisingly good night vision make them a great option for watching over a driveway, backyard, or shed.
Just remember you'll have to check them manually. But their camouflage and lack of wires make them a sneaky and effective security solution on a dime.