
Wildlife photography is a rewarding but challenging pursuit, blending technical skill with a deep appreciation for the natural world. For those just starting, the path can seem daunting. What gear do you need? How do you find animals, and how do you capture them ethically and beautifully? This guide breaks down the process into clear, actionable steps designed to build your confidence and capabilities in the field.
This comprehensive list offers essential wildlife photography tips for beginners, covering everything from mastering your camera's exposure triangle to the subtle art of fieldcraft. You will learn not only how to operate your equipment but also how to think like a naturalist. We'll explore how modern tools can revolutionize your scouting process, helping you be in the right place at the right time to capture stunning images.
Each tip is designed to provide practical knowledge you can apply immediately. We will cover the core principles that form the foundation of compelling wildlife imagery, including composition techniques, understanding light, and the critical importance of ethical practices. Whether your goal is to photograph a backyard bird in flight or a majestic buck at dawn, these foundational skills will set you on the right path for your photographic adventures. Let's get started.
1. Master Your Camera Settings (Aperture, Shutter Speed, ISO)
The single most important technical skill in wildlife photography is understanding the "exposure triangle." This concept describes the interplay between three core camera settings: aperture, shutter speed, and ISO. Mastering how they work together is a fundamental step for any beginner, allowing you to move beyond automatic modes and take creative control over your images. Proper exposure is the foundation of a compelling wildlife photo.
The Exposure Triangle Explained
Think of these three elements as a balancing act to achieve the perfect amount of light for your photo:
- Aperture (f-stop): This is the opening in your lens. A wider aperture (e.g., f/2.8) lets in more light and creates a shallow depth of field, blurring the background to make your subject pop. A narrower aperture (e.g., f/11) lets in less light but keeps more of the scene in sharp focus.
- Shutter Speed: This is the duration the camera's shutter is open. A fast shutter speed (e.g., 1/2000s) freezes fast action, like a bird in flight. A slow shutter speed (e.g., 1/30s) can create motion blur, which is rarely desired for crisp wildlife shots.
- ISO: This setting determines your camera sensor's sensitivity to light. A low ISO (e.g., 100, 200) produces the cleanest images but requires a lot of light. A high ISO (e.g., 3200, 6400) is necessary for low-light situations but introduces digital noise or "grain."
Practical Tips for Beginners
To start, switch your camera to Aperture Priority mode (A or Av). This lets you set the aperture and ISO, while the camera automatically selects a corresponding shutter speed. It's a great way to learn.
- For fast-moving animals: Use a fast shutter speed of at least 1/1000s.
- For perched or slow animals: A wider aperture like f/4 or f/5.6 will isolate them from the background.
- When light is low: Don't be afraid to increase your ISO. A slightly noisy but sharp photo is always better than a blurry one.
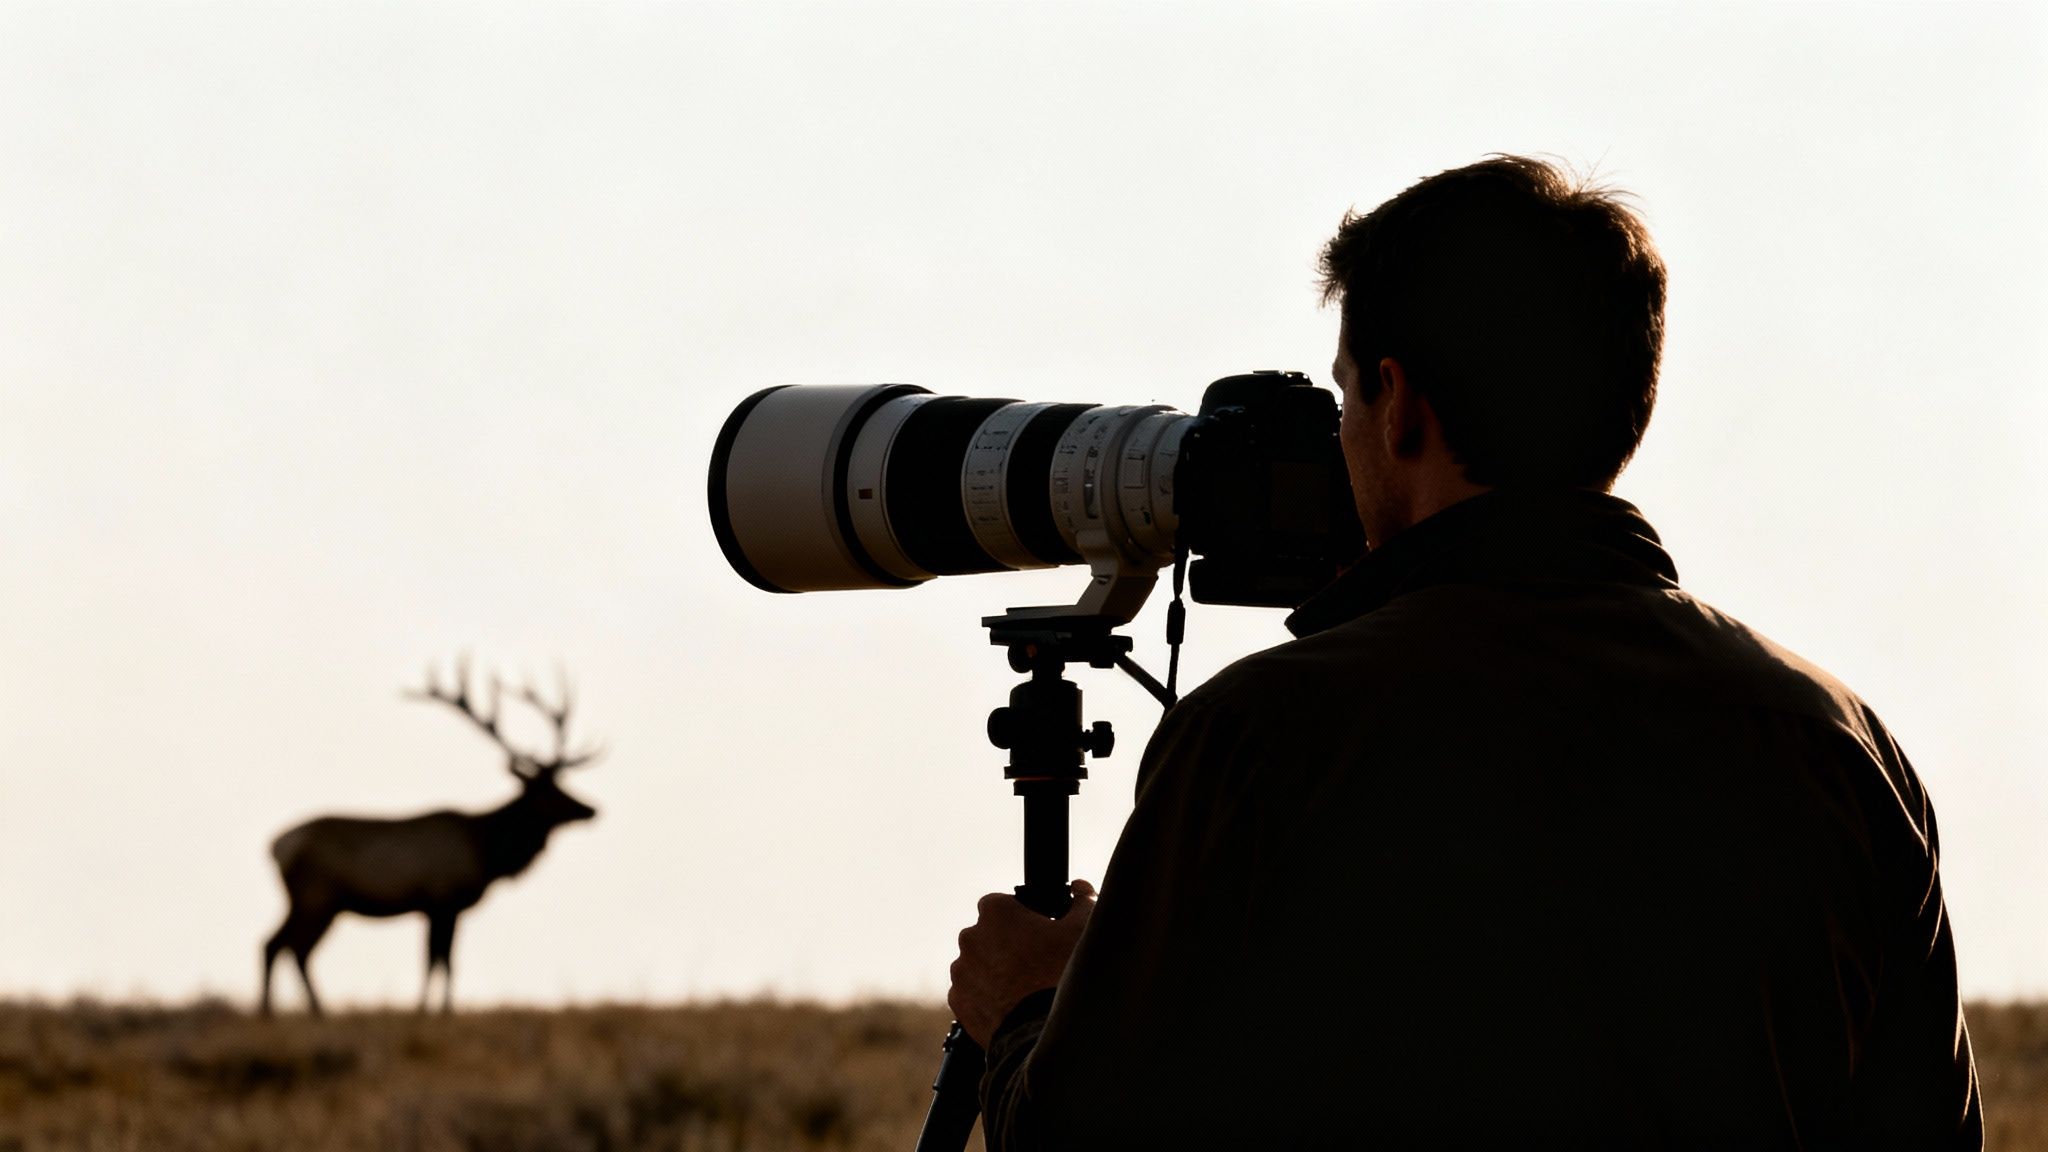
2. Invest in a Quality Telephoto Lens
Getting close to wildlife is often impossible and always inadvisable, as it can disturb the animals and put you in danger. A quality telephoto lens is the single most crucial piece of gear that solves this problem. It allows you to fill the frame with your subject from a safe, ethical, and respectful distance, which is fundamental to successful wildlife photography. For beginners, this is the investment that truly opens up the world of capturing wild animals in their natural element.
Why Reach Matters
A standard kit lens (like an 18-55mm) simply won't have the "reach" or magnification needed to capture a detailed shot of a distant bird or deer. A telephoto lens, typically in the 200mm to 600mm range, brings the action to you. This extended focal length is what creates those stunning, tightly-cropped portraits where the animal is the undeniable star. Popular options for beginners and enthusiasts include the Nikon AF-S 200-500mm f/5.6E and the Sony FE 200-600mm, both offering fantastic reach and quality.
Practical Tips for Beginners
Telephoto lenses are heavier and require more technique than smaller lenses. Keep these wildlife photography tips for beginners in mind when you start using one:
- Start sensibly: A lens in the 70-300mm or 100-400mm range is a versatile and affordable starting point.
- Prioritize stabilization: Look for lenses with built-in image stabilization (IS or VR) to help reduce blur from camera shake.
- Use support: A monopod or tripod is essential for staying steady during long periods of waiting and for supporting the lens's weight.
- Rent before you buy: Expensive prime lenses can cost thousands. Rent one for a weekend to see if its performance justifies the price for your needs.
3. Practice Patience and Observation Skills
Beyond any camera gear or technical setting, patience is the most powerful tool in a wildlife photographer's kit. Wildlife photography is often a waiting game. The most captivating shots are rarely the result of luck but are born from hours spent observing animal behavior, learning their patterns, and anticipating the perfect moment to press the shutter. This fundamental skill is what separates a simple snapshot from a truly professional and storytelling image.
The Art of Watching and Waiting
Learning to be a silent observer allows you to capture more natural and intimate moments. Animals that are unaware of or comfortable with your presence will exhibit authentic behaviors.
- Understand Routines: Animals are creatures of habit. By observing a species, you can learn its feeding times, watering holes, and common travel routes. This knowledge helps you predict where to be and when.
- Anticipate Action: Watching an animal allows you to see subtle cues that signal an impending action. A bird tensing its muscles before taking flight or a deer's ears swiveling to attention are moments that precede a great photo opportunity.
- Let the Scene Unfold: Rushing the shot often leads to disappointment. By waiting patiently, you allow for better lighting, a cleaner background, or a more interesting interaction to develop, resulting in a much stronger photograph.
Practical Tips for Beginners
Patience is a skill you can develop with practice. It requires a shift in mindset from just "taking pictures" to truly connecting with the environment.
- Arrive Early, Stay Late: The best light and most animal activity often occur during the "golden hours" of sunrise and sunset.
- Stay Still and Quiet: Find a comfortable spot, preferably downwind from your subject, and minimize your movements and noise.
- Use a Blind or Your Vehicle: These act as excellent hides, allowing you to observe animals without disturbing them.
- Study Before You Go: Research the behavior of your target species. Knowing what to look for will make your observation time more productive. For remote scouting, technology can be an incredible asset. Learn more about using a trail camera with GPS tracking to understand animal patterns before you even arrive.
4. Use Manual Focus for Precision
Modern autofocus (AF) systems are incredibly powerful, but relying on them exclusively can sometimes lead to missed shots. Learning to use manual focus (MF) provides a level of precision that AF can't always match, especially in challenging environments. This skill is a crucial part of our wildlife photography tips for beginners, as it gives you the final say over exactly where the critical point of sharpness lands in your image.
Taking Control of Your Focal Point
Manual focus is exactly what it sounds like: you rotate the focus ring on your lens to achieve sharpness instead of the camera doing it automatically. This is invaluable in several scenarios:
- Complex Scenes: When an animal is partially obscured by branches, grass, or leaves, autofocus systems can get confused and focus on the foreground instead of the subject's eye. Manual focus allows you to pinpoint the eye through the clutter.
- Low Light: Autofocus often struggles or "hunts" in dim conditions. Switching to manual focus allows you to lock in on your subject decisively without the camera's hesitation.
- Stationary Subjects: For a sleeping fox or a perched owl, you have time to carefully dial in the perfect focus on the most important feature, ensuring maximum impact.
Practical Tips for Beginners
Many modern cameras have tools to make manual focusing easier. Explore your camera's menu to find these helpful features.
- Use Focus Peaking: This feature overlays a bright color (like red or yellow) on the parts of the image that are in sharp focus, giving you instant visual confirmation.
- Magnify the View: Use your camera's Live View mode and zoom in on your subject's eye on the LCD screen. This allows you to make micro-adjustments for perfect sharpness.
- Practice with "Focus and Recompose": For a better composition, you can focus on the subject, hold the focus, and then slightly move your camera to frame the shot before pressing the shutter.
5. Understand Lighting and Golden Hour Photography
The quality of light is just as crucial as your camera settings. Harsh, overhead midday sun creates unflattering shadows and washed-out colors, but the soft, warm light during the "golden hours" can transform a good photo into a spectacular one. These periods, occurring shortly after sunrise and before sunset, provide a magical quality of light that enhances texture, color, and mood, making it a favorite among wildlife photographers.
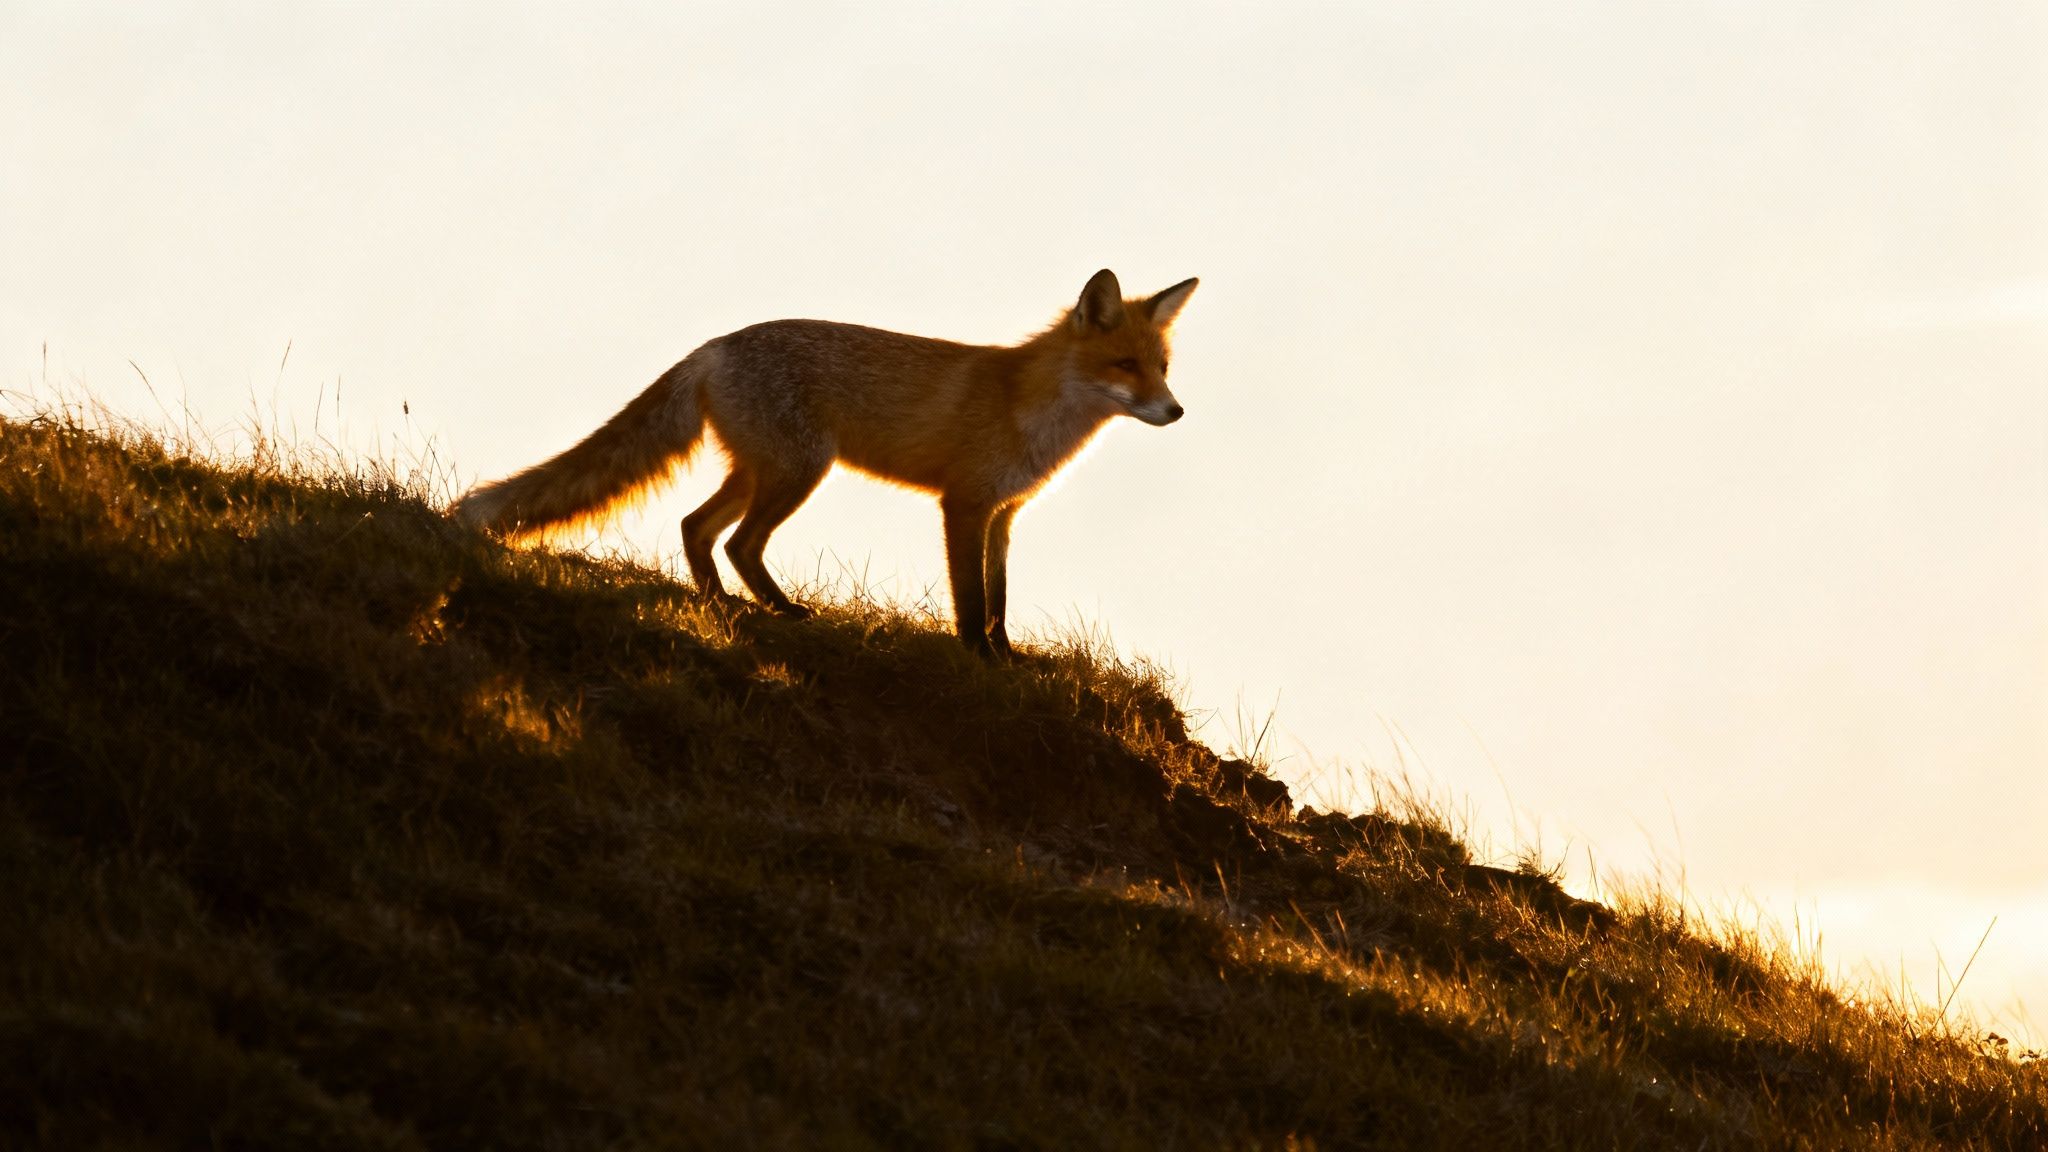
The Power of Golden Hour Light
Golden hour light is directional, low-angled, and diffused, which works wonders for wildlife subjects. This type of light adds depth and dimension to an animal's fur or feathers and creates beautiful, long shadows that add drama to the scene. For example, backlighting a deer with the setting sun can create a stunning golden rim light around its silhouette, separating it from the background and adding a professional, artistic touch to your image.
Practical Tips for Beginners
To make the most of this fleeting light, planning is essential. This is one of the most actionable wildlife photography tips for beginners that can elevate your work instantly.
- Time it right: Use a smartphone app like PhotoPills or The Photographer's Ephemeris to predict the exact timing of the golden hour at your location.
- Arrive early, stay late: Get to your spot at least 30 minutes before sunrise and plan to stay until 30 minutes after sunset. Animals are often most active during these times.
- Play with angles: Don't just shoot with the sun at your back. Position yourself to use it as a sidelight to reveal texture or as a backlight to create dramatic silhouettes and rim lighting.
- Embrace the warmth: Use your camera's "Cloudy" or "Shade" white balance setting to enhance the naturally warm tones of the golden hour light.
6. Study and Respect Animal Behavior and Ethics
Beyond technical skills, ethical conduct is the cornerstone of great wildlife photography. This means prioritizing the well-being of your subjects above getting the perfect shot. Understanding animal behavior allows you to anticipate moments without causing stress or altering natural activity, leading to more authentic and impactful images while ensuring the animals remain safe and undisturbed.
The "Wildlife First" Principle Explained
This approach is about being a respectful observer, not an intruder. The goal is to document nature as it is, without influencing it.
- Observation: Spend time learning the typical behaviors of your target species. Recognizing signs of stress (like alarm calls, agitated movements, or flattened ears) is crucial. A stressed animal will not behave naturally, and continuing to shoot is unethical.
- Distance: The best tool for respecting wildlife is a long lens. It allows you to fill the frame without encroaching on an animal's personal space. Getting too close can cause an animal to flee, waste precious energy, or even abandon a nest.
- Patience: Ethical photography is a waiting game. Instead of chasing animals, find a good location, conceal yourself, and let the wildlife come to you or go about its business undisturbed.
Practical Tips for Beginners
Putting ethics into practice is one of the most important wildlife photography tips for beginners you can learn. It protects wildlife and often results in better photos.
- Never bait or lure: Using food, calls, or other artificial means to attract wildlife is unethical as it can alter behavior and create dependency.
- Respect sensitive times: Avoid disturbing animals during nesting, mating, or denning seasons when they are most vulnerable.
- Leave no trace: Be mindful of your impact on the environment. Stay on designated trails and pack out everything you bring in.
- Know local regulations: Always research and follow the specific rules for wildlife viewing in the parks or areas you visit. For more on minimizing your impact, explore insights into how scouting tech affects animal behavior on magiceagle.com.
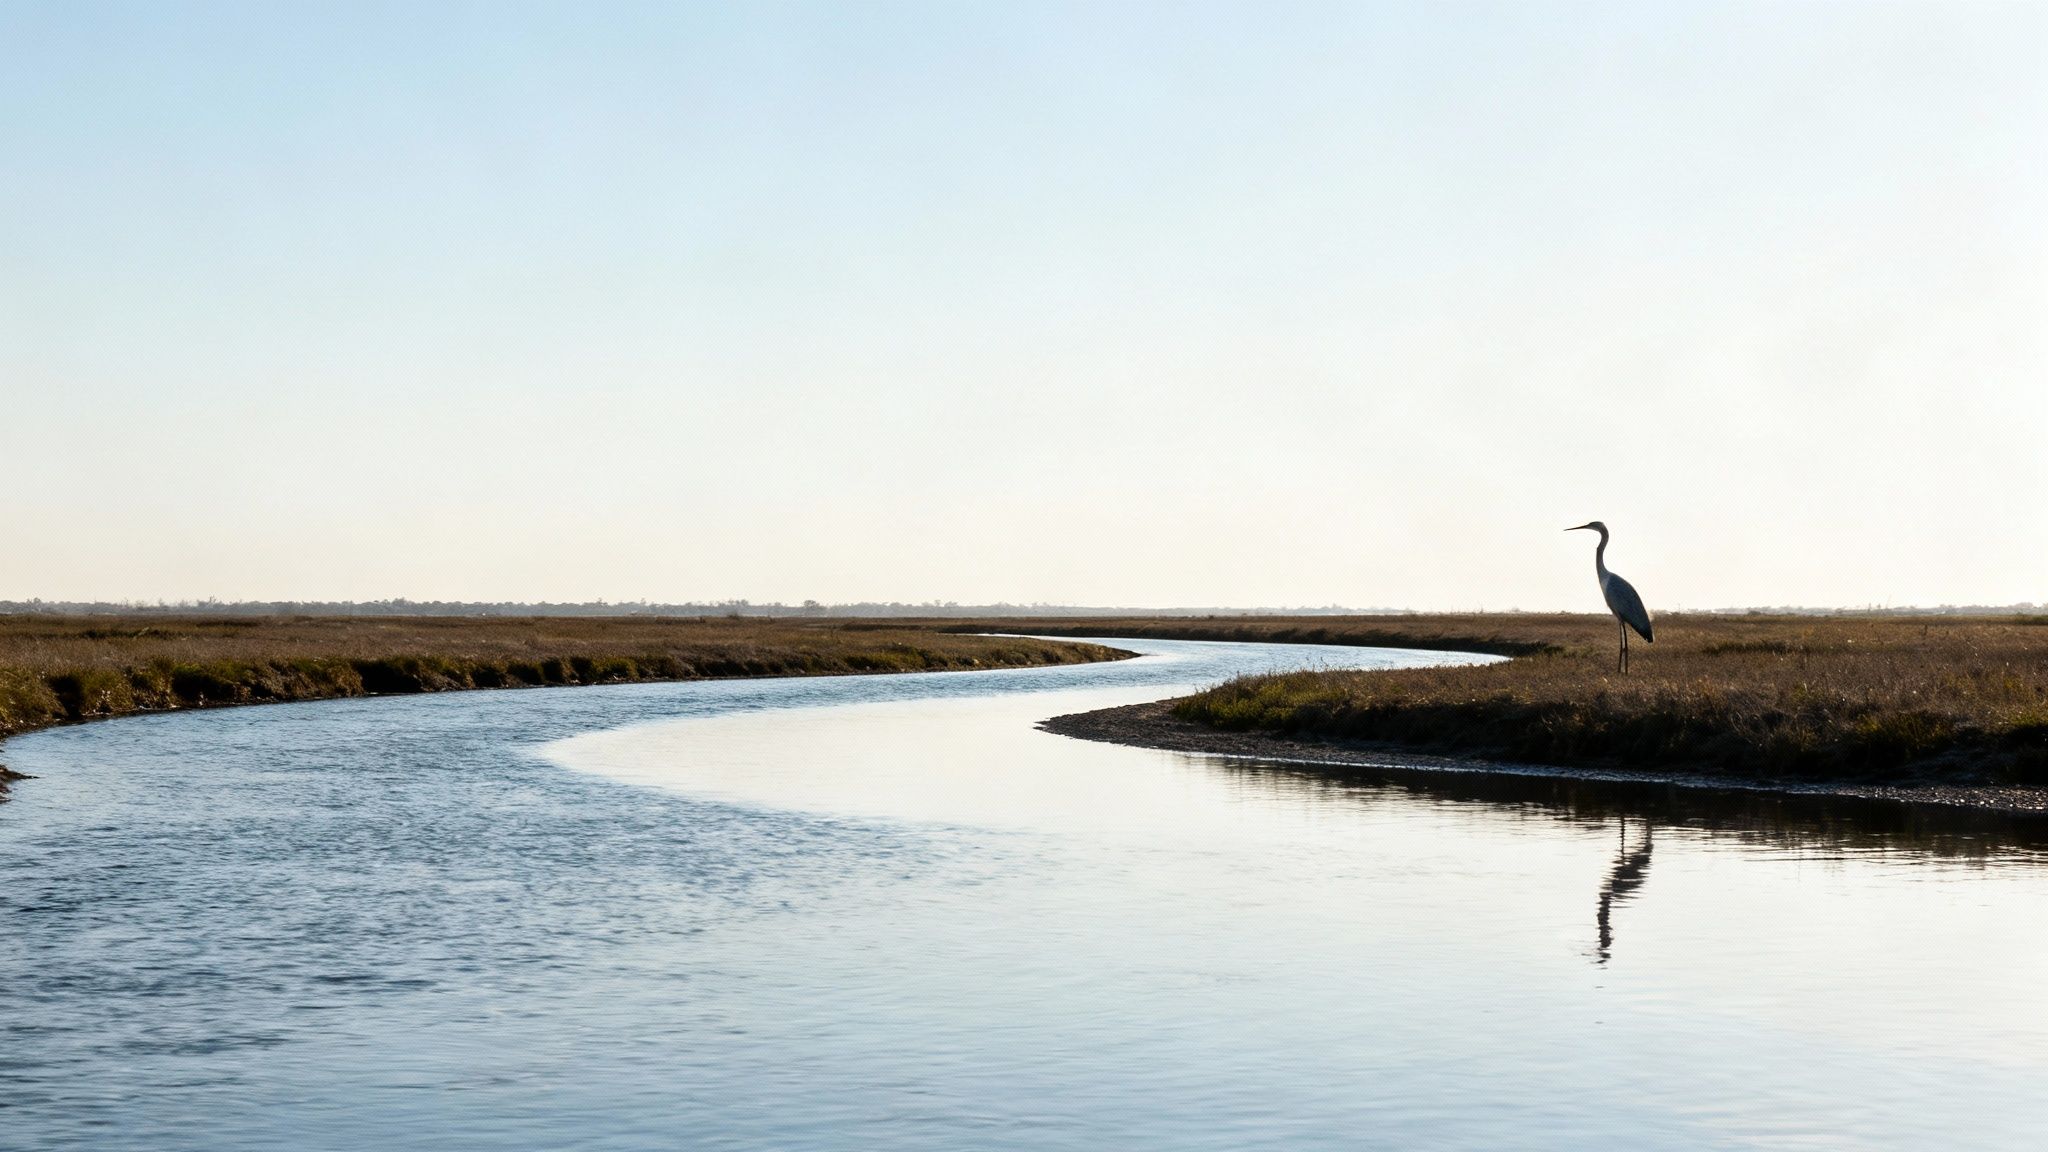
7. Compose Thoughtfully Using Rule of Thirds and Leading Lines
Strong composition is what separates a simple snapshot from a compelling wildlife photograph. Moving beyond just placing your subject in the center of the frame is key. Techniques like the rule of thirds and using leading lines create visual interest, guide the viewer's eye, and tell a more dynamic story. Mastering these fundamentals is one of the most impactful wildlife photography tips for beginners looking to elevate their images.
Composition Basics Explained
These principles help you arrange elements within your photo for maximum impact and a more professional look:
- Rule of Thirds: Imagine your frame is divided into nine equal rectangles by two horizontal and two vertical lines. Instead of centering your subject, place it along one of these lines or, even better, at one of the four intersection points. This creates a more balanced and engaging image.
- Leading Lines: These are natural lines within your scene, like a riverbank, a fallen log, or a trail, that draw the viewer's eye through the photograph. A leading line can guide the viewer directly to your wildlife subject, creating a sense of depth and direction.
Practical Tips for Beginners
Most cameras and smartphones have an option to display a rule of thirds grid on the screen or in the viewfinder; turn it on. It’s a fantastic learning tool.
- Mind the Gaze: Leave more empty space in the direction the animal is looking or moving. This "active space" gives the subject room to breathe and creates a more natural feel.
- Place Eyes on Intersections: For powerful portraits, try placing the animal's eye on one of the upper grid intersections.
- Find Natural Frames: Use elements like tree branches or rock formations to create a natural frame around your subject, adding depth to the scene.
- Break the Rules: Once you understand why these rules work, you can intentionally break them. A perfectly centered subject can be very powerful for a symmetrical, confrontational portrait.
8. Keep a Clean Sensor and Maintain Equipment Regularly
One of the most overlooked yet critical wildlife photography tips for beginners is diligent equipment maintenance. Dust on your camera's sensor creates distracting dark spots on your photos, especially visible against clear skies, while dirt or fungus on your lens will degrade image sharpness and contrast. Regular cleaning and proper care ensure your gear performs at its best, preventing frustration and costly repairs down the line.
The Importance of a Clean Kit
Your camera and lenses are your tools, and keeping them in prime condition is non-negotiable for capturing high-quality images.
- Sensor Dust: These are tiny particles that settle on your camera's sensor. They appear as small, dark, and often blurry spots in the same location across all your images. They are most noticeable when using a narrower aperture (e.g., f/11, f/16).
- Lens Condition: Smudges, dust, and moisture on the front or rear lens elements can drastically reduce image clarity, create unwanted flare, and lower contrast. In humid environments, neglecting proper storage can even lead to lens fungus, which permanently damages the lens coatings.
- Equipment Longevity: Regular maintenance protects your investment. Keeping gear clean, dry, and properly stored extends its lifespan and maintains its value.
Practical Tips for Beginners
Integrating maintenance into your routine is simple and effective. It ensures you are always ready to capture a clean, sharp shot.
- Change lenses carefully: Always do this in a sheltered, clean environment. Point the camera body downwards to prevent dust from falling onto the sensor.
- Use an air blower: A rocket-style air blower is the safest first step for removing loose dust from your sensor and lens elements. Never use compressed air, as its propellant can damage your sensor.
- Proper storage is key: Store your gear in a dry bag with silica gel packets to absorb moisture. This is especially important for preventing fungus and is a great tip for maintaining any outdoor camera. Learn more about how to prevent your camera from fogging up on magiceagle.com.
- Get a professional clean: If you notice stubborn sensor spots, have your camera professionally cleaned. An annual service is a good practice for serious photographers.
9. Shoot in RAW Format for Maximum Post-Processing Flexibility
Choosing the right file format is one of the most crucial decisions a beginner can make, and shooting in RAW is a non-negotiable for serious wildlife photography. Unlike a JPEG, which is a compressed, processed image, a RAW file is an uncompressed digital negative. It contains all the original data captured by your camera's sensor, giving you immense control during post-processing.
The RAW vs. JPEG Advantage
Think of a JPEG as a printed photograph and a RAW file as the original film negative. You can make minor adjustments to the print, but the negative holds all the information needed for a masterpiece.
- RAW Files: Capture a wider dynamic range, allowing you to recover details from shadows that appear too dark or highlights that seem too bright. This is perfect for high-contrast scenes, like a dark animal against a bright sky.
- JPEG Files: Your camera makes permanent decisions about white balance, sharpening, and color. These choices are "baked in," leaving you with very little room to make significant corrections later without degrading the image quality.
Practical Tips for Beginners
Switching to RAW is a simple setting change in your camera menu that unlocks professional-level potential. This is a fundamental wildlife photography tip for beginners who want to elevate their work.
- Recovering Detail: Use RAW to pull out subtle feather details on a bird against a bright background or bring out the texture in a bear’s fur hidden in the shadows.
- Correcting Color: Effortlessly adjust the white balance to perfectly match the warm light of sunrise or the cool tones of an overcast day.
- Storage is Key: RAW files are larger, so invest in high-speed memory cards (UHS-II) and external hard drives for storage and backup.
- Start with RAW+JPEG: Many cameras let you shoot both simultaneously. This gives you a RAW file for editing and a JPEG for quick sharing.
10. Learn Basic Post-Processing and Photo Editing
The work of a wildlife photographer doesn't end when the shutter clicks. Post-processing is a crucial final step where you can transform a good RAW file into a great, impactful image. Basic editing allows you to correct minor imperfections, enhance details, and guide the viewer's eye, bringing your artistic vision to life. This skill is a fundamental part of a modern digital photography workflow.
The Editing Workflow Explained
Post-processing is not about creating a fake image; it's about refining what your camera captured. Think of it as developing film in a digital darkroom. Key adjustments include:
- Exposure & Contrast: This is about correcting the overall brightness of your image and the tonal range between the darkest and brightest parts. For example, you can brighten an animal that was shot in a shadowy area.
- Color Correction: This involves adjusting the white balance to ensure colors look natural. You can also subtly enhance saturation or vibrance to make colors pop, such as warming an image to emphasize a golden hour feel.
- Sharpening & Cropping: Sharpening adds crispness and detail, especially to key areas like an animal's eyes. Cropping helps you improve the composition by removing distracting elements from the edges of the frame.
Practical Tips for Beginners
Software like Adobe Lightroom or even free alternatives provide all the tools you need. The golden rule is that less is often more.
- Subtle Adjustments: Start with small, subtle changes. A slightly over-edited photo can look artificial.
- Focus on the Eyes: Use selective sharpening tools to make the animal’s eyes the sharpest point in the photo.
- Crop for Composition: Don't be afraid to crop your image to better follow rules like the rule of thirds or to eliminate a distracting branch in the background.
- Ethical Editing: Maintain the integrity of your shot. Never add or remove animals or key environmental elements. Stick to adjustments that enhance reality, not alter it.
10 Beginner Wildlife Photography Tips Compared
| Item | 🔄 Implementation Complexity | ⚡ Resource Requirements | 📊 Expected Outcomes | ⭐ Ideal Use Cases | 💡 Key Advantages & Tips |
|---|---|---|---|---|---|
| Master Your Camera Settings (Aperture, Shutter Speed, ISO) | Moderate→High — steep learning curve, needs practice | Low — requires only camera and time | ⭐⭐⭐⭐ — precise exposure, sharper images | Foundation skill for nearly all wildlife shooting | Complete creative control; start in A/Av, use ≥1/1000s for fast birds |
| Invest in a Quality Telephoto Lens | Medium — handling and technique required | High — expensive, heavy; tripod/monopod advised | ⭐⭐⭐⭐ — reach, subject isolation, clean backgrounds | Distant subjects (birds, large mammals), ethical distancing | Enables safe distance shots; start 200–300mm, rent before buying |
| Practice Patience and Observation Skills | Low technical, high time commitment | Low cost, high time/effort | ⭐⭐⭐⭐ — more unique moments and higher success rate | Behavioral captures, rare interactions, dawn/dusk activity | Wake early, research behavior, use hides; be prepared to wait |
| Use Manual Focus for Precision | High — requires skill and steady hands | Low — camera features; may need focus peaking tools | ⭐⭐⭐ — precise focus in cluttered/low-light scenes | Dense vegetation, low light, stationary subjects | Prevents focus hunting; practice with live view and focus peaking |
| Understand Lighting and Golden Hour Photography | Moderate — timing and positioning matter | Low — planning and schedule flexibility | ⭐⭐⭐⭐ — warm tones, texture, improved detail | Sunrise/sunset portraits, rim-lit subjects, dramatic scenes | Arrive 30 min early, use apps to track golden hour, favor side/back light |
| Study and Respect Animal Behavior and Ethics | Moderate — research and situational judgment | Low→Medium — time, permits, sometimes longer distances | ⭐⭐⭐⭐ — sustainable access; more natural behavior in images | Sensitive species, nesting/breeding seasons, conservation projects | Maintain distances, avoid playback/lures, follow local codes of conduct |
| Compose Thoughtfully (Rule of Thirds, Leading Lines) | Low→Moderate — learn rules and apply consistently | Low — camera grid or eye for composition | ⭐⭐⭐ — stronger, more memorable images | Any wildlife framing where storytelling matters | Use grid, put eyes on intersections, leave space in movement direction |
| Keep a Clean Sensor & Maintain Equipment Regularly | Moderate — careful routine, occasional pro service | Low→Medium — cleaning kits, storage, professional cleaning | ⭐⭐⭐ — fewer artifacts, consistent sharpness, longer gear life | Fieldwork, dusty/humid environments, long-term use | Use air blower, change lenses sheltered, store with silica gel |
| Shoot in RAW Format for Maximum Flexibility | Low to operate; moderate workflow complexity | Medium — larger storage, faster cards, editing software | ⭐⭐⭐⭐ — extensive recovery and color control in post | High dynamic range scenes, critical-quality work, sunrise/sunset | Always shoot RAW (or RAW+JPEG); invest in backups and learn basic RAW edits |
| Learn Basic Post-Processing and Photo Editing | Moderate→High — software skills take time | Medium — software, storage, processing time | ⭐⭐⭐⭐ — refines images; corrects exposure/white balance | Portfolio prep, prints, competitions, client work | Start subtle (less is more); use presets as starting points; avoid unethical edits |
Bringing It All Together in the Field
Embarking on your wildlife photography journey is an exciting endeavor, one that blends technical skill with a deep appreciation for the natural world. This comprehensive guide has provided you with a foundational set of wildlife photography tips for beginners, moving from the essentials of camera settings and gear to the nuanced arts of composition, fieldcraft, and ethical conduct. Mastering these elements doesn’t happen overnight; it is a cumulative process built upon practice, patience, and a persistent desire to learn.
Remember, your camera is merely a tool. The real magic happens when you pair technical knowledge with an intimate understanding of your subjects and their environment. The difference between a simple snapshot and a breathtaking photograph often lies in the moments you spend quietly observing, anticipating an animal's next move, or waiting for the perfect light to kiss the landscape.
Your Roadmap to Becoming a Better Wildlife Photographer
As you venture out, keep these core principles at the forefront of your mind. They are the pillars that will support your growth and help you capture truly compelling images.
- Technical Mastery: Consistently practice adjusting your aperture, shutter speed, and ISO. Get so comfortable with the exposure triangle that changing settings becomes second nature, allowing you to react quickly to fleeting moments. Don’t forget to shoot in RAW to give yourself the ultimate flexibility in post-processing.
- Patience and Presence: The most crucial skill is not technical but mental. Learn to sit, wait, and watch. True wildlife photography is 90% observation and 10% pressing the shutter button. This patience will be rewarded with more authentic and intimate photographs.
- Ethical Fieldcraft: Your primary responsibility is to the well-being of the animals you photograph. Always prioritize their safety over your shot. Study their behavior, understand the signs of stress, and maintain a respectful distance. Ethical practices ensure that wildlife remains wild and undisturbed for generations to come.
- Creative Vision: Move beyond simply documenting an animal’s presence. Use compositional rules like the rule of thirds, leading lines, and negative space to tell a story. Pay close attention to the light, especially during the golden hours, as it can single-handedly transform a scene from ordinary to extraordinary.
Your Next Steps in the Field
The journey from beginner to proficient wildlife photographer is paved with practice. The concepts we've covered are your map, but the territory can only be learned by exploring it yourself. Your next great shot isn't just waiting for you; it's an opportunity you create through preparation, persistence, and a profound respect for nature. So, charge your batteries, clean your lenses, and get back out there. Observe, learn, and let the wild inspire you.
Ready to take your scouting and wildlife observation to the next level? For remote monitoring and capturing candid animal behavior without disturbing their habitat, explore the advanced cellular trail cameras from Magic Eagle. Visit Magic Eagle to see how our technology can help you find and photograph wildlife more effectively.
Article created using Outrank