
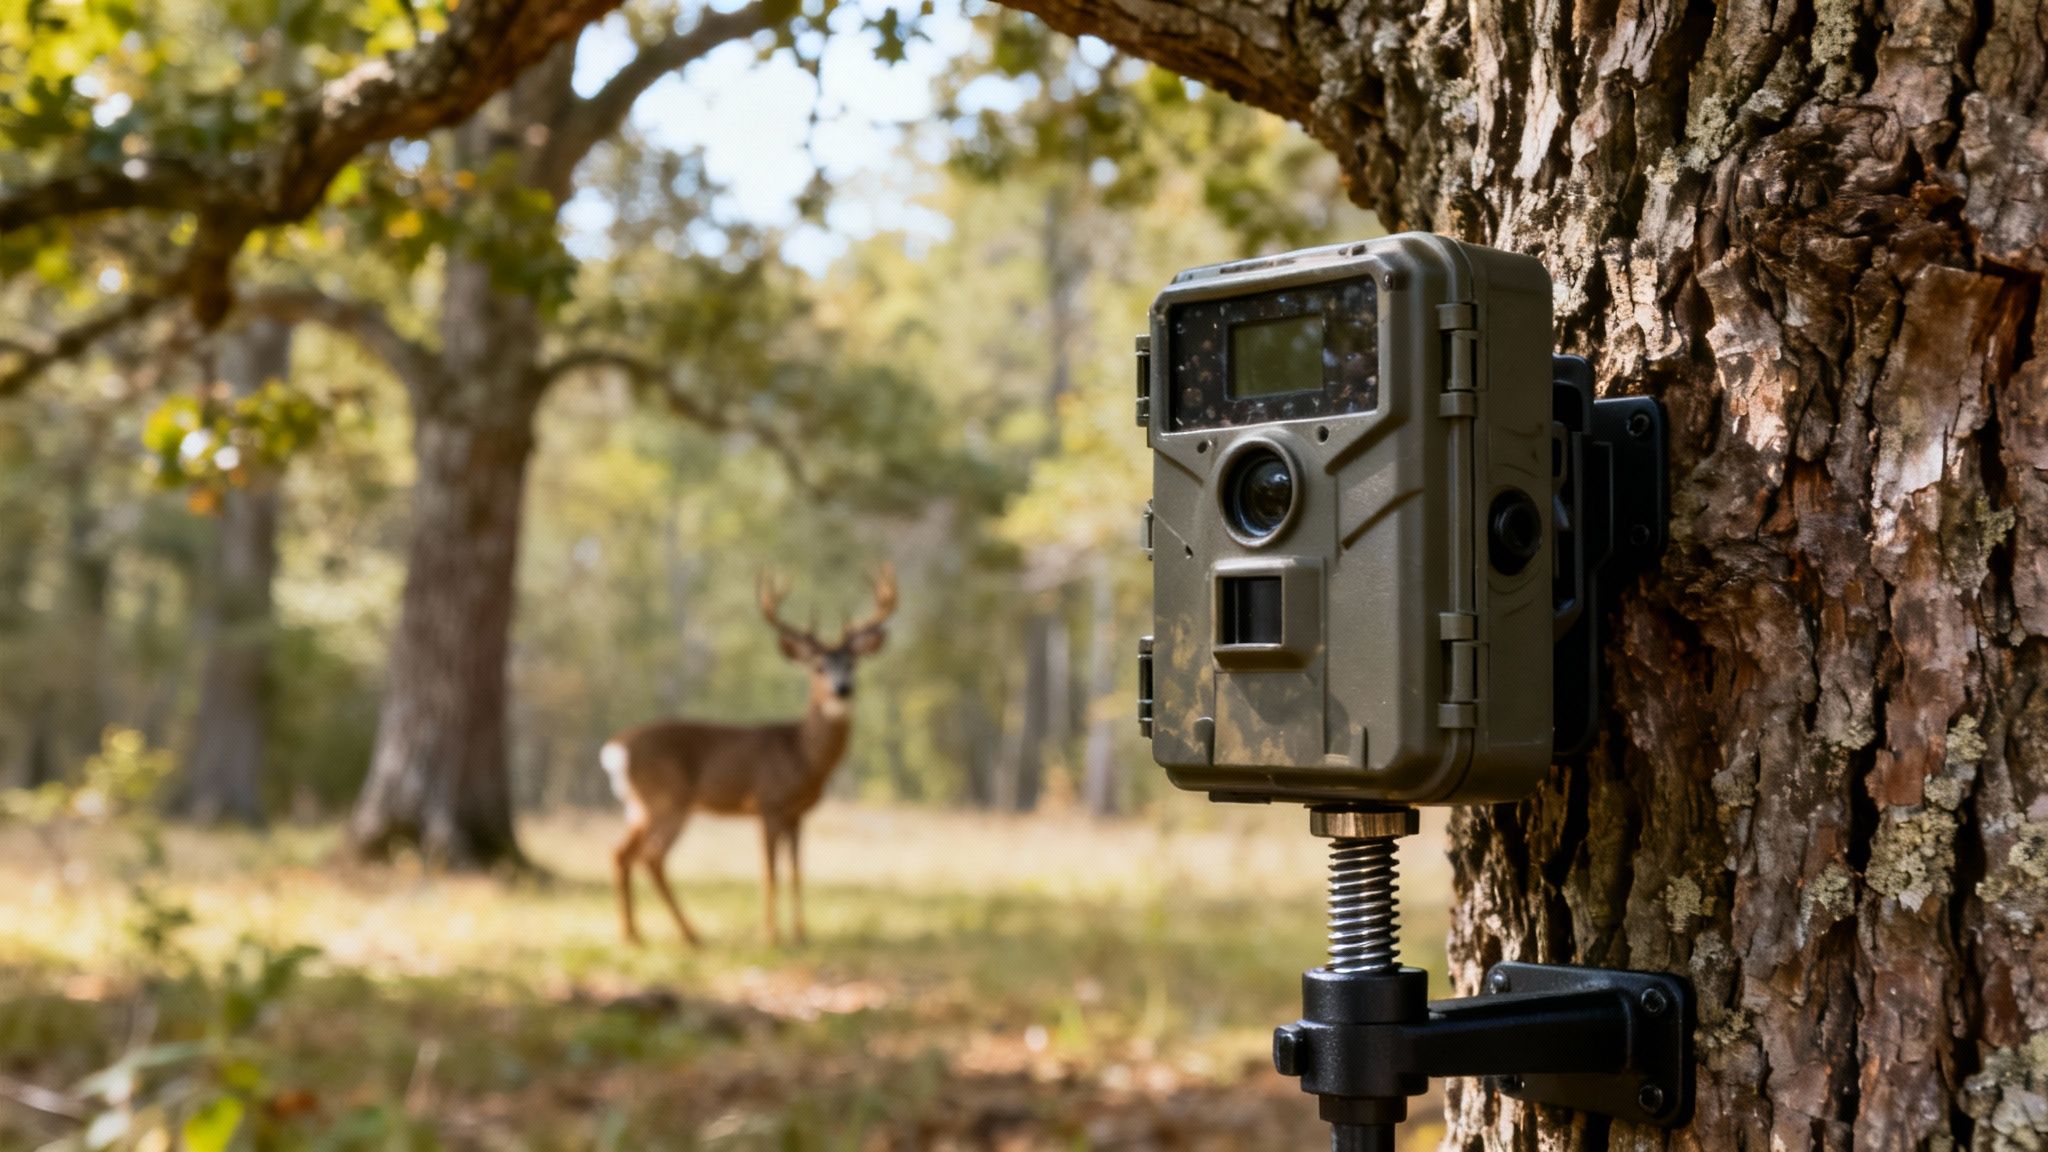
Game camera stands are way more than just another accessory to toss in your pack. They’re the absolute foundation for getting clear, reliable photos of the wildlife you’re after. Think of a stand as the steady hand holding your camera, making sure every single shot is perfectly framed and sharp. It’s the difference between a good scouting season and a great one.
Why Your Game Camera Stand Is a Critical Piece of Gear
Every seasoned hunter knows the feeling. You hike out to check your trail cam, full of anticipation, only to find a memory card full of blurry messes, shots of the ground, or a perfect picture of a branch swaying in the breeze. It's frustrating, and more often than not, the culprit is a cheap or poorly used mount.
A flimsy strap or a wobbly screw-in arm is an open invitation for disaster. A curious bear or a buck rubbing its antlers can knock it sideways in an instant, ruining weeks of patient scouting. Even a strong gust of wind can create just enough vibration to turn a crisp photo of a trophy buck into an unrecognizable blob. This is where a quality game camera stand proves its worth.
The Foundation of Successful Scouting
Your trail camera is the sharpshooter, but the stand is its stable shooting rest. Without that solid base, even the most expensive camera with all the latest tech is practically useless. The right stand gives you three huge advantages that directly translate to better scouting intelligence:
- Unwavering Stability: A well-built stand kills motion and vibration. This means your photos and videos are tack-sharp, day or night, which is crucial for accurately identifying individual animals.
- Complete Versatility: Whether you’re watching an open food plot with no good trees or a dense thicket, a versatile stand lets you put your camera in the perfect spot—not just the most convenient one.
- Long-Term Durability: Good stands are built to last. Look for materials like powder-coated steel that can take a beating from rain, snow, and brutal temperatures, protecting your camera investment for years to come.
A reliable stand isn't just about holding a camera up. It’s about guaranteeing that your time, effort, and money pay off with valuable, actionable intel from the field.
Ultimately, a stand elevates your camera from a simple gadget to a precision scouting tool. It unlocks the ability to get the perfect field of view, keep that angle locked in no matter what the weather or wildlife throws at it, and consistently gather high-quality data. By nailing this foundational piece of gear, you’re setting yourself up for a much more effective and successful hunt. Investing in a solid mount is just as critical as any of the other items in our guide to hunter essentials every outdoorsman needs.
Comparing the Different Types of Game Camera Stands
Picking the right game camera stand is a lot like choosing the right tool for a job. You wouldn't use a sledgehammer to hang a picture frame, and you definitely shouldn't use a flimsy ground stake to mount a heavy cellular camera on a windswept ridge. Each type of stand is built for a specific environment and purpose, and knowing their strengths and weaknesses is key to getting the best possible intel from your scouting.
This decision is more important now than ever. The global game camera market, which includes all the essential mounts and stands, hit a value of US$ 112.20 million in 2023 and is expected to climb to US$ 185.69 million by 2031. That growth shows just how many serious hunters are relying on stable, reliable camera setups to capture footage of elusive big game. You can dig deeper into the data on the evolving game camera industry.
Let's break down the most common types of stands you'll encounter.
Tree Straps: The Universal Default
The simple nylon tree strap is what you'll find in the box with most game cameras, and for good reason. It's the most basic, universal solution out there, working on pretty much any tree with enough girth to wrap around.
- Best Use Case: Quick setups in spots where you have plenty of straight, perfectly positioned trees.
- Key Advantages: They are feather-light, easy to pack, and won't damage trees—a common requirement on public land.
- Potential Downsides: Finding the perfect tree at the perfect angle can feel impossible sometimes. Straps also tend to slip on smooth-barked trees like birch or aspen, and they offer almost no ability to fine-tune your camera's angle.
Screw-In Mounts: For Rock-Solid Precision
When you absolutely need your camera to stay put and aim precisely, a screw-in mount is a hunter's best friend. These mounts usually have a sharp, auger-like tip that bites deep into a tree, creating a rigid platform for your camera.
Think of it as a permanent anchor. Once it's set, it's not going anywhere. This makes it perfect for long-term monitoring of high-traffic spots like scrapes, mineral licks, or established game trails where you plan to leave a camera for months.
A heavy-duty screw-in mount provides unmatched stability on a mature oak, ensuring that even a curious bear or a rubbing buck won't knock your camera out of position and ruin your scouting data.
Most quality screw-in mounts come with a ball-joint head, giving you 360-degree rotation and a ton of tilt. This lets you point the camera exactly where it needs to go, no matter the tree's angle or imperfections.
T-Post Mounts and Ground Stakes: The Open-Country Solution
What do you do when there are no trees? This is where T-post mounts and ground stakes really shine. They give you the freedom to set up a camera in the middle of a food plot, along a fenceline, or on the edge of a wide-open prairie.
A T-post mount is designed to clamp directly onto a standard metal T-post, which you drive into the ground. This creates an incredibly sturdy and durable setup that can handle harsh weather and even curious livestock.
Ground stakes, on the other hand, are simpler all-in-one units that you press or hammer right into the soil. They're more portable than a T-post setup but usually offer less height and stability, making them better suited for softer ground and temporary placements.
Tripod Stands: The Ultimate in Versatility
For the hunter who needs maximum flexibility, a tripod stand is the answer. These freestanding units can be set up anywhere, on any terrain—from a rocky outcrop to a muddy creek bank.
Tripods are incredibly useful for temporary situations where you don't want to leave a permanent mount, like monitoring a new mineral site for a few weeks or scouting a specific bedding area during the rut. Their adjustable legs let you level the camera on uneven ground, and you can easily tweak the height and direction without any tools.
Quick Comparison of Game Camera Stand Types
To help you choose, here’s a quick rundown of the most common game camera stands. Think about where you hunt most often and what challenges you face—this table should point you in the right direction.
| Stand Type | Best Use Case | Key Advantages | Potential Downsides |
|---|---|---|---|
| Tree Strap | Basic, quick setups on public land or with ideal trees. | Lightweight, portable, non-damaging. | Limited adjustability, can slip on trees. |
| Screw-In Mount | Long-term, permanent setups requiring precise angles. | Extremely stable, highly adjustable. | Damages trees, often not allowed on public land. |
| T-Post Mount | Open fields, food plots, and fencelines with no trees. | Very sturdy, durable, perfect for long-term placement. | Requires carrying and driving a heavy T-post. |
| Ground Stake | Soft ground in open areas for quick, temporary sets. | Highly portable, easy to deploy. | Less stable, limited height, not for hard ground. |
| Tripod Stand | Uneven terrain, temporary setups, maximum flexibility. | Place anywhere, highly adjustable for height/level. | Can be bulky, may be less stable in high winds. |
Ultimately, the best game camera stands are the ones that fit your specific hunting environment. Many serious hunters keep a few different types in their gear bag, making sure they always have the perfect tool for whatever the landscape throws at them.
Choosing the Right Material and Build Quality
Beyond the style of stand you choose, the actual materials and construction quality play a huge role in how well it performs in the field. A poorly built stand is a liability. It risks damaging your expensive camera and could fail at the worst possible moment. Think of it as the stand’s armor against the elements—some are built for battle, others aren't.
You wouldn’t build a deck with flimsy wood, right? For the same reason, you shouldn’t trust a cheap plastic mount to secure a several-hundred-dollar cellular camera. High winds, freezing rain, and even curious animals are constantly testing your gear. The material and build quality are what determine whether your stand can handle that pressure year after year.
The Anatomy of a Durable Stand
When you start looking at game camera stands, you'll run into three main materials. Each one has its place, depending on your scouting scenario.
- Powder-Coated Steel: This is the heavyweight champion of durability. The steel itself provides incredible strength, while the powder coating creates a tough barrier against rust and corrosion. It's the go-to choice for permanent or semi-permanent setups where you need maximum stability and longevity.
- Aluminum: Offering a great balance of strength and portability, aluminum is a lot lighter than steel but still plenty strong. It’s naturally rust-resistant, making it a reliable option for hunters who move their cameras around and need a stand that’s easy to carry without giving up too much stability.
- Durable Plastics and Polymers: High-quality, UV-resistant plastics are your most lightweight and portable option. They aren't as rigid as metal, but they are perfect for backpack hunters or quick, temporary setups where cutting down on weight is the number one priority.
This decision tree can help you visualize which type of stand might work best based on where you're hunting.
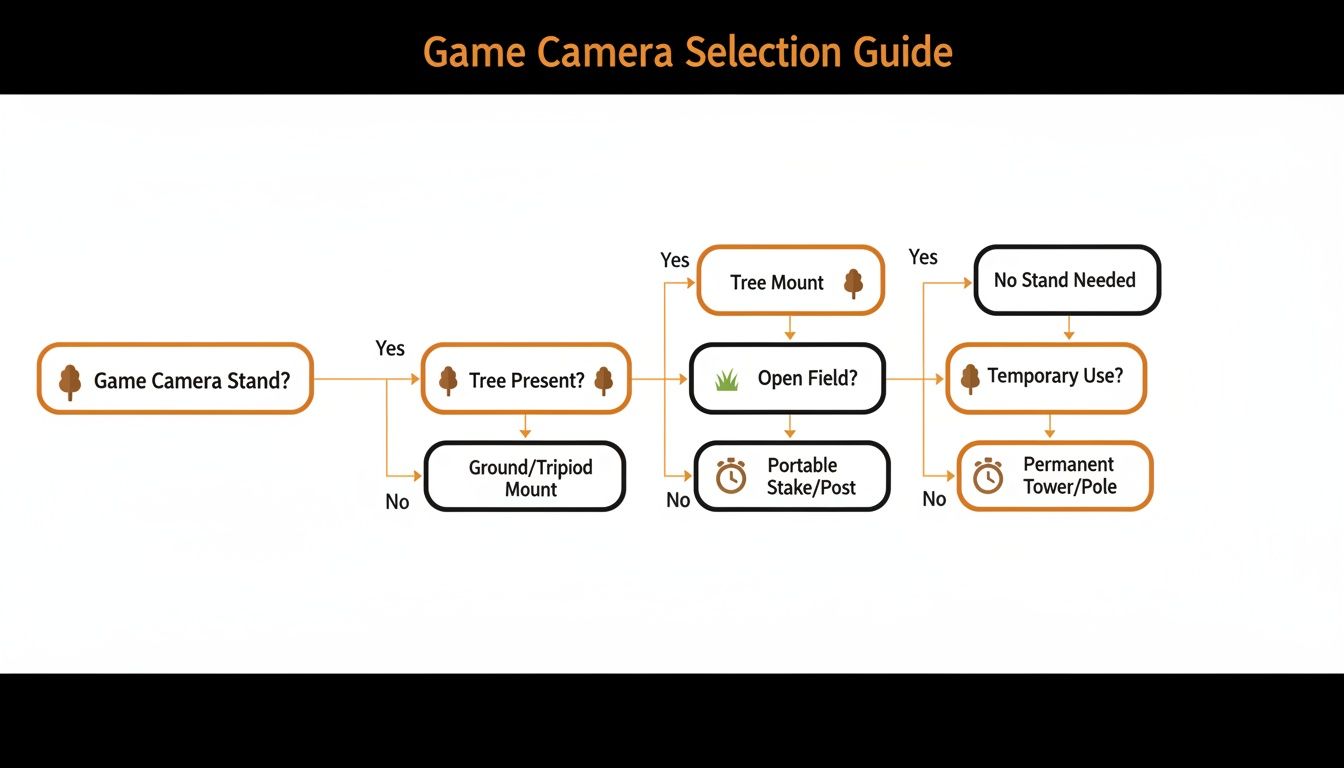
As the flowchart shows, your environment—whether you're in dense woods, an open field, or just need something temporary—is the first thing to consider when narrowing down your options.
Understanding Load Capacity
One of the most overlooked specs on any game camera stand is its load capacity. This is simply the maximum weight the stand can securely support without bending, drooping, or flat-out failing.
Think of load capacity like choosing the right hook to hang a heavy mirror. A small adhesive hook might hold a postcard, but you need a heavy-duty, anchored bolt to safely support a 50-pound mirror. Your camera deserves the same careful consideration.
This is especially critical with modern cellular trail cameras, like the Magic Eagle EagleCam 5, which are often heavier than their non-cellular cousins due to larger batteries and internal antennas. A stand with a low load capacity might hold the camera at first, but a strong gust of wind or a nudge from a deer could cause it to sag. That ruins your camera's aim and leads to missed or poorly framed photos.
Always check the manufacturer's stated load capacity and compare it to the weight of your camera setup, including any security lockbox you plan to use. As a rule of thumb, choose a stand with a capacity at least 25% higher than your gear’s total weight. That extra buffer ensures unwavering stability, protecting your investment and guaranteeing your camera stays pointed exactly where you left it.
Mastering Camera Placement for Perfect Shots
Owning the best game camera stand is only half the battle. The other, more critical half is mastering its placement in the field. A rock-solid mount is useless if it’s aimed at the rising sun or positioned where every gust of wind triggers a false photo, filling your SD card with hundreds of images of swaying branches.
Proper placement is an art that transforms your camera from a simple motion detector into a precision scouting tool. It’s about thinking like a photographer, a hunter, and even a meteorologist all at once. By paying attention to a few key details, you can dramatically increase the quality and value of the intel you gather.
The impact of getting this right can't be overstated. Today, around 62% of North American hunters use trail camera stands in their routines because they know precise positioning is the key to effective scouting. This widespread adoption is a big reason the hunting and trail cameras market is projected to grow from USD 224.08 million in 2024 to USD 375.16 million by 2034. You can explore more about how stands are transforming modern hunting practices.
Finding the Sweet Spot: Height and Angle
The ideal height for your camera depends entirely on the game you're after. Get this right, and you'll capture clear, identifiable images and reliably trigger the motion sensor.
- For Deer: Aim for a height of 3 to 5 feet off the ground. This chest-high placement gives you a natural broadside view of the animal, making it easy to judge body size and antler growth.
- For Turkeys: You’ll need to go lower, around 1 to 2 feet high. This puts the camera right at the bird's level to capture detailed shots as they pass.
- For Bears and Hogs: A slightly higher placement, around 4 to 6 feet, is often best. This height helps keep a curious animal from messing with your camera and gives you a good overview of their size.
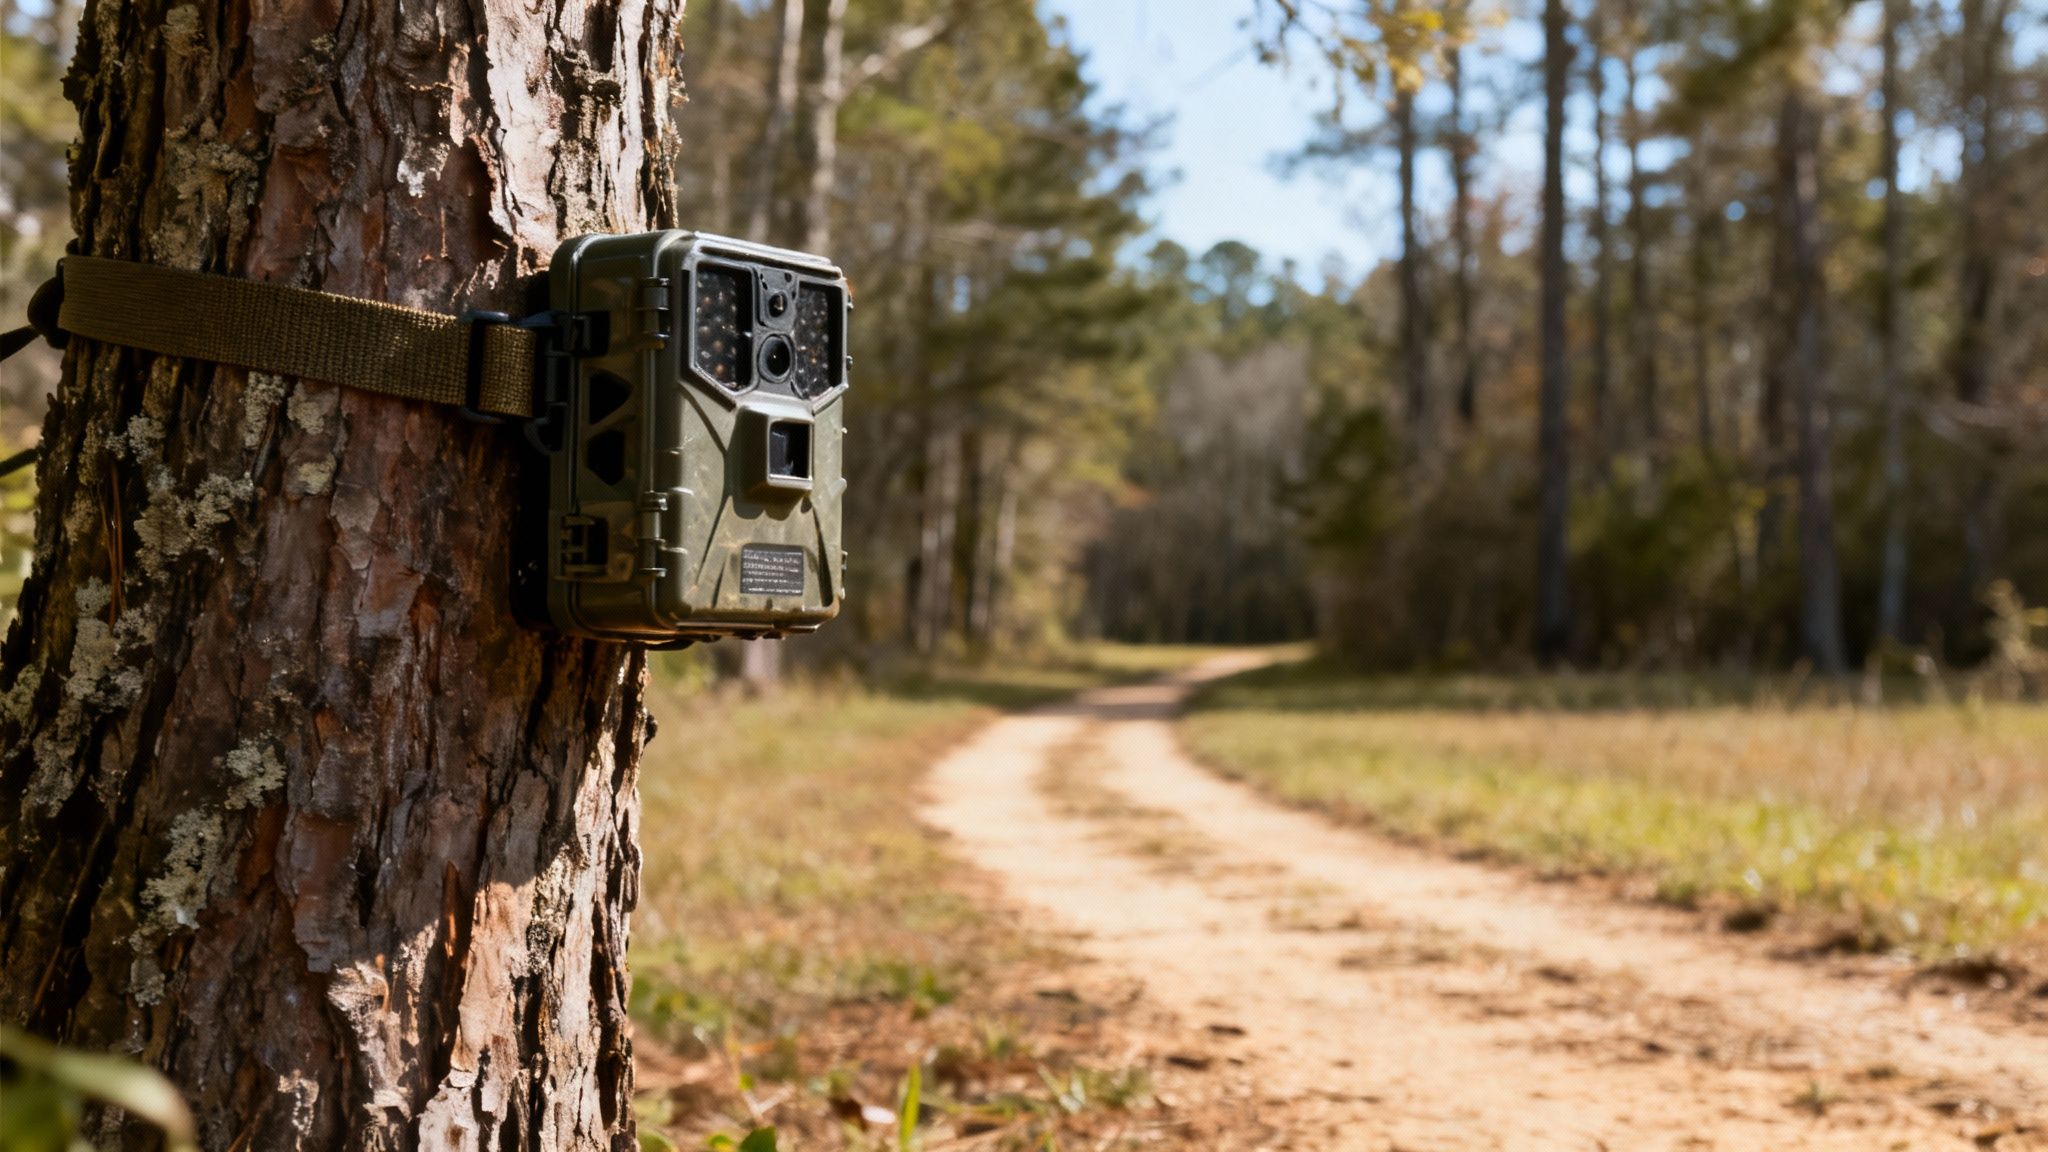
The angle is just as crucial. Always aim for a 45-degree angle relative to the trail you're watching. Pointing a camera straight down a path gives an animal less time in the detection zone, often resulting in blurry "tail-end" photos. An angled view maximizes the time they spend in front of the sensor for sharper, better-framed shots.
Think of your camera's field of view as a stage. You want the animal to walk onto the stage and linger for a moment, not sprint across it. Angling the camera gives you a wider performance area, ensuring you get the perfect shot.
Battling the Elements and False Triggers
Your biggest enemies in the field are often the sun and the wind. Placing your camera without considering them is a recipe for washed-out images and a memory card full of nothing.
Sunlight Management
Never point your camera directly east or west. The rising or setting sun will blast the lens with direct light, creating lens flare and silhouetted images that hide all the details you need. The best practice is to always face your camera north or south whenever possible. This one simple step keeps direct sunlight out of your lens for consistently better photos all day long.
Clearing the Trigger Zone
Before you walk away, take a minute to clear small branches, tall weeds, and overhanging leaves from in front of the camera. These are the number one culprits for false triggers. A single branch swaying in the breeze can generate hundreds of useless photos, draining your battery and burying any real activity.
For a full walkthrough on getting your gear ready, check out our guide on how to set up a trail camera for beginners.
Placement Tips for Cellular Cameras
Cellular cameras like the Magic Eagle EagleCam 5 add one more thing to the checklist: signal strength. Poor placement can mean the difference between getting instant notifications and having a camera that’s completely offline.
When setting up a cellular model, check the signal strength on the camera or through its app before you finalize the location. Sometimes moving just a few feet to one side of a tree or gaining a little elevation can make a huge difference. Use your stand’s adjustability to find that sweet spot where both the camera angle and the signal are perfect.
It’s also a smart move to log your best spots—those with strong signals and high game traffic—on a digital map so you can find them again next season.
How to Secure Your Camera and Avoid Theft
Let's face it: leaving a pricey piece of gear out in the woods for weeks at a time comes with some risk. Beyond what the weather or a curious bear might do, theft is an unfortunate reality for anyone running trail cameras. Protecting your investment means getting smart and layering your security, combining tough hardware with even tougher-to-spot placement.
A solid game camera stand is your first line of defense. It gives the camera a stable base and makes it harder for someone to just rip it off a tree. But to really lock things down, you need to pair that stand with a few other security tools. This one-two punch makes your camera a much less appealing target for thieves looking for an easy score.
And there are a lot of cameras out there to protect. North America accounts for over 40% of the global trail cameras market share, a market that's expected to hit USD 53.80 million in 2025. With more than 15 million recreational hunters in the U.S. alone, that’s a ton of gear in the field. You can read more about the role of stands in the thriving trail camera market to see just how big the industry has become.
Hardening the Target with Physical Security
The most straightforward way to stop a thief is to make the camera physically difficult to take. That's where purpose-built security hardware comes in, designed to lock your camera and its stand tightly to a tree or post.
Your two go-to tools for this job are:
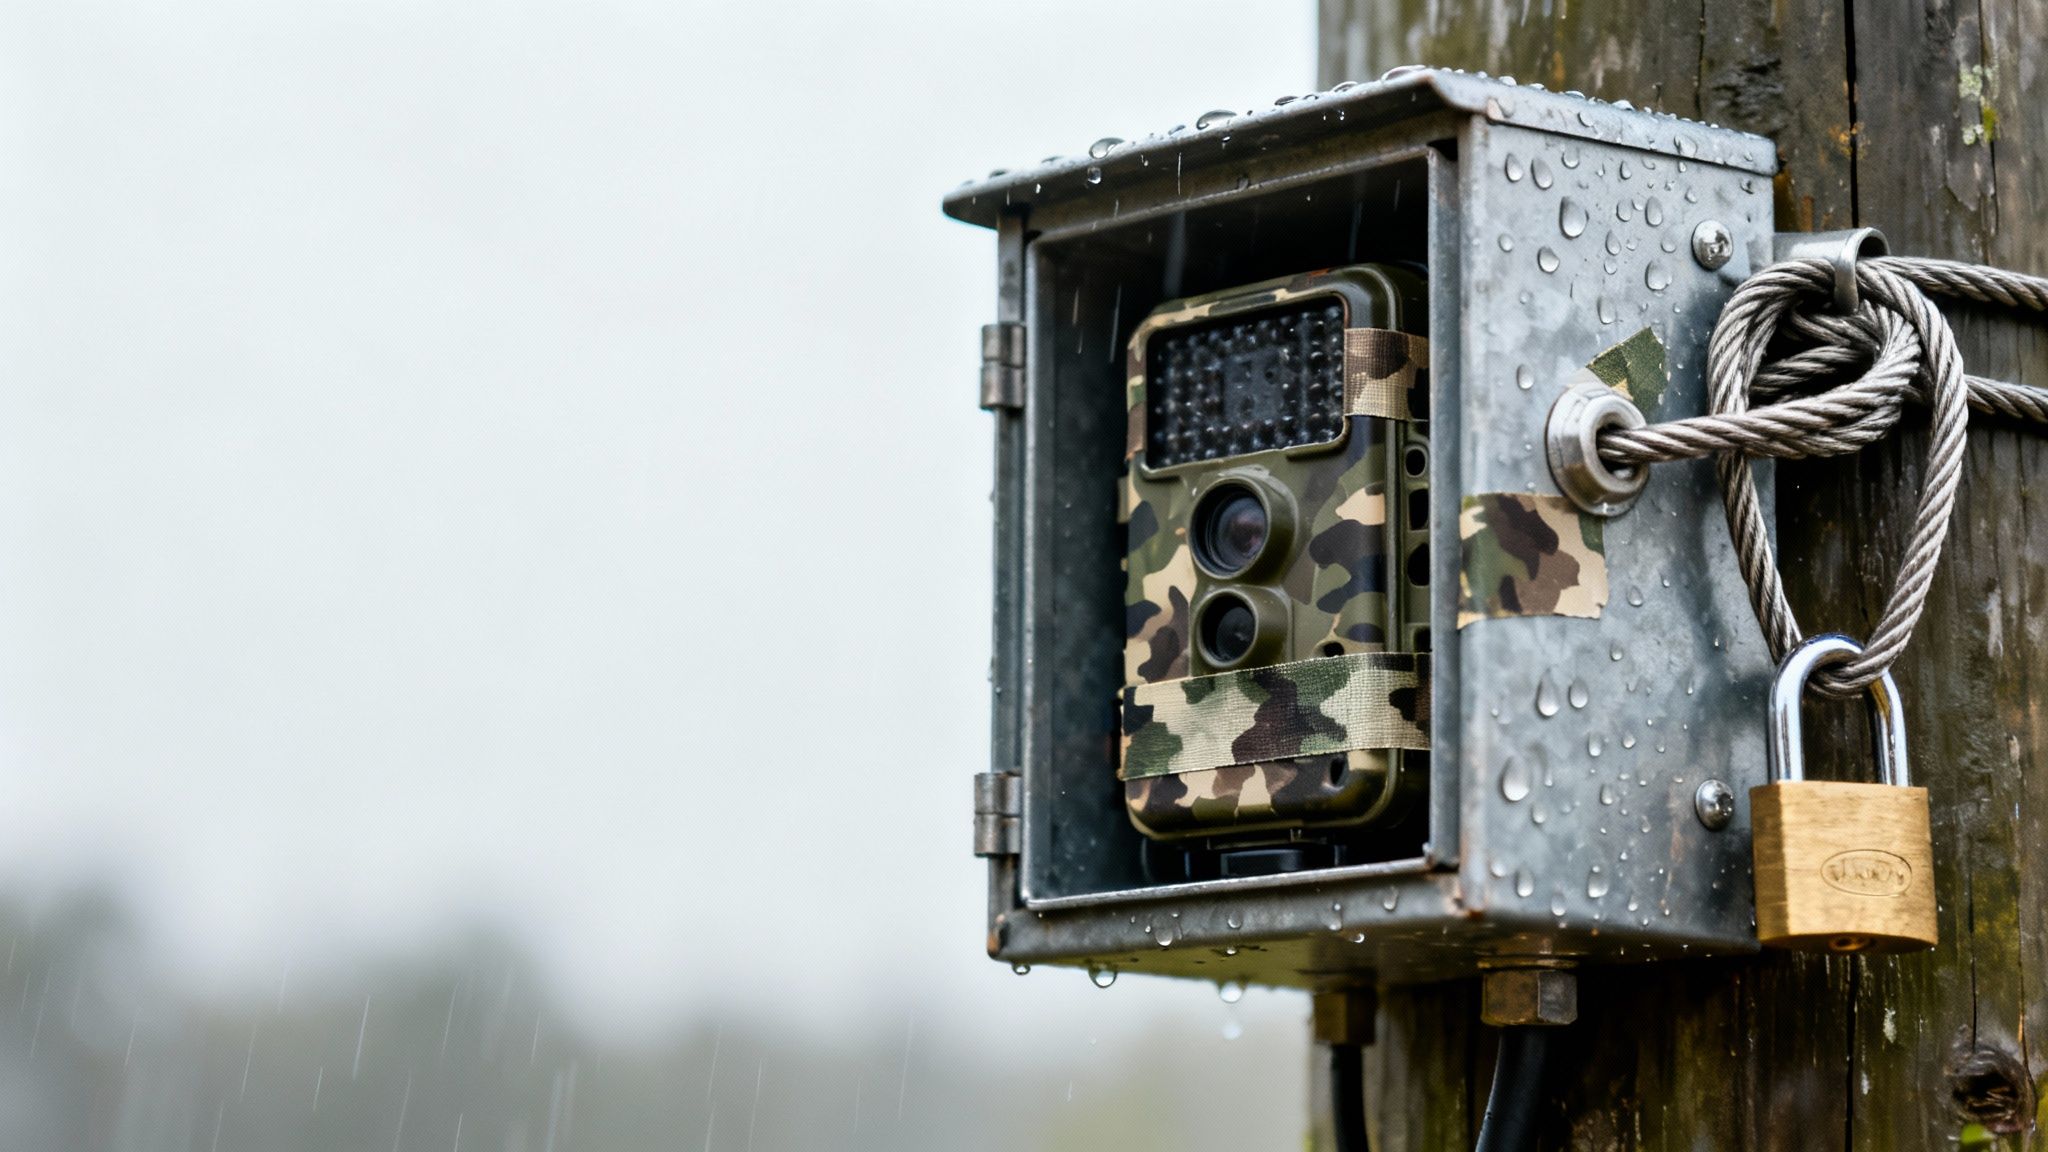
- Steel Lockboxes: These are heavy-duty steel cases molded to fit specific camera models. You place the camera inside, then lag or cable the box to the tree. This prevents anyone from messing with the camera's controls, stealing your SD card, or getting to the mount.
- Python Cables: A braided steel cable lock is a non-negotiable security tool. You can run it through the lockbox and around the tree or thread it directly through the security loops found on most modern cameras and stands. Cinch it down tight, and you're good to go.
A well-secured camera isn't just about stopping a determined criminal; it's about making your setup look like too much work. Most thieves are opportunistic. A visible lockbox and cable are often enough to make them move on.
The Art of Security Through Obscurity
While locks and cables are great, the absolute best defense is a camera that no one ever sees in the first place. Learning to camouflage your setup is a skill that works hand-in-hand with physical security.
Start by picking a camera and stand with a camo pattern that actually matches the woods you're in. Next, stop putting your camera at eye level on a perfect, straight tree right next to a game trail—that’s the first place anyone looks.
Instead, think outside the box. Mount it higher up and angle it down, tuck it behind a thicket of branches, or find a tree with rough, textured bark that helps break up the camera's outline. Sometimes, adding a few local leaves and twigs or even a ghillie wrap can make it virtually disappear.
Practicing Legal and Ethical Scouting
Finally, securing your gear also means respecting property lines and local laws. Placing a camera where it shouldn't be is a quick way to have it confiscated or to start a conflict with a landowner.
Always double-check the regulations for public land use. Some areas prohibit any screw-in mounts or have limits on how long you can leave equipment out. If you're on private land, getting clear permission is non-negotiable.
Being a responsible and ethical scout is part of the game. It minimizes the chances of your camera being taken down by authorities or a frustrated landowner. For more detailed advice, our guide on choosing a game camera lock cable has some extra tips to help.
Essential Maintenance and Troubleshooting Tips
Treating your game camera stands with a ‘set it and forget it’ mindset is a quick way to get unreliable intel. Over time, straps fray, metal rusts, and adjustment points loosen—often leading to camera failures right when the action heats up. The good news? Proactive maintenance is simple and keeps your gear ready to perform.
A well-maintained stand is a dependable one. Just a few minutes of inspection each season can prevent frustrating issues like a sagging camera angle or a complete mount failure. It’ll extend the life of your gear and protect your camera investment from a damaging fall.
A Simple Seasonal Checklist
Before you deploy your stands for the season and again after you retrieve them, run through this quick inspection. This simple check helps you catch small problems before they become big headaches in the field.
- Inspect Metal for Corrosion: Look over all the steel parts for any signs of rust or chipped powder coating. If you spot some, sand it down lightly and hit it with a coat of rust-resistant spray paint to stop it from spreading.
- Check Straps and Cords: Nylon straps are notorious for sun rot, which makes them brittle and weak. Look for fading, frayed edges, or any signs of animal chews—squirrels and mice love to gnaw on them.
- Tighten All Hardware: Wind and weather can vibrate screws and adjustment knobs loose over time. Go over every connection point and make sure all bolts, screws, and ball-joint locks are snug and secure.
Think of seasonal maintenance like tuning up your bow before opening day. You wouldn't risk a hunt with frayed strings or a loose sight, and your camera setup deserves the same level of attention to ensure it performs flawlessly when a trophy animal steps out.
Troubleshooting Common Stand Problems
Even with good maintenance, you might still run into issues out in the woods. Here’s how to fix some of the most common frustrations that can compromise your scouting data.
Problem 1: The Sagging Camera Angle
You set the perfect angle, but a week later, your camera is pointing straight at the ground. This is almost always caused by a loose adjustment point or a stand that just can't handle the camera's weight, a common issue with heavier cellular models.
- The Fix: First, make sure the ball joint or tilt screw is tightened down as much as possible. If it still sags, your stand’s load capacity might be too low for your camera. As a quick field fix, you can try wedging a small stick under the camera to provide extra support and lock the angle in place.
Problem 2: Blurry Night Photos
If your daytime photos are sharp but your night shots are blurry, the culprit is likely subtle vibration. At night, the camera uses a slower shutter speed, making it extremely sensitive to the slightest movement during the flash.
- The Fix: Stabilize that mount. Ensure your tree strap is cinched down as tightly as it can go or that your screw-in mount is biting deep into solid wood. For tripod or T-post game camera stands, double-check that they are firmly planted in the ground and not wobbling. Sometimes, just clearing away a small branch that's touching the stand is enough to stop wind-induced vibration.
Common Questions About Game Camera Stands
Even the most seasoned hunters run into questions in the field. When it comes to game camera stands, a handful of common issues can mean the difference between getting the perfect shot and walking away empty-handed. This section is your field guide for quick, no-nonsense answers.
We've gathered the most frequent questions from hunters and wildlife watchers to help you clear up any confusion, reinforce what we've covered, and make your scouting strategy even stronger.
What Is the Best Height to Mount a Game Camera for Deer?
For whitetail deer, the sweet spot is usually 3 to 5 feet off the ground. This height gives you a natural, broadside view of the animal and lines up perfectly with its body, making sure your motion sensor triggers every time. It’s the classic setup for a reason.
Now, if you're in an area where theft is a real worry, you can go much higher—think 8 to 10 feet—and angle the camera down. Just be sure your stand is solid enough to hold that downward angle without drooping over time. And no matter what height you choose, always clear away nearby leaves and branches that might blow in the wind and fill your SD card with hundreds of useless photos.
Can I Use Game Camera Stands on Public Land?
This is a big one, and the answer is: it depends entirely on local rules. Many public lands, like national forests or Wildlife Management Areas (WMAs), have very specific guidelines about what you can and can't attach to their trees.
Some places have a strict ban on any mount that screws into or damages a tree. If that's the case, your only legal options are strap-based mounts or freestanding setups like tripods and T-post mounts. Other areas might limit how long you can leave any equipment unattended.
Before you even think about setting up a camera, always check the official regulations for the specific public land you're scouting. A quick search on the managing agency's website can save you from a hefty fine or, even worse, getting your expensive gear confiscated.
How Do I Stop My Game Camera from Being Stolen?
Protecting your gear isn't about one single trick; it's about a layered strategy. Thieves look for easy targets, so your job is to make your camera setup look like way too much work.
A multi-pronged defense is always your best bet:
- Use Physical Deterrents: Don't just use one lock. Combine a heavy-duty steel lockbox with a tough Python cable lock. For maximum security, run the cable through the lockbox, around the tree, and through the stand itself.
- Practice Smart Placement: Stay away from obvious, high-traffic spots. Instead, mount your camera higher up, tuck it behind some natural cover, or pick a tree with rough bark that helps break up its outline.
- Consider Cellular Technology: A cellular camera with anti-theft features is a game-changer. Things like GPS tracking, instant photos of a potential thief, and geofence alerts can be the key to getting your property back if the worst happens.
By combining these tactics, you create a solid defense that will turn away most opportunistic criminals and keep your scouting tools right where you left them.
Ready to capture the perfect shot with a setup you can trust? The Magic Eagle EagleCam 5 offers advanced features like AI detection and GPS anti-theft protection, ensuring your camera is always secure and effective. Explore the future of wildlife scouting today at https://magcieagle.com.