
Think of a motion-activated game camera as your own personal, full-time wildlife photographer. It’s a tough, weatherproof little box designed to sit quietly in the woods for weeks, even months, automatically snapping photos or recording videos whenever an animal wanders by. It’s your window into a world you’d otherwise never see.
The Role of a Motion Activated Game Camera
Imagine having a scout that works 24/7, never gets tired, and makes absolutely no noise. That’s exactly what a game camera does. Instead of you having to spend countless hours in a blind or relying on pure luck, these cameras use special sensors to pick up on heat and movement. When they detect something, they instantly trigger the camera to capture the moment.
Each camera is a self-contained unit, packing a lens, motion sensor, night vision flash, and a durable case built to handle anything Mother Nature throws at it.
Once a niche gadget, these cameras are now an essential tool for almost anyone who spends time outdoors. Their popularity has exploded because they're both incredibly useful and increasingly affordable. In fact, the global game camera market hit a value of around US$ 112.20 million in 2023 and is only expected to keep growing. Hunters make up the biggest slice of that pie, accounting for over 60% of all uses, but researchers and recreational nature watchers are close behind. You can read more about the game camera market and its trends.
Core Components and Their Purpose
At its heart, a motion-activated game camera is a pretty straightforward piece of tech. Knowing the main parts helps you understand how it gets those incredible, candid shots of wildlife.
- PIR Sensor: This is the camera's trigger finger. The Passive Infrared (PIR) sensor is constantly scanning for changes in heat and motion. When a warm body moves into its view, it tells the camera to wake up and get to work.
- Camera Lens: Just like your phone or digital camera, the lens is what captures the scene. The quality of the lens has a huge impact on the sharpness and clarity of your photos and videos.
- Infrared (IR) Flash: To see in the dark, these cameras use an IR flash. This flash produces light that is invisible (or nearly invisible) to most animals, so you can get crystal-clear images in total darkness without spooking your target.
- Weatherproof Housing: This is the tough outer shell that keeps the sensitive electronics safe from rain, snow, blistering heat, and freezing cold. It’s what allows the camera to operate reliably out in the field for long stretches.
Who Uses These Cameras and Why
The list of people who rely on game cameras is surprisingly long and diverse. Hunters use them to pattern deer and learn their routines. Wildlife researchers track elusive species to study their behavior and populations. Landowners even use them for security, keeping an eye on their property.
And, of course, plenty of folks just set them up in their backyards to see what critters come visiting after dark.
The real magic of a game camera is its patience. It catches those fleeting moments that are almost impossible for a person to witness firsthand—a bobcat on the prowl at midnight, a big buck scraping a tree, or a bear cub curiously exploring a trail. It pulls back the curtain on the secret lives of animals.
How a Game Camera Detects Motion
A game camera doesn't "see" the world the way you and I do. Instead of using visible light, it senses its surroundings through heat and movement, acting like a silent watchman that only springs to life when something interesting wanders by. The magic behind this is a little component called the Passive Infrared (PIR) sensor.
Think of the PIR sensor as a network of invisible tripwires spread across the camera's field of view. These tripwires aren't looking for physical contact; they're constantly measuring the ambient infrared energy—the heat signature—of the area they’re monitoring.
The camera starts by establishing a baseline temperature of its environment, like the ground, trees, and rocks. As long as this baseline stays consistent, the camera chills out in a low-power standby mode. But the moment a warm-bodied animal like a deer or a person steps into one of these invisible zones, it introduces a brand-new heat signature.
This sudden change in infrared radiation throws the baseline out of whack. The PIR sensor immediately detects this difference and sends a wake-up call to the camera’s processor, telling it to capture an image or start recording video.
Understanding Detection Zones and Range
The PIR sensor doesn't just see one big blob of heat. It works with a special lens, called a Fresnel lens, which is that curved plastic piece you see on the front of the camera. This lens is clever—it divides the sensor's view into multiple distinct detection zones.
This multi-zone design is what makes the sensor so good at picking up on actual movement. An animal has to cross from one zone to another for the camera to trigger. This smart requirement helps prevent false alarms from stationary warm objects, like a sun-baked rock, because there's no movement across the zones.
The total area the sensor can cover is defined by two key specs:
- Detection Range: This is how far out the camera can reliably detect a heat signature in motion. For most game cameras, this sweet spot is between 60 to 100 feet.
- Detection Angle: This specifies the width of the sensor's coverage. It often differs from the camera's actual field of view, so a wider detection angle might trigger before an animal is perfectly centered in the frame.
This whole process, from detection to storage, happens in a flash.
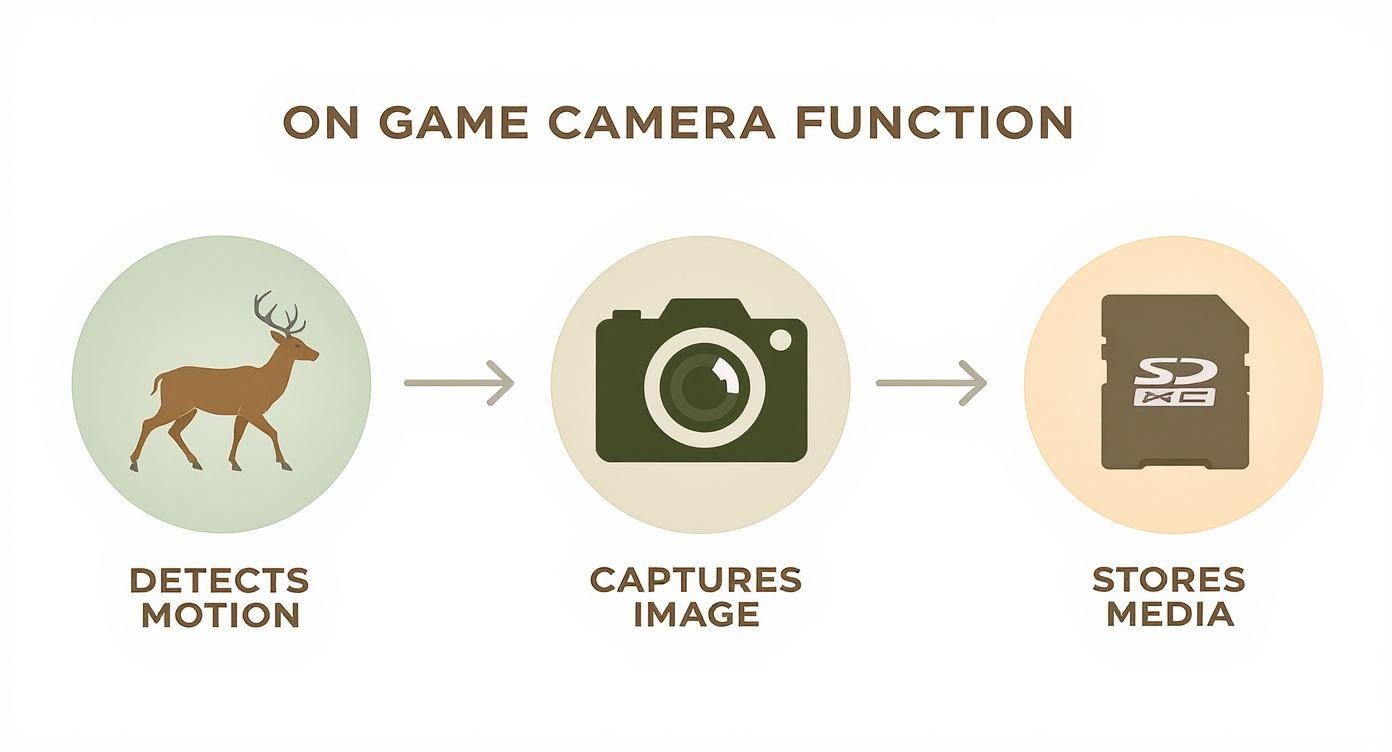
The PIR sensor's ability to detect motion is the critical first step that kicks off the entire capture sequence. It’s a simple but incredibly efficient system.
Fine-Tuning the Trigger with PIR Sensitivity
Most modern game cameras let you adjust the PIR sensor's sensitivity. This setting basically tells the camera how big of a change in heat and motion it should pay attention to. Nailing this adjustment is crucial for getting the best performance in different environments.
For instance, a high sensitivity setting is perfect for an open field where you want to catch animals at a distance. But in a forest on a windy day, that same high setting might give you a hundred pictures of swaying branches warmed by the sun.
Lowering the sensitivity in that windy forest tells the camera to ignore those minor thermal changes, which saves you a ton of battery life and SD card space. Learning to adjust this setting is one of the most important skills for any trail camera user.
To really get the hang of it, you can check out our detailed guide that explains what PIR sensitivity on a trail camera is and how to master it. When you match the sensitivity to your environment, you make sure your motion-activated game camera captures exactly what you want—and nothing you don't.
Choosing the Right Camera Features for Your Needs
https://www.youtube.com/embed/l2z2DN0PBdI
Stepping into the world of motion-activated game cameras can feel like trying to crack a secret code. Manufacturers love to throw around specs like "trigger speed," "detection range," and "megapixels," but what do those numbers actually mean when you're out in the woods?
Understanding these key features is the difference between capturing a jaw-dropping photo of a mature buck and getting a blurry shot of its tail disappearing into the brush. It's all about choosing the right tool for the job. You wouldn't use a hammer to turn a screw, and the perfect camera for a wildlife researcher studying slow-moving turtles is completely different from what a hunter needs on a fast-paced game trail.
Let's break down the essential features and translate the technical jargon into practical advice, so you can pick a camera that's a perfect match for your goals.
Trigger Speed: The Race Against Movement
Trigger speed is the blink-of-an-eye delay between the moment the sensor detects motion and when the camera actually snaps the picture. This tiny fraction of a second is one of the most critical specs you can look at, especially if your target is a fast-moving animal.
A slow trigger speed (around 1.0 second) might be fine for a bait station where animals tend to linger, but it's a recipe for empty frames on a trail. A deer walking at a brisk pace can cross the entire frame in that time. For trails and scrapes, you really want a trigger speed of 0.5 seconds or less. The top-tier models can fire in under 0.2 seconds, ensuring you freeze the action perfectly every time.
Detection Range and Angle: How Far and Wide Can It See?
The detection range tells you how far away the camera can sense a moving, heat-emitting animal. Most quality cameras have a solid range between 60 and 100 feet. A longer range is fantastic for watching over open fields or long food plots, while a shorter range is usually more than enough for dense woods.
Just as important is the detection angle, which defines the width of the sensor's field of "vision." A wider angle covers more ground but can sometimes trigger the camera before the animal is nicely centered in the photo. A narrower angle is more focused. The goal is to find a camera where the detection angle closely matches the camera's field of view (what the lens sees) to avoid those frustrating pictures of just a nose or a tail entering the zone.
Image Quality: Megapixels vs. Sensor Reality
Camera brands love to advertise huge megapixel (MP) counts, but this number can be incredibly misleading. While more megapixels can produce a larger image file, the real measure of photo quality comes from the camera's image sensor and lens.
A camera with a high-quality 5MP sensor will almost always produce sharper, clearer images than a cheap camera that uses software to stretch a 2MP sensor's output to a supposed 20MP. This process, called interpolation, just adds digital grain and noise. Don't fall for the hype.
Instead of chasing the highest MP number, look for real-world photo examples from the camera model you're considering. The 8–12 MP range remains the most popular, making up about 60% of sales, because it hits that sweet spot of great quality and manageable file sizes.
A motion-activated game camera with a superior lens and a modest native sensor will consistently outperform a high-megapixel camera with poor optics. It's like having a powerful engine in a car with bad tires—you can't effectively put the power to the ground.
Night Vision Flash: No-Glow vs. Low-Glow
Nighttime is when the magic happens for most wildlife, so your camera's flash is absolutely essential. There are two main types of infrared (IR) flash to choose from:
- Low-Glow (850nm IR): These flashes emit a faint red glow that some animals (and humans) can see. The upside is that they typically produce brighter, more detailed night photos and have a longer flash range.
- No-Glow (940nm IR): This type of flash is completely invisible to the naked eye. This makes it perfect for security or for monitoring highly sensitive or pressured animals that might get spooked by a low-glow flash. The trade-off is often a slightly shorter flash range and grainier images.
Cellular Connectivity: The Ultimate Game Changer
In the old days, you had to physically hike out to your camera to pull the SD card. Cellular game cameras have completely changed the game by sending photos and videos directly to your smartphone or email just moments after they're taken.
This immediate feedback is a massive advantage for serious hunters and property managers. You can monitor activity in real-time, tweak your strategy without tromping through the area and spreading your scent, and get instant security alerts. While they cost more upfront and require a data plan, the convenience and timely intel they provide are often well worth the investment.
And once you've captured that great footage, you might want to edit it into something shareable. There are plenty of online video maker tools that can help you clean up your clips and create compelling content.
To help you decide what's most important, the table below breaks down the ideal features for different goals.
Game Camera Feature Comparison for Different Needs
This table compares key camera specs and offers recommendations to help you prioritize features whether you're a hunter, researcher, or just keeping an eye on your property.
| Feature | Ideal for Hunters | Ideal for Researchers | Ideal for Security |
|---|---|---|---|
| Trigger Speed | Very Fast (under 0.4s) for trails, moderate for bait sites. | Moderate to Fast, depending on the species being studied. | Very Fast (under 0.3s) to capture intruders immediately. |
| Night Vision | Low-Glow for maximum brightness and range on unpressured game. | No-Glow to avoid altering animal behavior during studies. | No-Glow is essential for covert surveillance. |
| Image Quality | Good (8-12MP native) for clear identification. | High (12MP+ native) for detailed analysis and publication. | Good (8-12MP native) for clear subject identification. |
| Connectivity | Cellular is a major advantage for real-time scouting. | Cellular for remote data collection without site disturbance. | Cellular provides instant alerts for immediate response. |
| Battery Life | Long life is crucial for minimizing trips to remote locations. | Long life is essential for multi-month deployment cycles. | Can be supplemented with solar panels for continuous operation. |
Ultimately, choosing the right camera comes down to matching its strengths to your specific needs in the field. By focusing on the features that truly matter for your situation, you'll be well on your way to capturing incredible images.
Mastering Your Camera Setup and Placement
Owning a top-tier motion-activated game camera is only half the battle. Let's be honest, a fantastic camera in a terrible spot is no better than a weatherproof box strapped to a tree—it’ll capture plenty of wind-blown leaves, but not much else. True success comes from mastering the art and science of deployment.
It’s about choosing the right location, angle, and settings to capture those incredible wildlife moments you're after. This is where your field knowledge transforms a piece of technology into a powerful scouting tool. By thinking like an animal and understanding how your camera sees the world, you can turn an empty SD card into a gallery of impressive discoveries.
Let's walk through the essential steps to get your camera perfectly positioned for action.
Choosing the Perfect Location
Location is everything. It’s the single most important factor in successful camera trapping. You need to place your camera where animals already want to be. Instead of hoping for a lucky encounter in a random part of the woods, target areas that concentrate animal movement.
Think about the key resources wildlife needs to survive: food, water, and safe travel routes. Placing your camera near these hotspots dramatically increases your odds of capturing activity.
Here are some high-potential spots to consider:
- Established Game Trails: These are the highways of the animal kingdom. Look for worn-down paths through thickets or clearings that show signs of repeated use.
- Water Sources: Ponds, creeks, and springs are natural gathering places, especially during dry seasons. Animals will reliably visit these spots to drink.
- Food Sources: Setting up near a food plot, an oak tree dropping acorns, or a natural mineral lick can yield fantastic results as animals linger to feed.
- Natural Funnels: Look for narrow passages like creek crossings, fence gaps, or saddles between ridges that force animals to pass through a specific point.
The best camera spots are rarely obvious from a distance. Get on the ground and look for the subtle signs of animal life—tracks, scat, and browse lines. These clues are your roadmap to a successful deployment.
Setting the Right Height and Angle
Once you've found your spot, the next step is getting the height and angle just right. This is crucial for framing your subject perfectly and avoiding the dreaded "false trigger"—an empty photo captured because of a moving branch or the rising sun.
A common mistake is aiming the camera straight ahead. A slight downward angle is almost always better. It focuses the sensor on the ground where animals walk, not on the swaying treetops.
For optimal placement:
- Mount Height: For medium-sized mammals like deer or coyotes, a height of 2 to 3 feet off the ground is ideal. This puts the camera at body level for a clear, compelling shot.
- Direction: Whenever possible, face your camera north or south. This prevents the rising and setting sun from shining directly into the lens, which can cause glare and false triggers.
- Clear the View: Trim away any tall grass, leaves, or small branches directly in front of the camera. On a windy day, these can move enough to set off the motion sensor repeatedly, draining your battery and filling your SD card.
Pre-Deployment Checklist and Security
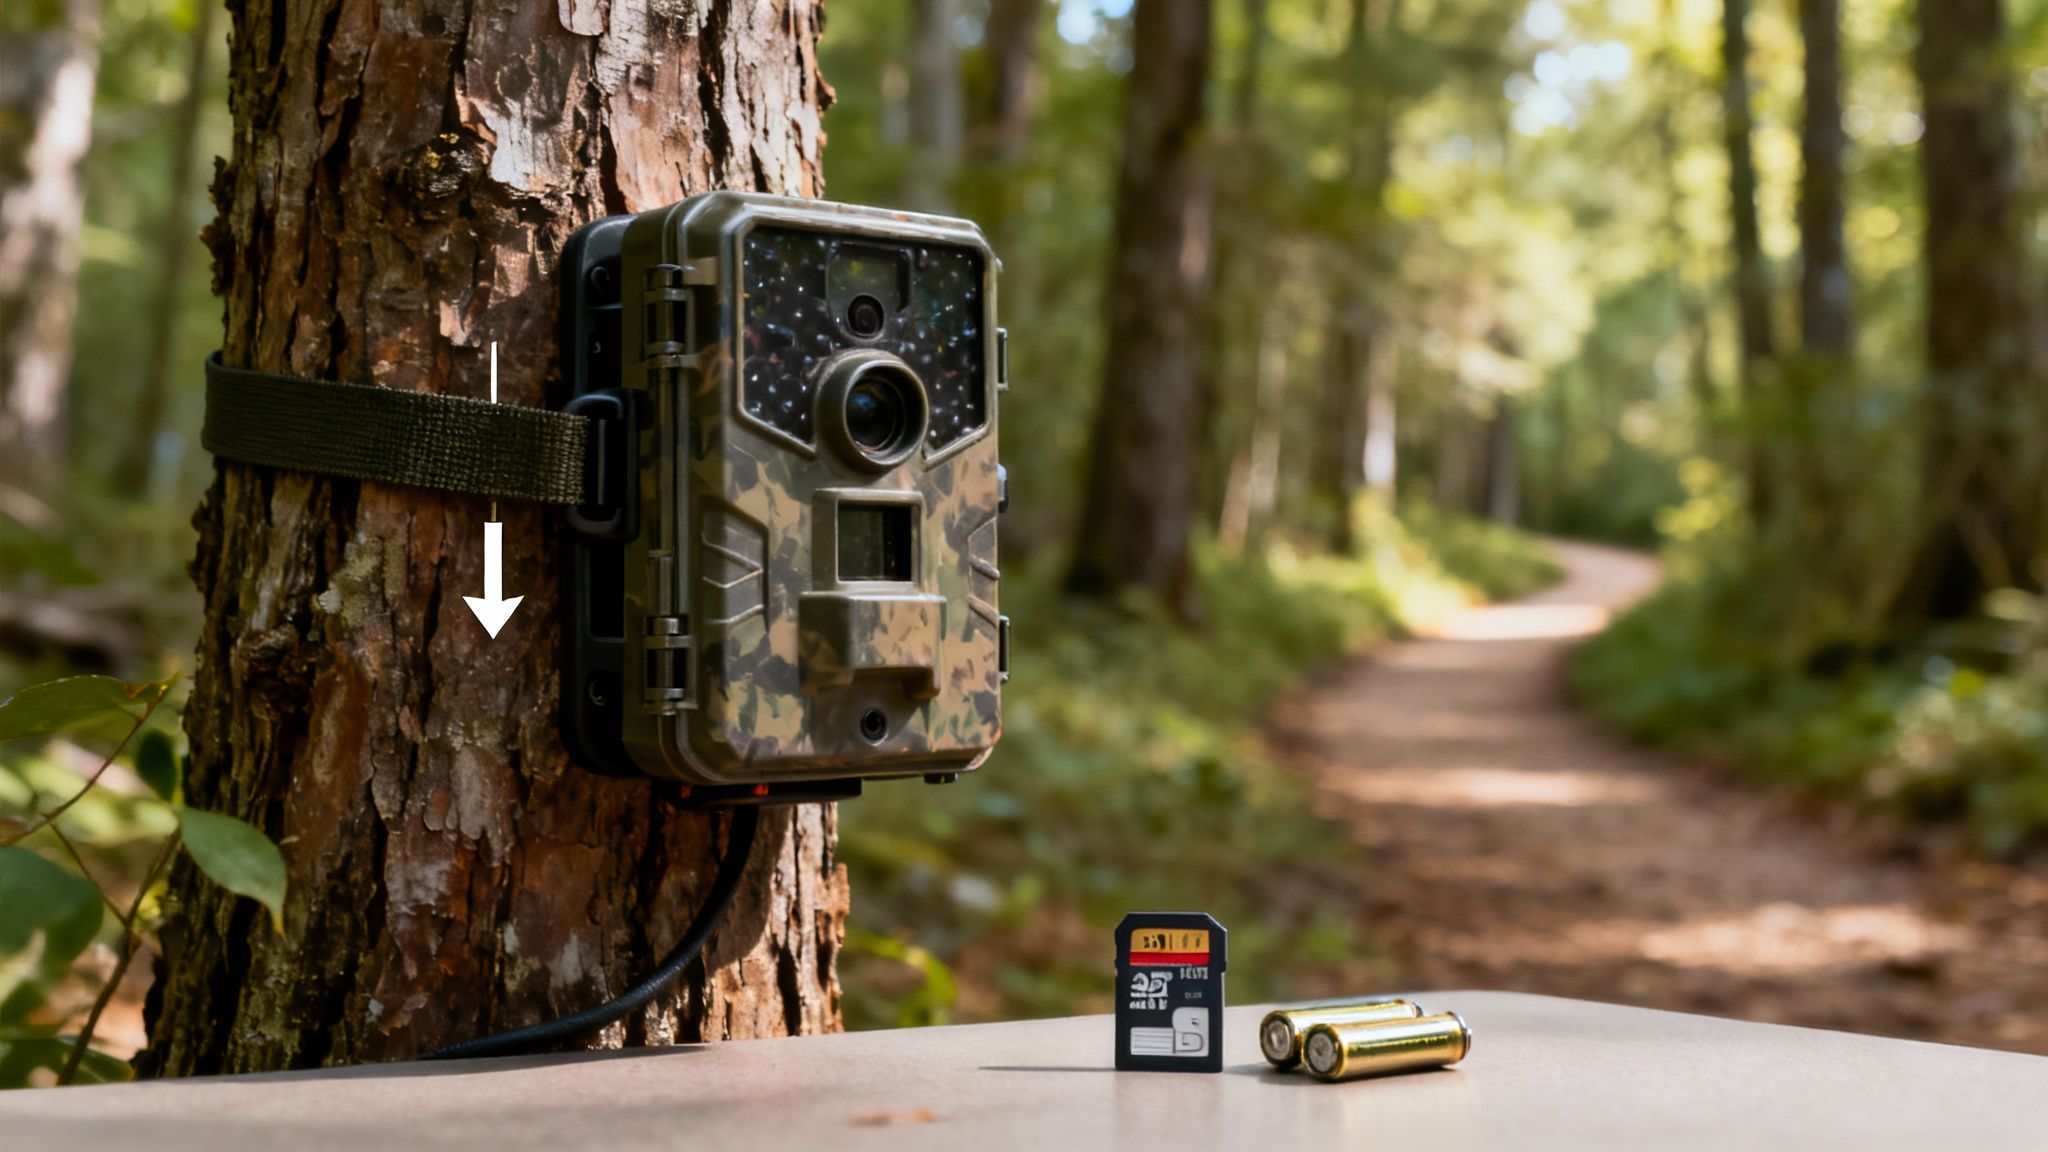
Before you walk away, run through a quick pre-flight checklist. Trust me, you don’t want to return in two weeks only to find out the camera never turned on.
Essential Pre-Deployment Steps:
- Fresh Batteries: Always start with a fresh set of high-quality lithium batteries, especially in cold weather.
- Formatted SD Card: Format the SD card in the camera to ensure it's compatible and clear of old files.
- Correct Settings: Double-check that the date, time, and capture mode (photo or video) are set correctly.
- Walk Test: Secure the camera to the tree, turn it on, and walk in front of it. Confirm the red light blinks, indicating it has detected you.
Finally, think about securing your investment. A simple cable lock can deter casual theft, while a dedicated steel security box offers maximum protection against both thieves and curious bears. While these steps are specific to trail cameras, understanding general installation best practices from other fields can sometimes offer a fresh perspective.
For a deeper dive into the initial setup, you can learn more about how to set up a trail camera with our beginner's guide. With these strategies, you’re ready to deploy your camera like a pro.
Exploring Next-Generation Game Camera Technology
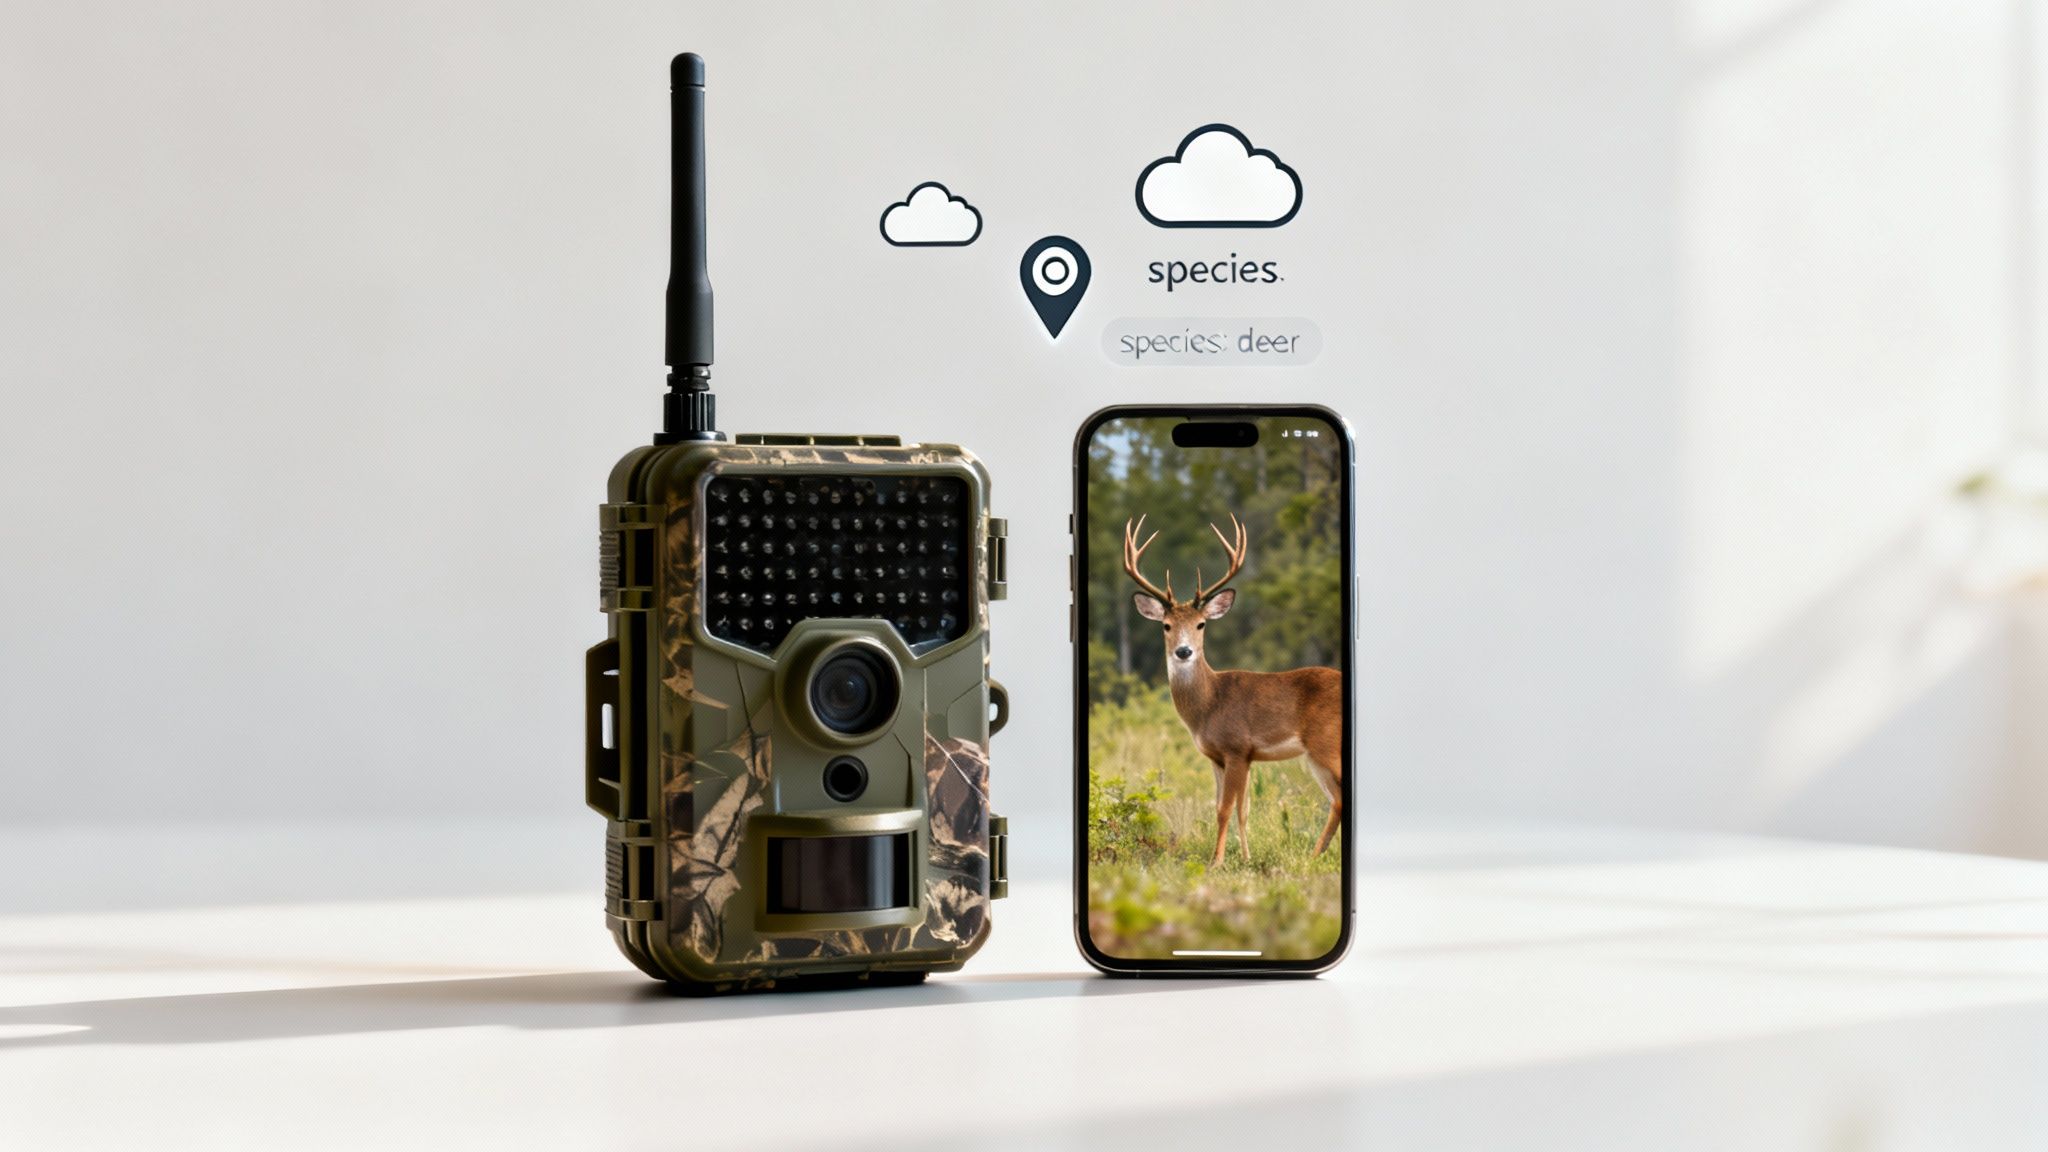
The humble motion-activated game camera has come a long way. What used to be a simple, passive observer is now a smart, connected device that sends real-time intel from the deep woods straight to your phone. Today's cameras are packed with features that once felt like science fiction, making them more powerful and far easier to use than their predecessors.
Leading the charge is cellular and wireless technology. This is the single biggest game-changer, turning your camera from a data collector into an active scouting partner. Gone are the days of waiting weeks to pull an SD card. Now, you get images and videos on your phone just moments after they're taken.
This immediate feedback is a massive advantage. It lets hunters tweak their strategy on the fly and gives landowners instant security alerts without ever having to step foot on the property and disturb the area. If you want to dive deeper into the mechanics, check out our guide on how cellular trail cameras work.
Smarter Scouting with AI and GPS
Modern cameras aren't just sending photos anymore—they're starting to understand them. Artificial Intelligence (AI) is being built right into the software to intelligently filter and sort your images before you even see them.
- AI Species Recognition: The camera's brain can identify the animal in the picture, automatically sorting your captures into folders for deer, turkey, or hogs.
- Intelligent Filtering: This allows you to automatically trash unwanted photos, like those of squirrels at the feeder or a branch swaying in the wind. It saves you hours of mind-numbing manual sorting.
This kind of automation means you spend less time scrolling and more time analyzing the patterns that matter. On top of that, many high-end models now come with GPS tagging. Every photo is stamped with its exact coordinates, letting you map out animal movements across large properties with incredible precision.
These technological advancements have significantly enhanced the capabilities of motion-activated game cameras. The increasing demand for wireless and cellular-enabled motion-activated cameras is also contributing to market growth, as these devices offer real-time data transmission and remote monitoring capabilities. You can explore more about the trail camera market trends.
The Power of Cloud Integration
The final piece of the puzzle is cloud integration, which ties all these powerful features together. Instead of worrying about a tiny SD card filling up or failing, your photos and videos are automatically beamed to a secure cloud server.
This shift to the cloud brings a few key benefits:
- Unlimited Storage: You never have to wonder if your camera stopped taking pictures because the memory card is full.
- Easy Organization: You can manage thousands of photos from dozens of cameras in one clean, accessible library.
- Simple Sharing: Spot a shooter buck? Share the image or video clip with your hunting buddies with just a few clicks.
From instant notifications and AI-powered analysis to seamless cloud management, the modern motion-activated game camera has become an indispensable tool. It gives us a deeper, more immediate connection to the wild, completely changing how we scout, research, and protect our properties.
Troubleshooting Common Game Camera Problems
Even the best motion activated game cameras run into glitches out in the field. It’s incredibly frustrating when a camera stops working, especially after you’ve spent hours scouting the perfect spot and getting it set up just right.
But don't assume your camera is a dud just yet. Most of the time, the fix is surprisingly simple. This section is a quick-and-dirty guide to solving the most common headaches you'll face.
Solving Power and SD Card Errors
A camera that won't turn on or keeps flashing a card error is probably the most frequent issue people run into. The good news? These two problems are often linked and usually easy to fix.
-
Problem: The Camera Won't Power On. Nine times out of ten, this is a battery issue. Dead batteries are the number one culprit, but putting them in backward is a close second. Make sure you're using a fresh set of batteries, they're all facing the right direction, and you haven't mixed old with new. Stick to one brand and type for the best results.
-
Problem: SD Card Error Message. If your screen says "Card Error" or "No SD Card," first check that the card is actually seated correctly. If it is, the next step is formatting. Always format the SD card inside the camera itself—not on your computer. This ensures it's perfectly matched to the camera's file system. This error can also pop up if the card is full or has become corrupted.
Fixing Poor Quality or Missing Photos
What if your camera is working, but the pictures are just… bad? Blurry, dark, or completely empty photos usually point to a problem with your settings or placement, not a broken camera. A few small tweaks can make a world of difference.
When your camera seems to be "missing" shots or only catching the tail end of an animal, it’s almost always a mismatch between its trigger speed and where you've placed it. If a deer is moving quickly past the lens, a slow trigger will miss the shot every single time.
Here’s how to dial in your image quality:
-
Reduce False Triggers and Empty Photos: Getting hundreds of pictures of a swaying branch? That’s a classic false trigger. The PIR sensor is detecting the movement of foliage that's been warmed by the sun. The fix is simple: trim away any branches or tall grass in front of the camera. It also helps to point your motion activated game camera north or south to keep direct sunlight from hitting the lens and tricking the sensor.
-
Improve Blurry or Dark Night Photos: If your nighttime shots are fuzzy or pitch black, your subject was probably too far away. Every camera has an ideal flash range, usually somewhere between 50 and 80 feet. Make sure your target zone, like a well-used game trail, is comfortably within that distance. Also, give the IR flash cover a quick wipe—mud and grime can seriously block the light.
Frequently Asked Questions
After getting the hang of how motion-activated game cameras work, a few specific questions almost always come up. Here are some straight answers to the most common things people ask out in the field.
How Far Can a Game Camera See at Night?
This one's a bit tricky because you're actually dealing with two different things: detection range and flash range. The detection range is how far out the camera’s PIR sensor can pick up a moving heat signature, which is usually somewhere between 60 to 100 feet.
But the flash range is how far the infrared flash can actually light up a subject for a decent photo. This is almost always shorter, typically between 50 and 80 feet. A camera might sense a deer at 90 feet, but the photo you get is just a pair of glowing eyes in the dark because the flash couldn't reach that far.
Pro tip: For the best night shots, make sure your target area—like a trail crossing or bait pile—is well inside your camera's flash range, not just its detection range.
Can I Use a Game Camera for Home Security?
Absolutely, and a lot of people do. Their rugged, weatherproof builds and incredible battery life make them perfect for watching over parts of a property where you can't easily run power for a typical security camera.
There are some trade-offs, though. A no-glow model is fantastic for staying hidden, but most game cameras won't give you the live-view feeds or instant alerts you get from a dedicated Wi-Fi security camera. The exception, of course, is a cellular model. For your front door, a purpose-built system is probably a better fit. But for a remote barn, driveway, or back gate? A game camera is a tough and reliable solution.
What Are the Rules for Placing a Game Camera?
The rules for placing a game camera depend entirely on where you put it.
- On Private Land: If you own the property or have clear permission from the owner, you’re generally good to go.
- On Public Land: This is where things get complicated. Rules can vary wildly between states, counties, and even specific land management areas, especially during hunting seasons.
Before you strap a camera to a tree on public land, always check with the local wildlife agency or the office that manages that specific area. Using your camera legally and ethically means respecting privacy and knowing the local laws first.
Ready to see what’s moving on your property with unmatched clarity and real-time alerts? The Magic Eagle EagleCam 5 delivers AI-powered species recognition, live streaming, and robust GPS protection directly to your phone. Discover the EagleCam 5 today!