
A trail camera locking cable is your best friend for physically anchoring your camera to a tree, stopping theft and tampering dead in its tracks. It's a lot like a bicycle lock, but built tougher. This braided steel cable is designed to secure your valuable gear in the wild, giving you peace of mind when you're not around.
Why Your Trail Camera Needs a Locking Cable
There’s nothing worse than heading out to your spot only to find your expensive trail camera gone. It's a gut-punch for any hunter or wildlife watcher. You don't just lose the camera; you lose all that irreplaceable scouting data you've been collecting for weeks or even months.
A trail camera locking cable is your first and most effective line of defense against this all-too-common headache. It's not just another accessory—it's a core part of a secure setup.

Think about it. You wouldn't leave a few hundred bucks in cash lying on a park bench, would you? Leaving a trail camera unsecured in the woods is pretty much the same gamble. These cables are built to handle nasty weather and resist basic cutting tools, making them a serious deterrent for any would-be thief.
The Growing Need for Camera Security
As more people get into wildlife monitoring, the need for solid security has shot up. The trail camera market was valued at a whopping USD 852.97 million in 2024 and it’s only expected to climb. That means more cameras are out in the field than ever before, making security solutions like locking cables absolutely essential.
Understanding why you need a cable is just as crucial as packing your family camping essentials for a safe trip outdoors. It's basic preparedness.
A locking cable transforms your camera from an easy target into a well-fortified asset. Its primary function is to make theft so time-consuming and difficult that a potential thief will give up and move on.
Of course, a cable is just one piece of the security puzzle. For total protection, a lot of folks layer their security. For instance, pairing a physical lock with a trail camera with GPS tracking adds a powerful digital safety net, helping you find your gear if a determined thief somehow gets past the cable.
Deconstructing a Trail Camera Locking Cable
To really know you're picking the right security tool, you've got to understand how it's built. A good trail camera locking cable isn’t just a piece of wire; it’s a dedicated system with three core parts working in sync: the cable, the cinch mechanism, and the lock. Each piece plays a critical role in making a thief's job as difficult as possible.
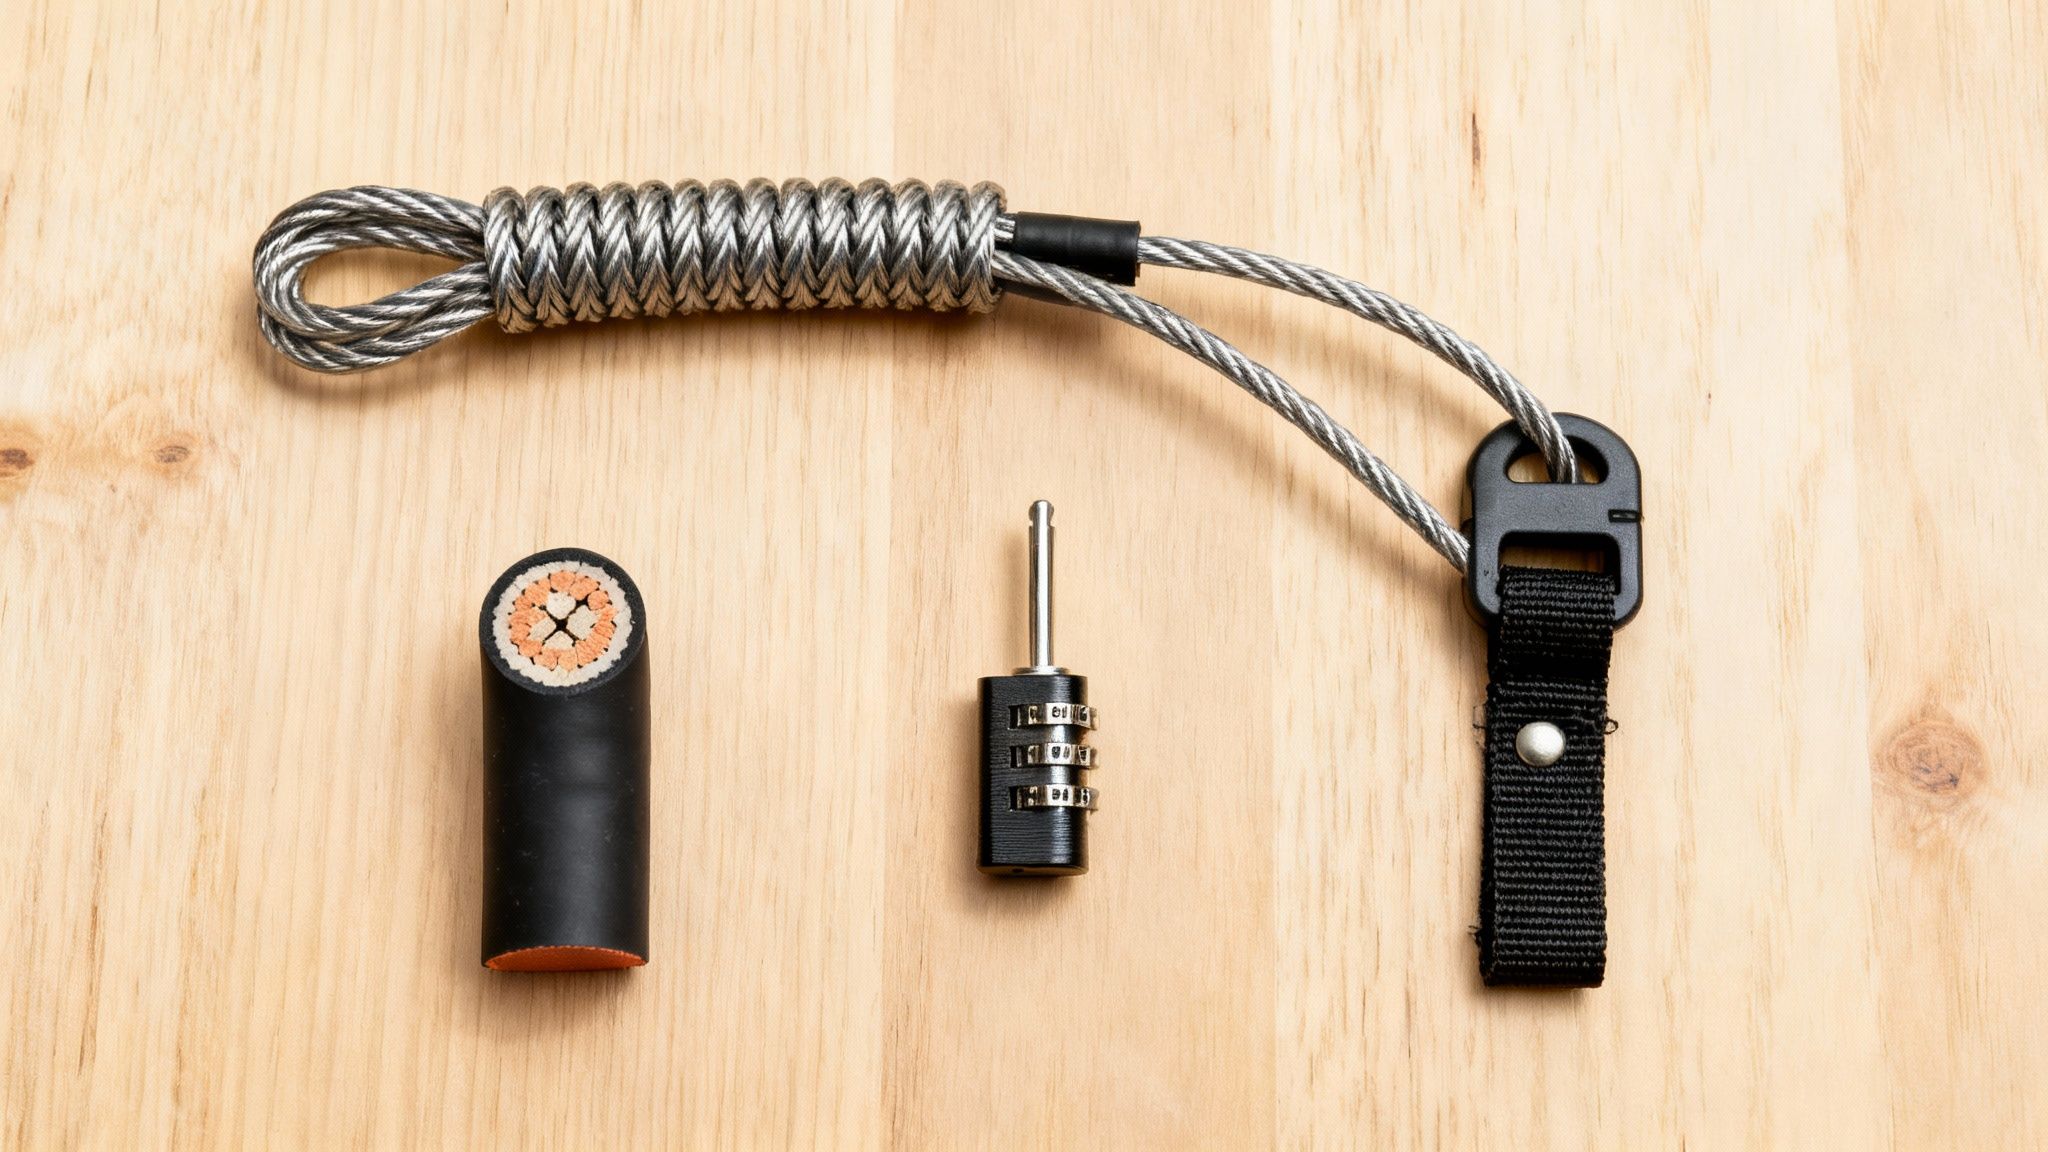
Think of the cable's core as a super-strong rope. But instead of fabric, it’s made of multiple strands of braided steel, which gives it incredible strength while staying flexible. This design makes it a real pain to snip with basic hand tools. A thief can't just make one clean cut—the braided steel just frays and fights back.
This tough steel core is then wrapped in a protective vinyl or rubber coating. This outer jacket is like a raincoat, shielding the steel from rust and corrosion after months of rain, snow, and humidity. It also keeps the cable from scratching up your camera or damaging the tree bark, protecting both your gear and the environment.
The Brains of the Operation: The Lock and Cinch
The lock itself is where the real security engineering is. Most quality cables use a pin tumbler lock, a classic and time-tested design that’s tough to pick. Inside, a series of small pins has to be perfectly aligned by the correct key before the cylinder will turn and release the cable. It’s a simple concept, but it works.
The cinch mechanism is the secret sauce that makes these cables so adaptable. It lets you pull the cable tight as a drum around the tree, leaving zero slack.
By cinching the cable snugly, you remove any wiggle room a thief might try to exploit with a pry bar. A tight fit is a secure fit, basically turning the tree itself into an anchor for your camera's defense.
You can see this design philosophy in action with products like the Master Lock Python Cable. This popular 6-foot cable has a tough 5/16” braided steel core and a weather-resistant vinyl coating, nailing that perfect balance of durability and flexibility. It’s a great example of how the market has embraced this all-in-one approach to security. For more on this, check out some of the latest market trends in trail camera accessories to see how these products have become essential.
To give you a clearer picture, here’s a breakdown of what to look for in a quality locking cable.
Key Features of a Trail Camera Locking Cable
This table summarizes the essential components and materials that make up a high-quality trail camera locking cable.
| Component | Material/Type | Function & Benefit |
|---|---|---|
| Cable Core | Braided Steel | Resists cutting tools and provides high tensile strength. |
| Protective Coating | Vinyl or Rubber | Prevents rust, corrosion, and protects surfaces from scratches. |
| Lock Type | Pin Tumbler or Combination | Offers pick-resistance and secure locking without easily being bypassed. |
| Cinch Mechanism | Adjustable Sliding Lock | Allows the cable to be pulled tight, eliminating slack and leverage points. |
Understanding these parts is the first step. When you know what makes a cable tough, you can spot the difference between genuine security and a cheap imitation.
Once you understand these three key components—the braided steel, the protective coating, and the locking mechanism—you're much better equipped to look at the different trail camera locking cables on the shelf and pick one that actually protects your investment.
How to Choose the Right Locking Cable
Now that you’ve got a handle on what makes a quality locking cable, you can start narrowing down the options. Picking the right one isn’t about grabbing the most expensive model off the shelf; it's about matching the cable’s features to where and how you’ll be using it. Think of it like buying boots—what works for a casual hike won't cut it on a rugged mountain expedition.
Getting the perfect trail camera locking cable really comes down to four key factors. If you think through each one, you’ll end up with a setup that’s perfectly suited for your neck of the woods. Rushing this decision is a recipe for frustration, leaving you with a cable that's too short, too weak, or just plain won't work with your gear.
Cable Diameter and Length
The first and most obvious choice is the cable's physical size. It’s simple: a thicker cable is always tougher to cut. Most standard cables are around 5/16 inches in diameter, which hits that sweet spot of strength and flexibility. But if you’re in a high-risk area or just want maximum peace of mind, stepping up to a 3/8-inch cable gives you a whole lot more cut resistance against tools like bolt cutters.
Length is all about where you plan to set up. A standard 6-foot cable is plenty long for wrapping around most trees and posts you'll encounter. But if you’re setting up in an area with massive, old-growth oaks or need to secure your camera to a weirdly shaped rock, a longer 8 or 10-foot cable might be a necessity. Trust me, it’s always better to have a little extra slack than to come up short.
Material and Weatherproof Coating
When it comes to what the cable is made of, there’s no substitute for braided steel. It's not just a single thick wire; its multi-strand construction is specifically designed to frustrate and bind up cutting tools. This should be a non-negotiable feature for any locking cable you're serious about.
Just as important is what’s on the outside. A thick vinyl or rubber coating does two critical jobs. First, it’s a weatherproof shield, protecting the steel inside from rust and corrosion after months of sitting out in the rain and humidity. Second, it keeps the cable from scratching your camera or digging into the tree bark, preserving both your expensive equipment and the woods you're in.
Lock Type and Keying System
The lock itself is the brains of the operation. You'll generally find two ways to manage your keys, and the right choice depends entirely on how many cameras you're running.
- Keyed Different: Each lock opens with its own unique key. This is a perfectly fine solution if you're only managing one or two cameras in the field.
- Keyed Alike: This is where multiple locks are designed to open with the exact same key. It's a massive time-saver for anyone running a dozen cameras on a hunting lease or a big property. No more fumbling with a heavy, jangling keychain.
The security level between keyed different and keyed alike systems is identical. The choice is purely about convenience in the field and how you prefer to manage your gear.
Camera and Security Box Compatibility
Finally, make sure the cable will actually work with your specific trail camera. Most cameras have built-in security loops made for these cables to pass right through. Before you buy, take a second to check your camera for them.
If your camera doesn’t have security loops—or you just want to add another layer of armor—pair the locking cable with a steel security box. This combination is the gold standard for keeping your camera safe. Just make sure the cable’s end is small enough to fit through the lock holes on the security box. A quick check of the specs online will save you a headache later.
Proper Installation for Maximum Security
A top-notch locking cable is a fantastic deterrent, but it's only as good as its installation. Think of it like this: a solid front door doesn't do much good if you install a flimsy, cheap lock on it. The same logic applies here. The best cable in the world won't protect your gear if you make a few critical mistakes setting it up.
Taking a few extra moments to get the installation right can be the difference between a thief giving up and you losing a camera.
The whole game is about eliminating opportunity. Thieves are lazy—they want easy targets. A loose, wobbly, or poorly placed cable is practically an invitation. Your job is to make stealing that camera so annoying and time-consuming that they just move on.
Step-by-Step Installation Process
Putting on a locking cable is pretty simple, but the details are what count. If you follow these steps, you'll create a serious barrier that protects your investment.
- Find a Solid Anchor: First thing's first, pick a healthy, living tree that’s wider than your camera. Stay away from skinny saplings or dead trees that someone could just push over or snap. Your anchor is the foundation of the whole setup.
- Thread the Cable the Right Way: Run the adjustable end of the cable through your camera's dedicated security loops. If you’re using a steel security box, thread it through the lock holes on the box instead. Never, ever run the cable through a plastic strap loop—those can be snapped off with very little effort.
- Cinch It Down Tight: Wrap the cable around the tree and feed it back through the lock body itself. Now, pull that cable as tight as you possibly can, leaving zero slack. A snug fit stops a thief from wedging tools like bolt cutters or a pry bar between the cable and the tree.
- Position and Lock It Up: Place the lock mechanism somewhere awkward to get to. Facing it downwards or tucking it into a deep groove in the bark works great. This makes it much harder to pick or drill. Once it's in a good spot, engage the lock and give the whole thing a hard yank to make sure it’s completely secure.
Before you even head out to the woods, thinking through these key decisions will make sure you have the right gear for the job.
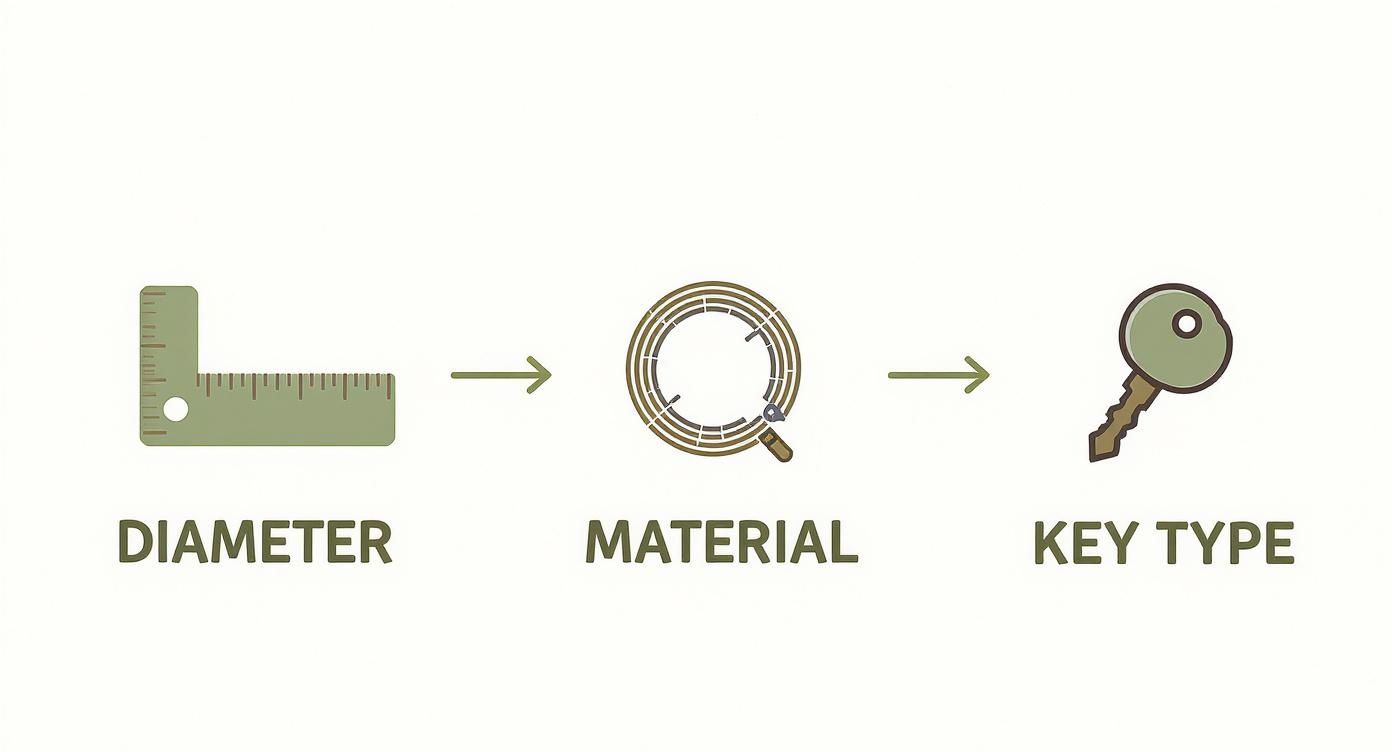
This graphic just drives the point home: picking the right diameter, material, and key type is your first step toward a bulletproof installation.
Pro Tips for a Rock-Solid Setup
Want to take it a step further? These are the field-tested tricks the pros use to keep their gear safe, especially in remote spots.
A common mistake is leaving the cable just 'tight enough.' You want it so snug that it feels like it’s part of the tree. There should be absolutely no wiggle room for a thief to get leverage.
Also, think about where you place the camera on the tree. Mounting it higher up—around 7-8 feet—instantly puts it out of the casual sightline and easy reach of most people walking by. If you can, combine that height with some natural cover like branches or thick leaves to make your camera almost disappear.
For more on the basics, our comprehensive article on how to set up a trail camera: a beginner's guide dives deep into placement strategies. When you master the installation, you guarantee that locking cable is giving you every ounce of security it was designed for.
Building a Layered Trail Camera Security System
A trail camera locking cable is an excellent starting point, but it should never be your only line of defense. The smartest way to secure your gear is with a layered system, where every component adds another headache for a potential thief. The goal is to make stealing your camera so frustrating and time-consuming that they just give up and move on.

Think of it like securing a medieval castle. Your locking cable is the strong outer wall. But you still want a moat, a drawbridge, and watchtowers. Each additional layer slows down an attacker and dramatically increases the odds they’ll either get caught or decide it’s not worth the trouble.
This multi-faceted approach isn't just a good idea—it's becoming a necessity. The global market for cable locks, including those for trail cams, is expected to climb to $1.8 billion by 2032. That growth is a direct response to a real problem: over 60% of camera owners in the U.S. have had their gear stolen at some point. One layer just doesn't cut it anymore.
Fortifying with Physical Barriers
The most common partner for a locking cable is a steel security box. These heavy-duty cases wrap your camera in a metal shell, protecting it from both brute force and the elements. A determined thief with the right tools might eventually get through a cable, but cracking open a steel box is a whole different ballgame.
It all comes down to the core principles of effective asset security—creating redundant obstacles.
- Steel Security Boxes: This is your armor. It protects the camera from being smashed, pried open, or vandalized.
- Camouflage: Sometimes the best defense is not being seen at all. Using camo tape or custom skins helps your camera melt into the background, making it much harder for a thief to even spot.
- Concealment: Take advantage of the natural environment. Placing your camera behind a screen of branches, inside a cluster of small trees, or tucked into a hollow can make it practically invisible to the casual observer.
Adding Digital Layers of Protection
This is where modern cameras really shine. What used to be high-end features are now becoming standard, giving you powerful recovery tools that work even after a thief gets past your physical locks.
A layered strategy combines physical deterrence with digital tracking. If a thief manages to get past the locks and bolts, the digital features give you a fighting chance to track and recover your investment.
Magic Eagle cameras, for instance, come with a whole suite of these digital safeguards built right in. You can learn more about how they work in our deep dive on Magic Eagle's Smart Anti-Theft System, but these features are designed to work hand-in-glove with your physical security.
Here are the key digital tools you get:
- GPS Tracking: This lets you pinpoint your camera's exact location on a map, even if it’s been stolen and moved miles away.
- Instant Cloud Uploads: The camera immediately sends photos and videos to the cloud. Even if the thief takes the camera and the SD card, you already have the evidence.
- Geofence Alerts: You can set a virtual perimeter. The second your camera moves outside that area, you get an instant notification on your phone.
To illustrate how these layers work together, let's compare them side-by-side.
Trail Camera Security Methods Compared
| Security Method | Primary Purpose | Effectiveness Against Theft | Effectiveness Against Vandalism |
|---|---|---|---|
| Locking Cable | Physically anchors the camera to a tree | Good | Fair |
| Steel Security Box | Protects the camera body from direct force | Excellent | Excellent |
| Camouflage/Concealment | Hides the camera from being spotted in the first place | Good | Good |
| GPS Tracking | Allows for recovery after the camera is stolen | Excellent | N/A |
| Instant Cloud Upload | Secures image evidence even if the camera is gone | Good | N/A |
As you can see, no single method is foolproof against every threat. A cable is great against a snatch-and-grab thief, but a steel box is what you need to stop a vandal with a rock.
By combining a sturdy trail camera locking cable with a steel box, smart placement, and digital tracking, you create a formidable system. You're not just locking up your gear; you're protecting it from every conceivable angle.
Got Questions About Locking Cables? We've Got Answers.
Even after you've picked out the perfect locking cable and figured out how to install it, a few questions might still be nagging you. Let's be honest, getting the real story on these common concerns is the last step before you can truly trust your security setup. We'll tackle some of the most frequent "what ifs" that pop up for everyone from first-timers to seasoned pros.
Think of this as your field guide for troubleshooting. We’re diving into the practical scenarios you’re actually going to face out there.
Can Thieves Actually Cut Through a Locking Cable?
This is the big one, and the straight answer is: yes. With enough time, the right tools, and a lot of determination, any lock or cable can be beaten. But here’s the thing: a trail camera locking cable isn't meant to be an indestructible vault. Its real job is to be a massive pain in the neck for a thief.
A quality braided steel cable is specifically designed to laugh off common tools like wire cutters or flimsy pliers. Trying to snip through all those tough steel strands is slow, noisy, and frustrating. Most thieves are opportunists looking for a quick grab-and-go. When they see a properly secured cable, your camera instantly becomes a high-effort, low-reward target. They'll almost always just move on to something easier.
The true power of a locking cable is how much time and effort it adds to the theft equation. Make your camera a hassle to steal, and you drastically slash the odds of it ever getting stolen.
For those of you in high-risk areas—or if you just want to sleep better at night—the solution is simple: go thicker. Bumping up from a standard 5/16” cable to a heavy-duty 3/8” model makes it significantly harder for even bolt cutters to get a bite.
Will a Locking Cable Even Fit My Camera?
More than likely, yes. The vast majority of locking cables are made to be universal. They have a slim, non-locking end designed to thread neatly through the small security loops built into most modern trail cameras from brands like Browning, Moultrie, and Bushnell.
Before you buy, just take a second to look over your camera's case for these little loops. You'll usually find them on the back or side.
If your camera happens to be one of the few without them, don't sweat it. Your best bet is to pair the cable with a compatible steel security box. These boxes not only add another tough layer of protection but also have standardized holes designed specifically for locking cables to pass right through.
What Kind of Maintenance Do These Cables Need?
Locking cables are built to live outdoors, but a tiny bit of upkeep will keep them working perfectly season after season. The good news is, it only takes a few minutes.
- Lube the Lock: After a long, wet winter or a humid summer, spray a little graphite lubricant into the keyhole. This keeps the internal pins from getting sticky or seizing up from moisture.
- Check the Coat: Give the vinyl coating a quick wipe-down and look for any deep gashes or cracks. If the steel core inside gets exposed to rain and humidity, it can start to rust and weaken the cable.
- Keep It Clean: Before you pack a cable away for the off-season, just wipe it down to get any mud or gunk out of the locking mechanism.
That's it. These simple steps ensure your lock turns smoothly every single time.
Keyed Alike vs. Keyed Different: Which One Is Better?
This one is purely about convenience. Both "keyed alike" and "keyed different" systems provide the exact same level of security. Your choice just depends on how you run your cameras.
- Keyed Different: Every lock has its own unique key. This works perfectly fine if you're only managing one or two cameras. No big deal.
- Keyed Alike: A whole set of locks can be opened with the same, single key. If you're running a dozen cameras across a big property or a hunting lease, this is an absolute game-changer. No more fumbling with a giant, clanking keychain in the dark.
Think about how many cameras you need to secure, and the answer will be obvious.
At Magic Eagle, we build our cameras with security baked in, from their tough-as-nails construction to advanced digital protections. When you pair your camera with a high-quality locking cable, you create a complete security system that protects your investment from every angle. Check out our lineup of smart cellular trail cameras and build your ultimate scouting setup today.