
A dedicated trail camera stand is one of those pieces of gear that, once you use it, you'll wonder how you ever scouted without it. It gives you a stable, adjustable platform for your camera exactly where you need it, especially when there isn't a perfect tree in sight. This means you get total control over the placement, angle, and height—no more crooked horizons or blurry shots.
More importantly, it opens up a world of new monitoring locations, from wide-open fields to the subtle edges of a food plot.
Why a Trail Camera Stand Is a Scouting Game Changer
Let's be honest: relying only on trees is a recipe for frustration. We've all been there. You find the perfect scrape line or a hot trail, but the only nearby tree is either too big, too small, or facing the completely wrong direction. A good trail camera stand throws that entire limitation out the window. Suddenly, any patch of ground becomes a viable camera spot.
This kind of freedom is a massive advantage for scouting areas where trees are few and far between, like:
- Vast food plots where deer might enter from any direction.
- Wide-open agricultural fields or prairie landscapes.
- Remote creek crossings and hidden water sources.
- Long fence lines that naturally funnel animal movement.
Achieving Perfect Placement Every Time
A quality stand does more than just hold your camera up; it offers a level of precision that a simple tree strap can't hope to match. You can dial in the exact height you need, whether you’re capturing a wide view of a field or a tight shot on a specific trail. The ability to tilt and pan ensures your camera is perfectly level and aimed, which means no more cut-off antlers or missed opportunities at the edge of the frame.
This control leads directly to better, more consistent scouting intel. A stable platform also dramatically cuts down on motion blur from wind shaking a small sapling, giving you crisper images. That clarity is especially important for getting reliable AI species detection with advanced cameras like the Magic Eagle EagleCam 5.
The Shift to Multi-Camera Setups
As scouting strategies have gotten more sophisticated, so has the need for versatile mounting gear. It’s not just about one camera anymore. A recent industry report on marketgrowthreports.com backs this up, showing that as hunters deploy multi-camera setups, the demand for adjustable stands has shot up.
Think about it: an estimated 62% of North American hunters now use trail cameras, and more than a third of them are running three or more units on a single property. To get consistent, high-quality results across all those cameras, freestanding stands have become essential.
Picking the Right Trail Camera Stand for Any Spot
Choosing a trail camera stand isn't a one-size-fits-all deal. The right stand for a huge food plot is completely wrong for a tight funnel in the timber. Nailing this choice from the get-go saves a ton of headaches in the field and helps you gather the best intel possible.
First thing to consider is what it’s made of. Most stands are either steel or aluminum, and both have their place. Steel is bombproof and super stable, which is perfect for those long-term sets you don't plan on touching for months. The only real downside is its weight—if you have a long haul to your spot, you’ll feel it.
On the other hand, aluminum is the lightweight champ, making it a breeze to carry deep into the backcountry. Modern aluminum stands are plenty tough for holding a trail camera steady, even though they aren't quite as rigid as steel. You’ll usually pay a bit more for that portability, but it’s often worth it.
Matching the Stand to the Terrain
Beyond the material, the actual design of the stand determines where it’s going to work best. Each style is built for a specific job, and knowing the difference is what separates a good setup from a great one.
-
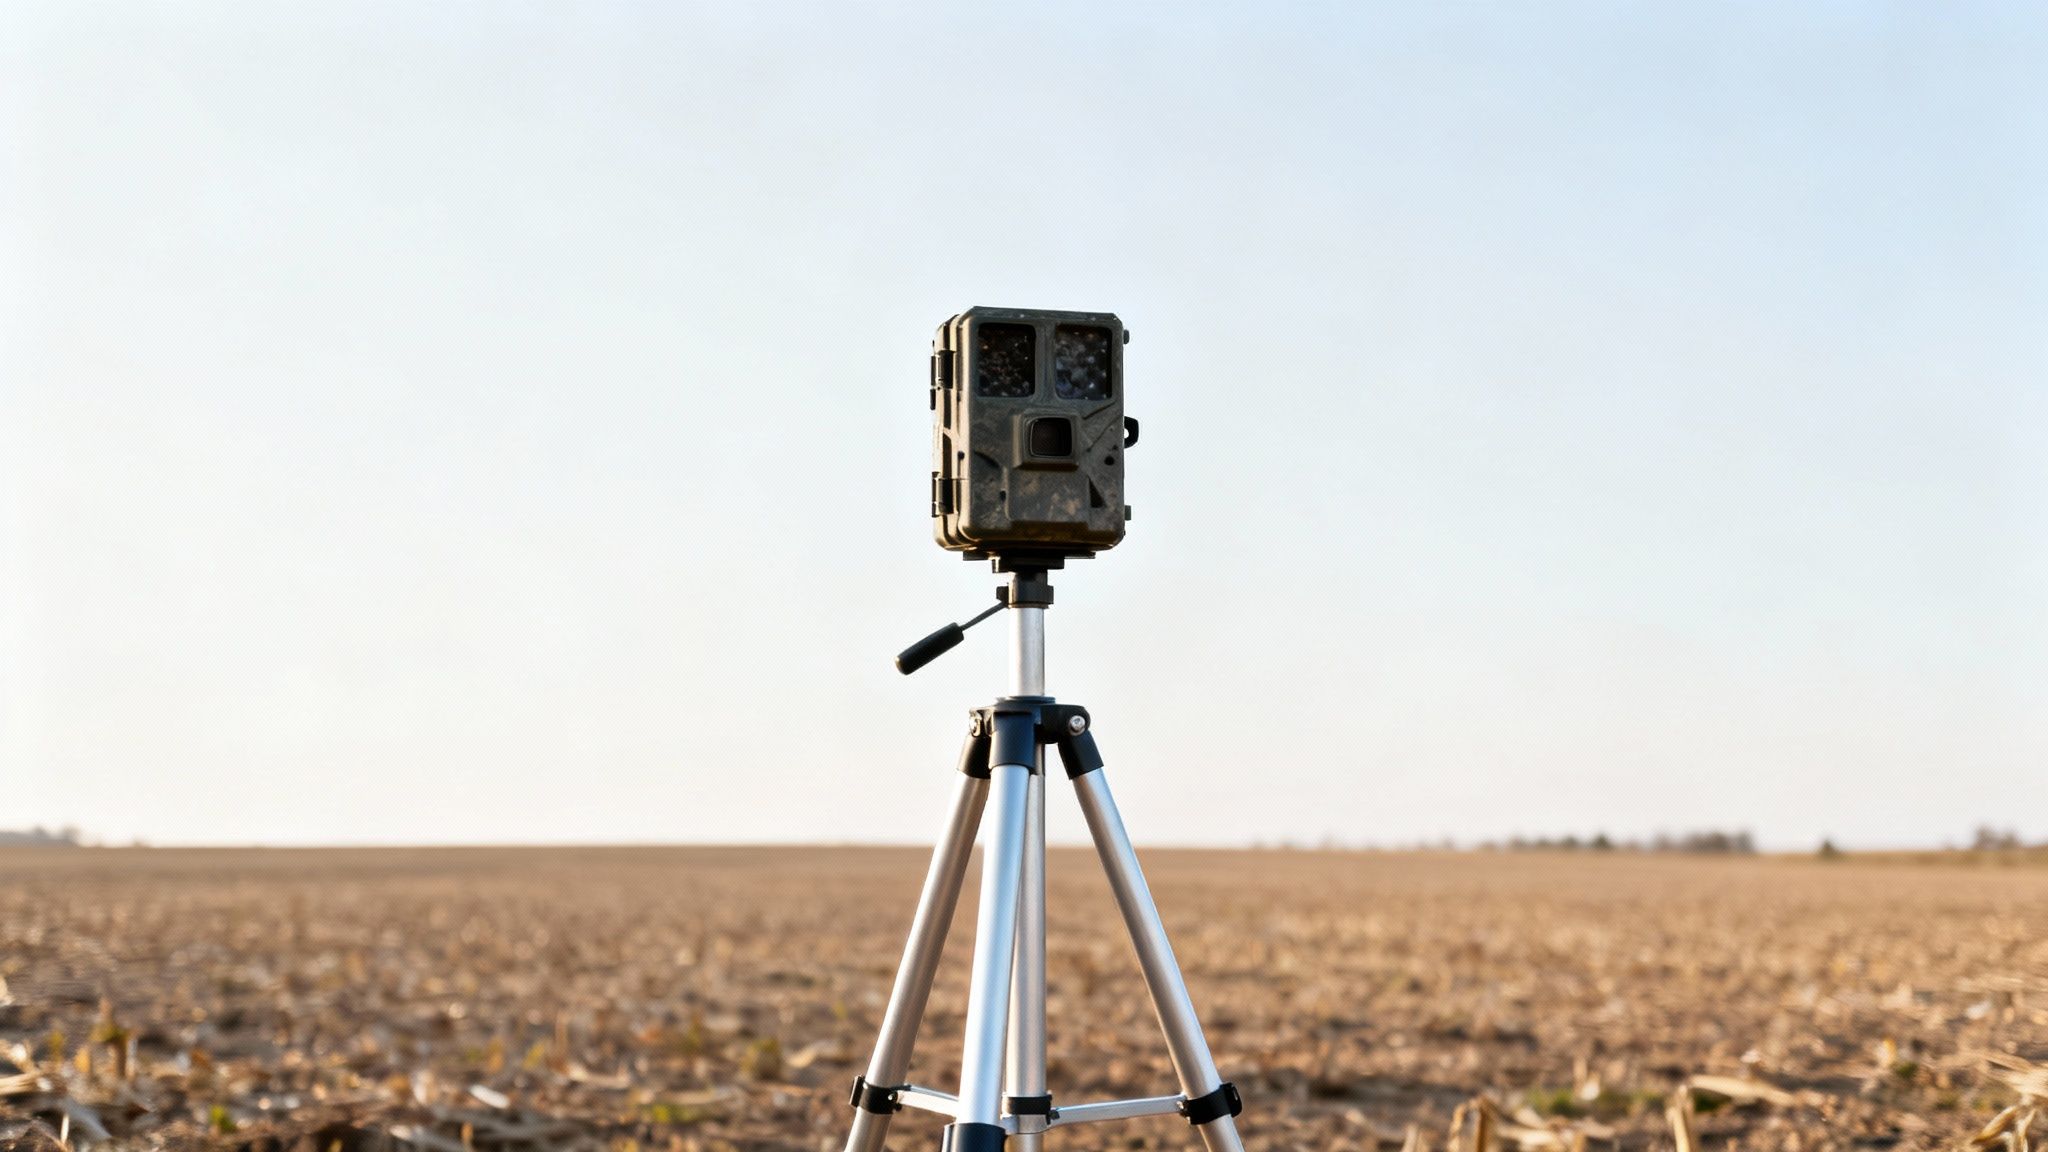
Tripod Stands: These are your go-to for wide-open country. Picture a big bean field where deer could pop out anywhere. A tripod gives you a freestanding, stable base you can stick in the middle of nowhere, letting you dial in the perfect height and angle for a wide view.
-
T-Post Mounts: Nothing beats a T-post mount for property lines, cattle pastures, or long fencelines. These rugged mounts clamp right onto a standard metal T-post, giving you a rock-solid anchor that’s already part of the landscape. They’re a favorite for ranchers and anyone keeping an eye on gates or fence crossings.
-
Ground Stakes: The simplest of the bunch, a ground stake is ideal for low-profile sets on a deer trail in thick brush or at the edge of a waterhole. Just stomp it into the ground, thread on your camera, and you're set. They're incredibly quick to deploy and easy to pack.
Here's a common mistake I see: people forget about adjustability. A stand that just holds a camera isn’t enough. You absolutely need one that lets you fine-tune the pan, tilt, and height. It's a non-negotiable for framing a mock scrape or a narrow trail perfectly.
Don't Overlook These Key Features
No matter which style you lean toward, a few features make a massive difference out in the woods. Always look for a stand with a universal 1/4"-20 threaded mount. This is the industry standard and fits nearly every trail camera out there, including all Magic Eagle models. It guarantees your stand will work with the camera you have now and any you buy down the road.
Another game-changer is a quality ball head. This is the little joint that lets you tilt and swivel the camera to get the angle just right. A good ball head with a big, easy-to-use locking knob will stop your camera from drooping over time, so that perfect shot you framed stays exactly where you aimed it. When your whole goal is getting clear, consistent images, it’s these little details in your stand that truly count.
Mastering Placement for Consistent High-Quality Images
Having the right trail camera stand is a great first step, but its real value comes from smart deployment in the field. Where and how you position your setup directly impacts the quality and consistency of the intel you gather. It’s about moving past just finding a decent-looking clearing and hoping for the best.
Strategic placement is really a mix of art and science. It’s about understanding animal behavior, predicting their movement patterns, and using the landscape to your advantage. A well-placed camera can turn a good spot into a goldmine of information, while a poor setup will just leave you with empty SD cards and a lot of frustration.
Dialing In the Perfect Height and Angle
The single biggest advantage of using a trail camera stand is the ability to control height and angle with absolute precision. Forget the generic advice you've heard—the perfect height is all about your target species and what you're trying to learn.
- For Whitetail Deer: I've found that a height of 3 to 4 feet is the sweet spot. This puts the lens right at chest level on a mature deer, which gives you fantastic photos for judging body size and antler development. It’s a natural perspective that also plays nice with AI species recognition software.
- For Turkeys or Predators: When you're after smaller game like coyotes or gobblers, you'll want to drop the camera lower, somewhere around 2 to 3 feet. This gets you right on their level for much more detailed and compelling shots.
- For Herd Monitoring: If you’re watching a big food plot for elk or just trying to get a count on does and fawns, elevating the camera to 5 or 6 feet can give you a broader, slightly downward-angled view. This helps you capture multiple animals in a single frame.
A common mistake I see is people aiming their camera perfectly level. A slight downward angle is almost always better. It cuts down on sky exposure, which means fewer false triggers from blowing branches in the background, and it focuses the detection zone right on the ground where the animals are walking.
This visual guide breaks down a simple process for thinking through your stand selection based on where you're hunting and what your goals are.
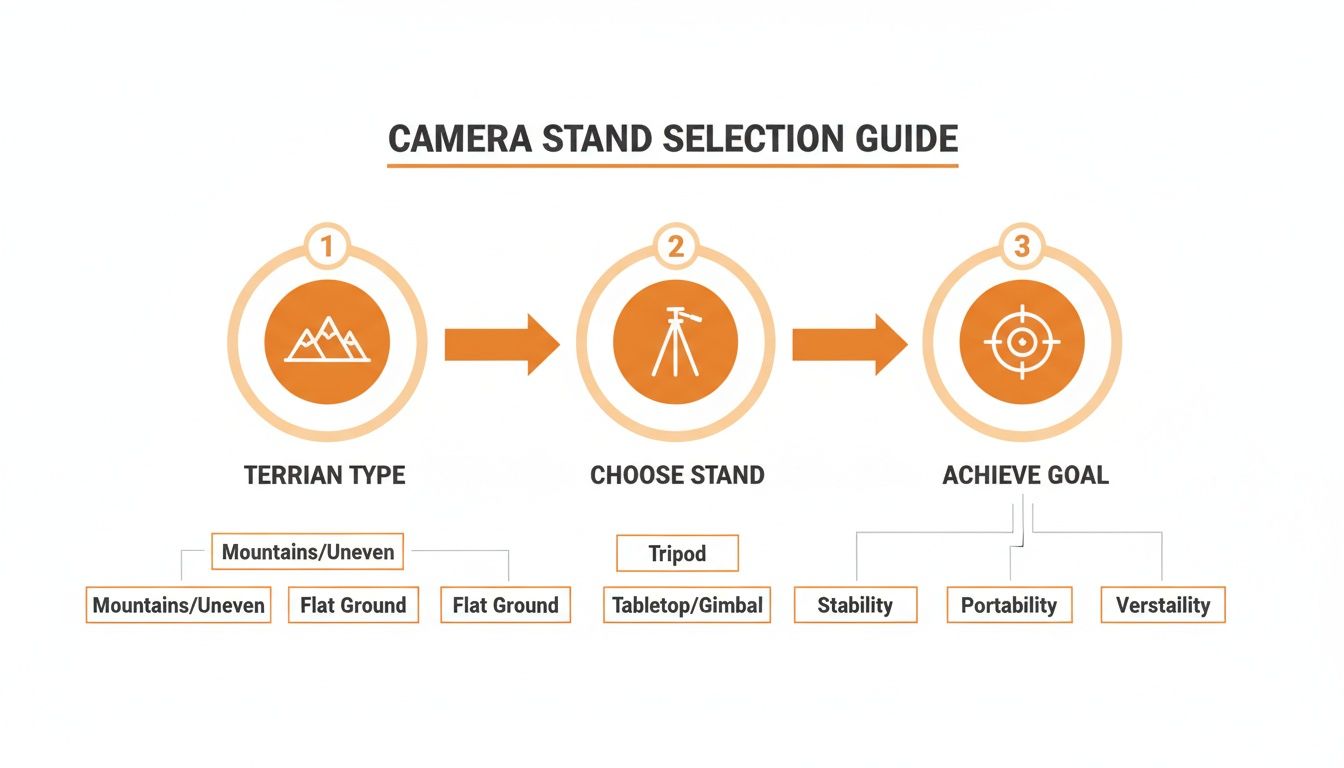
As the infographic shows, matching your stand to the terrain and your specific goal is the foundation of a successful camera set. It’s not just a small detail; it’s everything.
For serious scouting and wildlife management, this level of precision isn't just a nice-to-have—it's a requirement. Biologists running standardized surveys often mandate camera lens heights within a very narrow band, like 80–120 cm for deer. That's way easier to hit consistently with a calibrated trail camera stand than by trying to find the perfect branch on an uneven tree.
Using the Sun and Shadows to Your Advantage
One of the most overlooked parts of camera placement is the sun. Facing your camera directly east or west is just asking for trouble. The rising and setting sun will blast your lens, leaving you with completely washed-out, useless images.
Always try to position your stand so the camera faces north or south. A north-facing camera is usually ideal, since it will never get direct sunlight. A south-facing setup works well too, but just be mindful of how low the sun sits in the sky during the winter months. If you're new to this, our guide on how to set up a trail camera covers more of these foundational tips.
Concealment is just as important. A camera sitting on a stand out in the middle of an open field sticks out like a sore thumb. Use natural cover like tall grass, brush, or the shadow of a big tree to break up its outline. The goal is to make it disappear into the background, hiding it from both wary game and any two-legged thieves that might be passing through.
Optimizing Your Cellular Camera Signal and Battery Life
A cellular trail camera is only as good as its connection. Without a reliable signal, your expensive scouting tool is nothing more than a high-tech paperweight sitting in the woods. This is where a trail camera stand proves its worth, transforming from a simple mount into a critical piece of your communication setup.
Unlike strapping your camera to a fixed tree, a stand gives you the freedom to hunt for a signal. I've seen it firsthand—moving just a few feet in one direction can be the difference between one bar and three. That small adjustment ensures your images actually make it to your phone. Don't be afraid to make those micro-adjustments to find that sweet spot.
Finding and Boosting Your Signal
Before you ever walk away from your setup, the first thing you should do is check the signal strength on your camera or app. If it's weak, your initial move should always be to get higher. Terrain features like hills, deep ravines, and even thick, wet foliage can absolutely kill a cellular signal.
- Go Higher: Extend your tripod or stake-style stand to its maximum height. Getting the antenna just a few feet higher can often lift it above the worst ground-level obstructions.
- Move Around: If a little extra height doesn't do the trick, start walking a 10-20 foot circle around your target location. You'd be surprised how often you can find a small pocket with a much stronger connection just a few steps away.
- Check Antenna Orientation: Make sure your camera's antenna is pointing straight up and isn't blocked by branches or the stand itself. A vertical orientation is crucial for the best reception.
The shift to wireless and cellular cameras is completely changing how stands are designed. We're no longer just positioning for a good view of a game trail; we have to position for cell signal too. This has led to taller, more modular stands that can raise a camera by 0.5–1.0 meters compared to old-school mounts. Many pros I know now rely exclusively on tripod or stake‑style stands because they allow for the fine‑tuning of camera orientation, antenna clearance, and solar panel angle—all critical for high‑end systems like Magic Eagle’s EagleCam 5. For more on this trend, check out the latest trail camera market reports on techsciresearch.com.
Maximizing Solar Power and Battery Performance
Many of today's best cellular cameras, including the EagleCam 5, come with integrated solar panels designed to keep them running indefinitely. But that solar panel is completely useless if it's sitting in the shade all day. This is another area where a stand just blows a tree mount out of the water.
With a stand, you can orient your camera to give the solar panel maximum, unobstructed southern exposure. Think of it like setting up a satellite dish—you need a clear view of the sun's path across the sky. Even the small shadows from a few leaves can dramatically cut down your charging efficiency over a full day.
Pro Tip: Before you leave, use a compass app on your phone to find true south. Position your stand so the solar panel faces that direction, then tilt it at an angle to catch the most direct sun for the current season. A steeper angle works better in the winter when the sun is lower in the sky.
Understanding the tech behind your camera can also save you a lot of headaches in the field. To get a better handle on the mechanics, take a look at our guide on how cellular trail cameras work. By combining smart placement with a solid understanding of your gear, you can keep your camera powered up and connected all season long.
Keep Your Gear Safe: Security and Maintenance Tips
Getting a solid trail camera stand and a top-tier cellular camera is a great start, but it's just that—a start. If you want your gear to last more than one season, you need a plan to protect it from thieves and the elements. A little bit of security mixed with some routine maintenance will keep your camera sending you intel year-round.
The first step in physical security is making your camera a pain to steal. Good concealment is your best friend, but even the most hidden spot can be discovered. That's when you need to make your setup too much trouble for a thief to bother with.
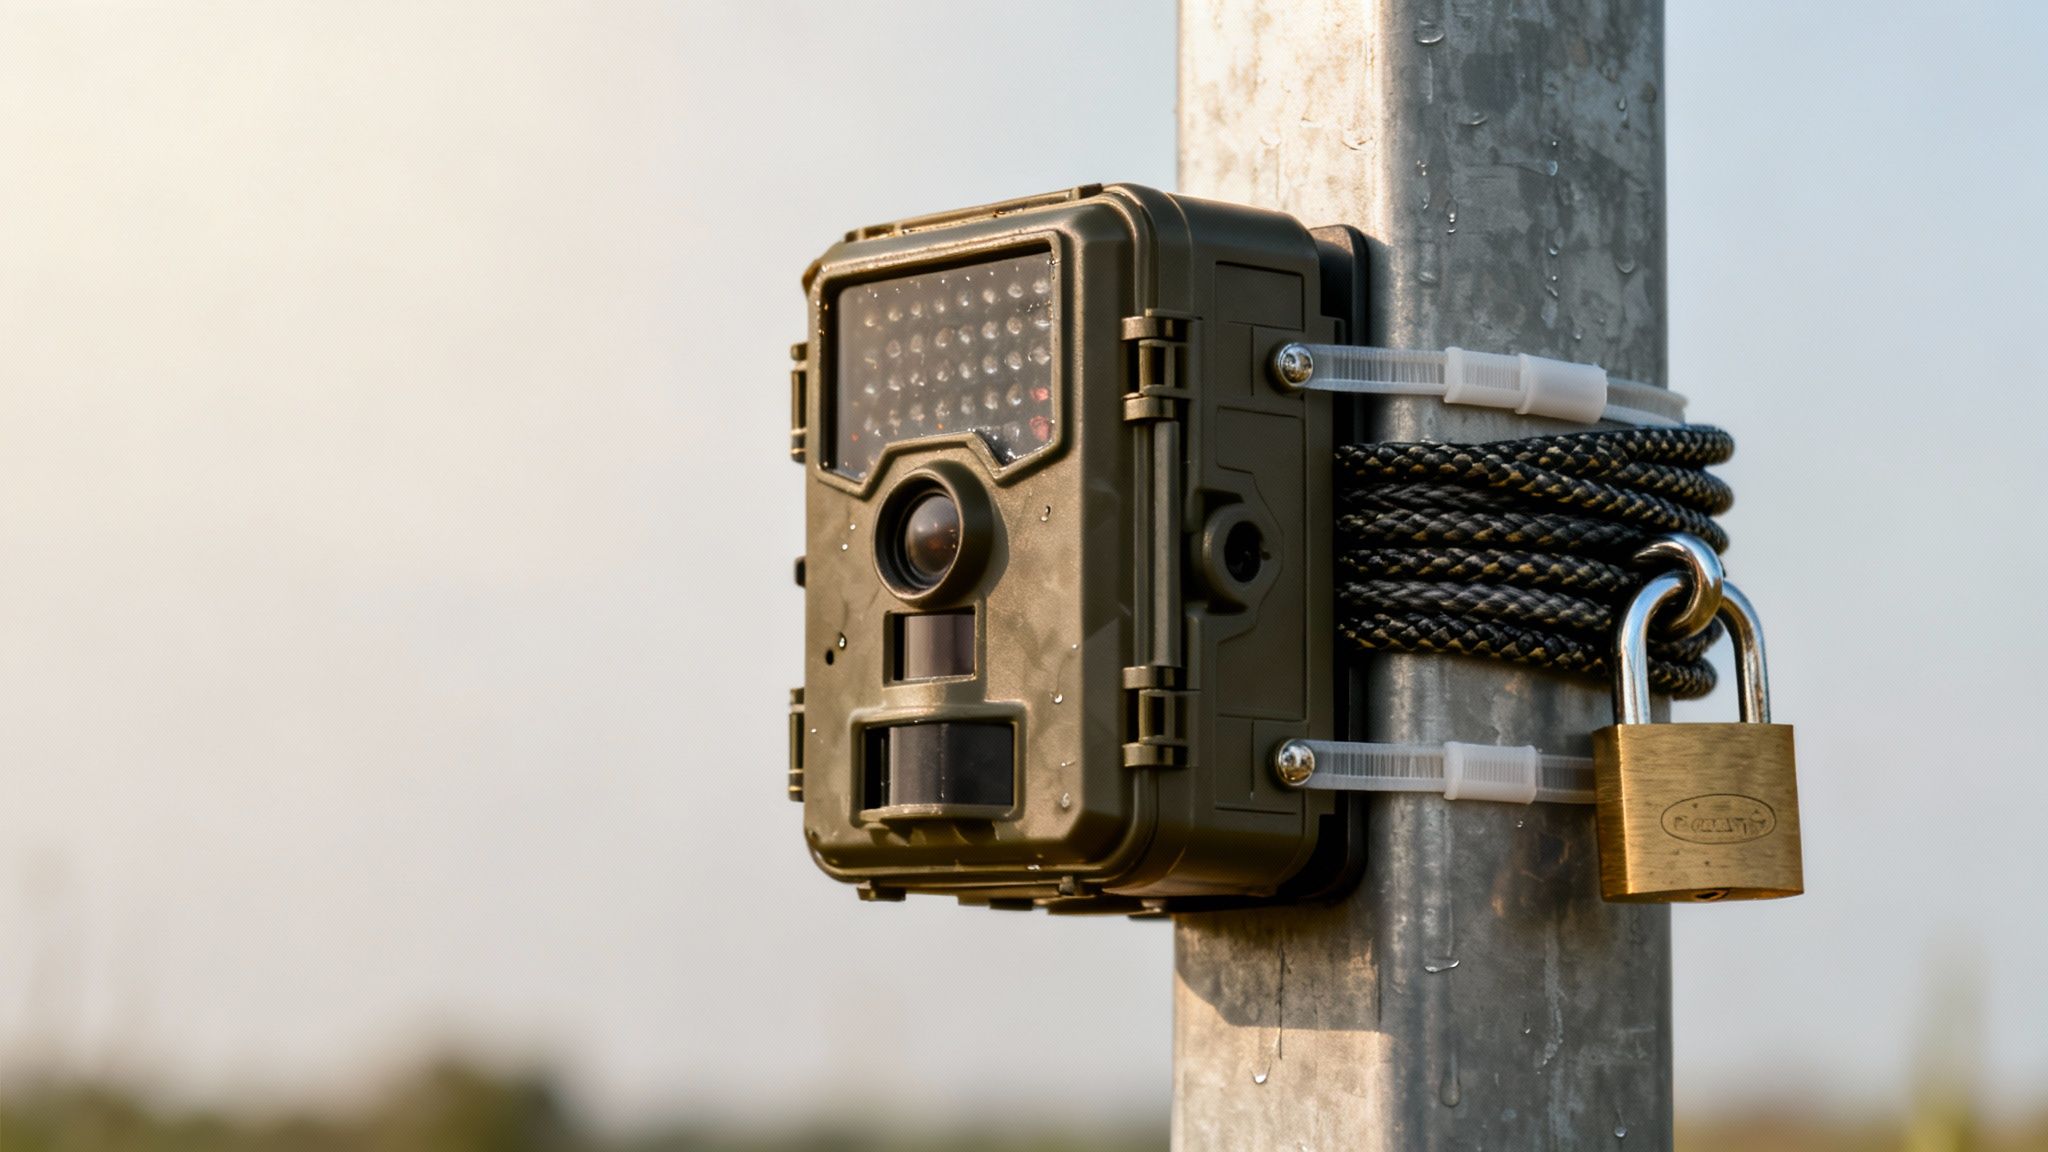
Think of a heavy-duty security lockbox as body armor for your camera. It'll protect it from two-legged thieves and four-legged vandals like curious bears. Lock that box to your trail camera stand with a quality python cable, and you've created a seriously tough target.
Using Tech as Your Ultimate Failsafe
With a modern cellular camera like the Magic Eagle EagleCam 5, your best security tools are already built-in. Locks can be cut and boxes can be broken, but it's a lot harder to outsmart GPS.
Before you walk away from your setup, always turn on the camera’s GPS and geofence features in the app. It's like a digital leash for your gear.
- GPS Tracking: This pins your camera's location on a map right inside the MAGIC EAGLE app. If it ever walks off, you'll know exactly where it went.
- Geofence Alerts: You can draw a virtual circle around your camera's location. The second it moves outside that zone, you get an instant alert on your phone.
This immediate notification is your best shot at getting stolen gear back. A thief might not even make it back to their truck before you know the camera is on the move and have its last coordinates.
Your Quick Seasonal Maintenance Checklist
Your trail camera and stand are just like any other piece of outdoor gear—they need a little TLC to keep working properly. A quick check-up now and then can prevent a major failure when that monster buck finally shows up.
Each time you visit your camera, run through this simple checklist.
- Look for Rust and Damage: Give your stand a once-over. Check the welds, knobs, and any moving parts for rust or wear. A little shot of rust-inhibiting spray paint can make a huge difference in its lifespan.
- Trim Back Overgrowth: Cut away any new branches, weeds, or tall grass that might sway in front of the camera's sensor. This small step saves you from countless false triggers, which drains your battery and spams your phone with useless pictures of a leaf.
- Check Your Connections: Give everything a good shake. Make sure the camera is still screwed on tight to the mount. Cinch down your python cables and double-check that your locks are clicked shut. For more on locking it down, our guide on choosing the right game camera lock cable has some great pointers.
- Wipe Down the Lens and Sensors: Use a clean microfiber cloth to gently wipe off any dust, pollen, or water spots from the camera lens and the PIR motion sensor. A clean lens is the difference between a blurry photo and a crystal-clear shot of your target animal.
Common Questions About Trail Camera Stands
Even with the best gear, questions always pop up out in the field. When it comes to setting up a trail camera stand, a few concerns come up again and again. Getting these details right can be the difference between a great season and a frustrating one, so let’s get into the most common questions hunters ask.
Clearing up these practical issues helps you sidestep the usual mistakes and get the most out of every camera you put out. It's all about turning potential problems into non-issues before you even leave the woods.
What Is the Best Height to Set My Trail Camera on a Stand?
There’s no magic number here—the right height for your trail camera stand depends entirely on what you're after and the lay of the land. But there are definitely some solid starting points for different situations.
- Whitetail Deer: A height of 3 to 4 feet is a fantastic baseline. This puts the lens right at chest level on most deer, giving you a clear shot for judging body size and antler growth. It’s also a natural perspective that works really well with AI detection.
- Turkeys and Predators: For smaller game like coyotes, foxes, or turkeys, you'll want to bring it down a notch. Aim for 2 to 3 feet off the ground to get on their level for more detailed and impressive photos.
- Large Game and Herd Views: If you’re watching a big food plot or looking for elk or bear, you can go higher. Bumping the camera up to 5 or 6 feet gives you a wider, slightly downward angle that helps capture multiple animals in a single frame.
Here's a pro tip: Use your camera's live-view feature if it has one, like the one in the MAGIC EAGLE app. A quick live stream confirms your field of view is perfect before you walk away. It'll save you a return trip every time.
How Can I Secure My Trail Camera Stand From Being Stolen?
Securing your gear is all about a layered approach, mixing old-school physical locks with modern tech. First, make your setup a pain to mess with. Use a heavy-duty cable lock, like a Python lock, to secure the camera inside its security box, then lock that box directly to the stand.
If you’re using a tripod or stake stand, you can drive a long piece of rebar through a leg or the baseplate deep into the ground to anchor it. For a T-post mount, make sure that post is driven at least two feet down for real stability.
But the most important step? Always activate your camera's GPS tracking and set up a geofence. You'll get an instant alert if the unit moves, giving you the best shot at getting it back.
Will a Metal Stand Interfere With My Cellular Signal?
Nope, the metal stand itself generally won't mess with your camera's cellular signal. The antenna is designed to broadcast away from the camera body and the mount. The real issue is the position of the stand.
If you place your stand behind a big metal barn or down in a deep ravine, you're definitely going to block the signal. The best thing about using a stand is its mobility. You can easily move it a few feet or raise it up to find a stronger connection. For the best performance, always make sure the antenna has the clearest possible line of sight to the sky.
Ready to gain total control over your scouting? The right gear makes all the difference. Explore the full range of cameras and accessories from Magic Eagle and see how a smart cellular setup can change your season. Visit Magic Eagle to learn more.