
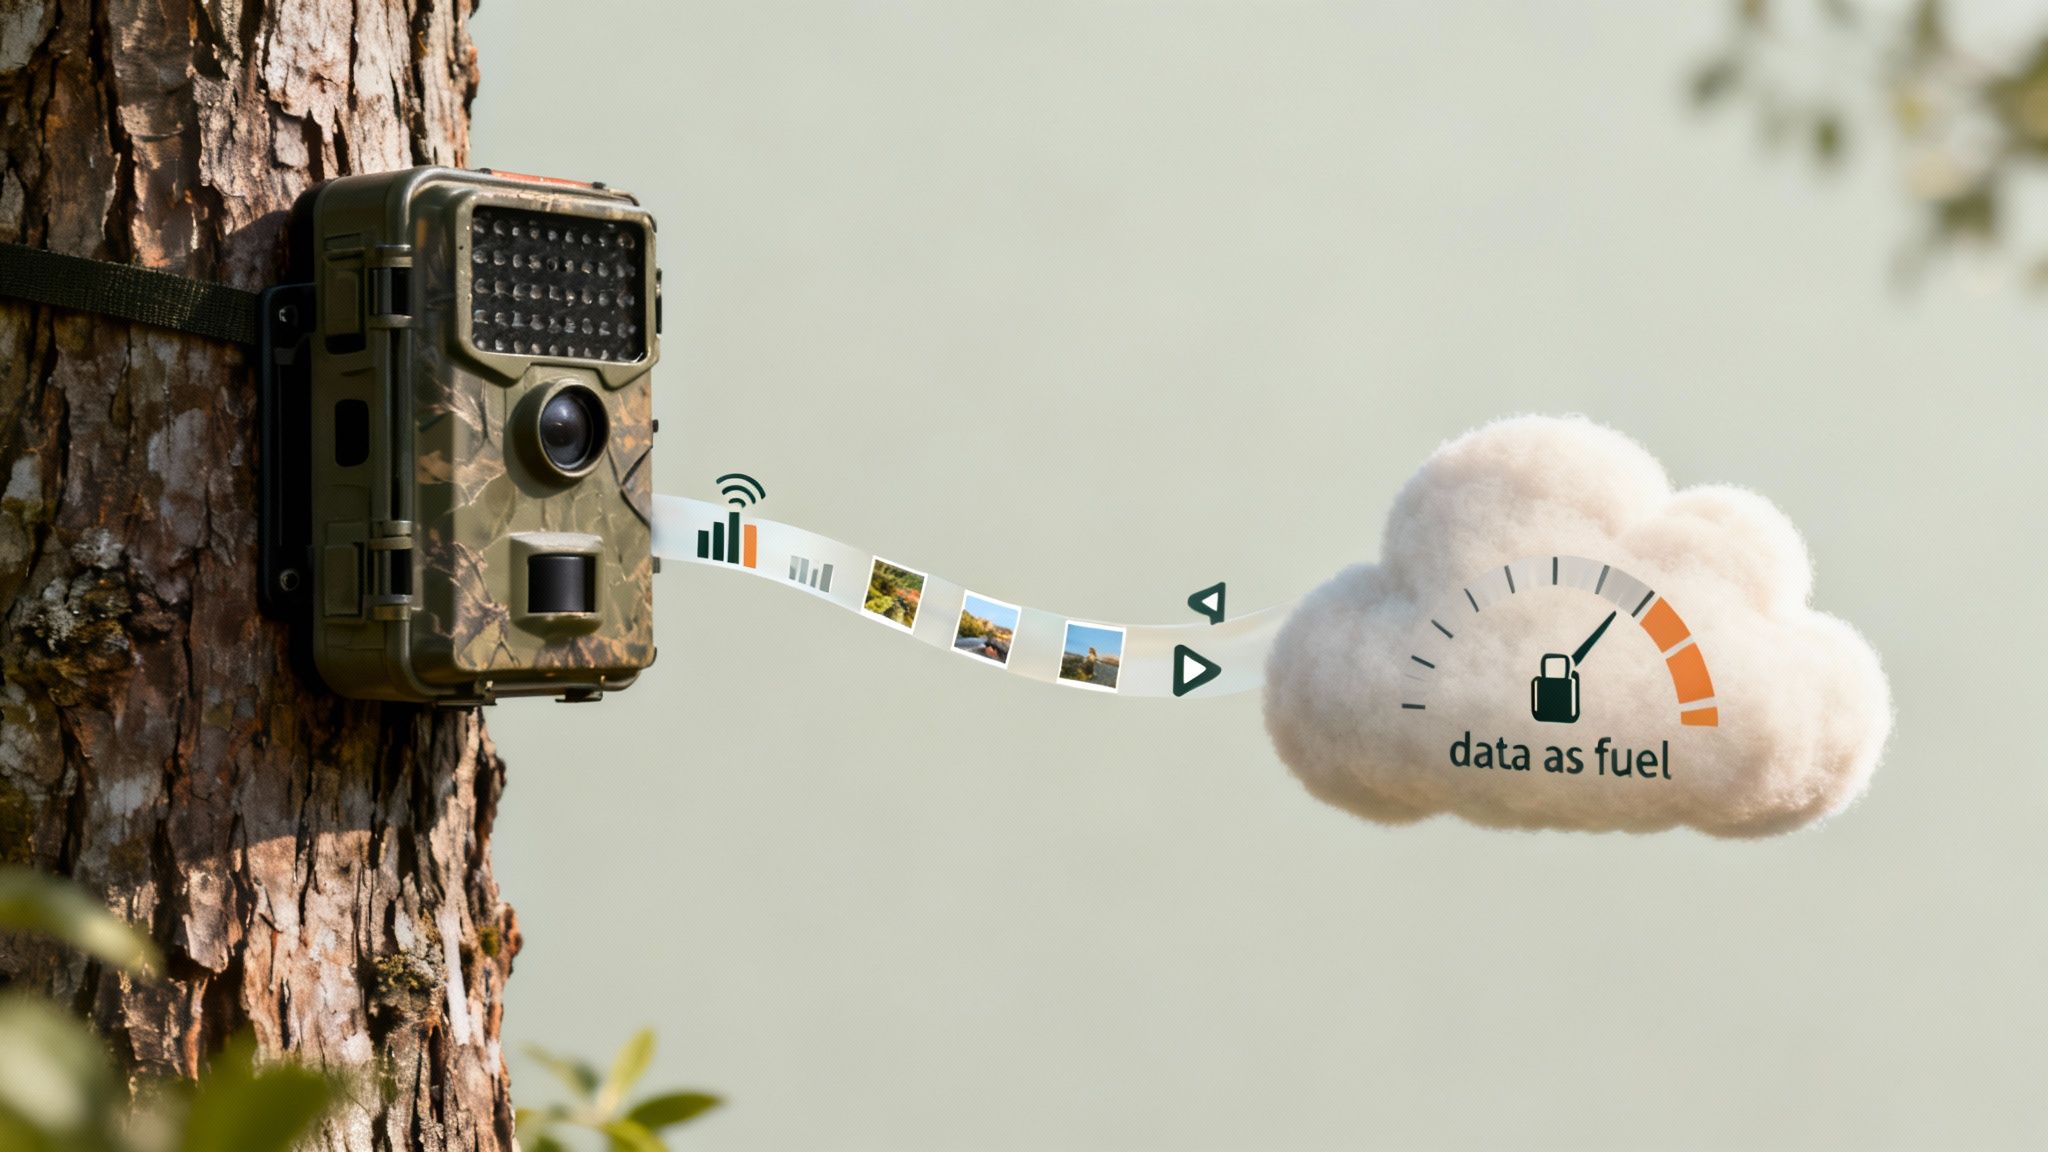
Picking the right Verizon plan for your trail camera is probably the most important decision you'll make to ensure it works when you need it most. Think of data as the 'fuel' your camera burns to send you photos and videos. The right plan makes sure you never run out mid-season, right when that target buck starts showing up.
Your choice really boils down to a few things: how many cameras you're running, whether you're sending just photos or data-hungry videos, and of course, your budget.
How to Choose the Right Verizon Plan for Your Trail Camera
Jumping into the world of cellular trail cameras can feel a little overwhelming, but picking a data plan doesn't have to be. It's all about matching what you need for scouting with the right kind of Verizon service. Honestly, Verizon has become a go-to for trail cams simply because its network is so reliable out in the sticks.
The use of Verizon-compatible cellular trail cameras has exploded, especially across North America where its solid 4G LTE network provides a dependable signal in those remote hunting spots we all love. In fact, reports between 2018 and 2022 showed that over 70% of cellular camera users in the U.S. stuck with Verizon because of its massive coverage and stable network. You can always get more details on Verizon's connected device plans straight from their site.
Understanding Your Main Options
Before getting lost in the weeds, let's look at the big picture. You have a few different paths you can take, and each one has its pros and cons depending on whether you value low cost, convenience, or the ability to manage a whole fleet of cameras. The best plan for a single camera watching a food plot is totally different from what someone needs for a dozen cameras spread across a huge property.
To make this simple, we've broken down the main Verizon plan types into a quick-glance table. This will give you a solid starting point and a reference as you read through the rest of this guide. You can also check out our wider look at the best cellular trail camera plans for more background.
The real trick is to avoid paying for data you'll never use while making sure you have enough juice to get those critical updates when it matters. Your plan should be a tool that works for you, not another headache.
Quick Comparison of Verizon Plan Types for Trail Cameras
Here’s a simple breakdown of the primary plan categories out there. Use this table to figure out which path makes the most sense for you before we dive into the nitty-gritty of each one.
| Plan Type | Ideal For | Typical Cost Range (per month) | Key Feature |
|---|---|---|---|
| Consumer "Connected Device" Plan | Individuals with 1-3 cameras and an existing Verizon phone plan. | $10 - $20 per camera | Simple to add to your current phone bill and manage in one place. |
| Business/IoT M2M Plan | Users with multiple cameras (4+) or those needing pooled data. | $5 - $15 per camera (often with pooled data) | Cost-effective for multiple devices and offers flexible data management. |
| Third-Party Reseller Plan | Users who prefer plans directly from the camera maker (e.g., Moultrie, Tactacam). | Varies by provider, often photo-based | Bundled with the camera's app for a seamless, all-in-one experience. |
| Prepaid Data-Only Plan | Seasonal users or those who want to avoid contracts and credit checks. | $10 - $30+ depending on data amount | Pay-as-you-go flexibility without long-term commitments. |
This table should help point you in the right direction. Now, let's get into what each of these options really means for you and your scouting setup.
Alright, now that we have a high-level map of the territory, it's time to explore the specific trails you can take to get your camera connected. Choosing the right Verizon data plan isn't about finding a single "best" option; it's about finding the best fit for your specific scouting needs.
We'll break down the three most common routes: adding a camera to your phone plan, using specialized business plans, and buying plans directly from camera brands.
Each path offers a different balance of cost, convenience, and control. A hunter with a single camera has very different priorities than a land manager running a dozen units across a large property. Understanding these trade-offs is the key to making a smart, cost-effective decision.
Standard Consumer Plans: The Convenience Route
For many hunters with just one or two cameras, the simplest path is often the best one. You can add a trail camera to your existing Verizon consumer phone plan as a "Connected Device," just like you would add a tablet or a smartwatch to your account.
The biggest win here is simplicity. The charge, typically around $10 to $20 per month, just shows up on your existing phone bill. No separate accounts to manage, no new companies to deal with. This approach is perfect for folks who want a "set it and forget it" solution and already trust Verizon for their personal phone service.
The one catch? The data your camera uses will typically pull from your main data pool, so it's a less ideal choice for heavy video users or those on limited data plans.
Business and IoT Plans: The Scalability Route
If you plan on running a small fleet of cameras—say, four or more—then Verizon's Business or IoT (Internet of Things) plans start looking a lot more attractive. These are specialized M2M (machine-to-machine) plans designed specifically for devices like trail cameras, GPS trackers, and other remote sensors that need to "talk" to each other.
The major advantage is cost efficiency at scale. Instead of paying per camera, you often get a pooled data plan. For example, you might have a single plan with 10GB of data shared across ten different cameras. This is far more economical, as a low-activity camera's unused data can be picked up by a high-activity camera on a hot scrape.
Think of it like this: A consumer plan is like buying a single ticket for each person to ride the bus. An IoT plan is like chartering the entire bus for your group—it's more efficient and cheaper per person if you have enough riders to fill the seats.
These plans offer much greater control and are built for managing multiple devices, but they can require a bit more setup, sometimes involving a Verizon Business account.
Third-Party Reseller Plans: The All-In-One Route
The final path involves buying a data plan directly from the trail camera manufacturer itself. Companies like Moultrie, Spartan, or Tactacam act as resellers, bundling Verizon's cellular service directly into their own app and ecosystem.
This creates a seamless, unified experience where your camera, app, and data plan are all managed in one place. It's a very popular option because it removes the need to deal with Verizon directly. You buy the camera, pick a plan in the app, and you're done.
These plans have a rich history that helped shape the market. The industry has evolved significantly, but as far back as December 2016, a provider like Spartan Camera was offering Verizon-based plans such as 1GB for $22.99 a month, with users transmitting about 2,000 photos per gigabyte. You can explore more about these foundational pricing models and how they influenced the industry.
This all-in-one approach is perfect for users who prioritize ease of use above all else. The trade-off is sometimes less flexibility and potentially higher costs compared to a direct IoT plan, especially when you start running multiple cameras.
Estimating Your Trail Camera Data Usage
Figuring out how much data your trail camera will actually use is the best way to pick the right Verizon plan and dodge those frustrating overage fees. Think of your data plan as a monthly budget. Every photo, video, and status check "spends" a little bit of it. The key to staying under budget is knowing how much each action costs.
A simple status check—where the camera just pings the network to say "I'm still here"—uses a tiny sliver of data. Sending a low-resolution thumbnail costs a bit more. But requesting a full-HD image or a short video clip? That's like making a big purchase—it'll chew through your data allowance much faster.
What Does a Photo Really Cost in Data?
The biggest data hogs are, you guessed it, the images and videos your camera sends back to you. And the size of these files can swing wildly depending on the settings you pick. A grainy, low-res thumbnail might only be 50 KB, but a crisp, high-definition image could be 5 MB or even larger. That's a 100-fold difference.
This is a good time to get familiar with the main types of plans you'll run into with Verizon.
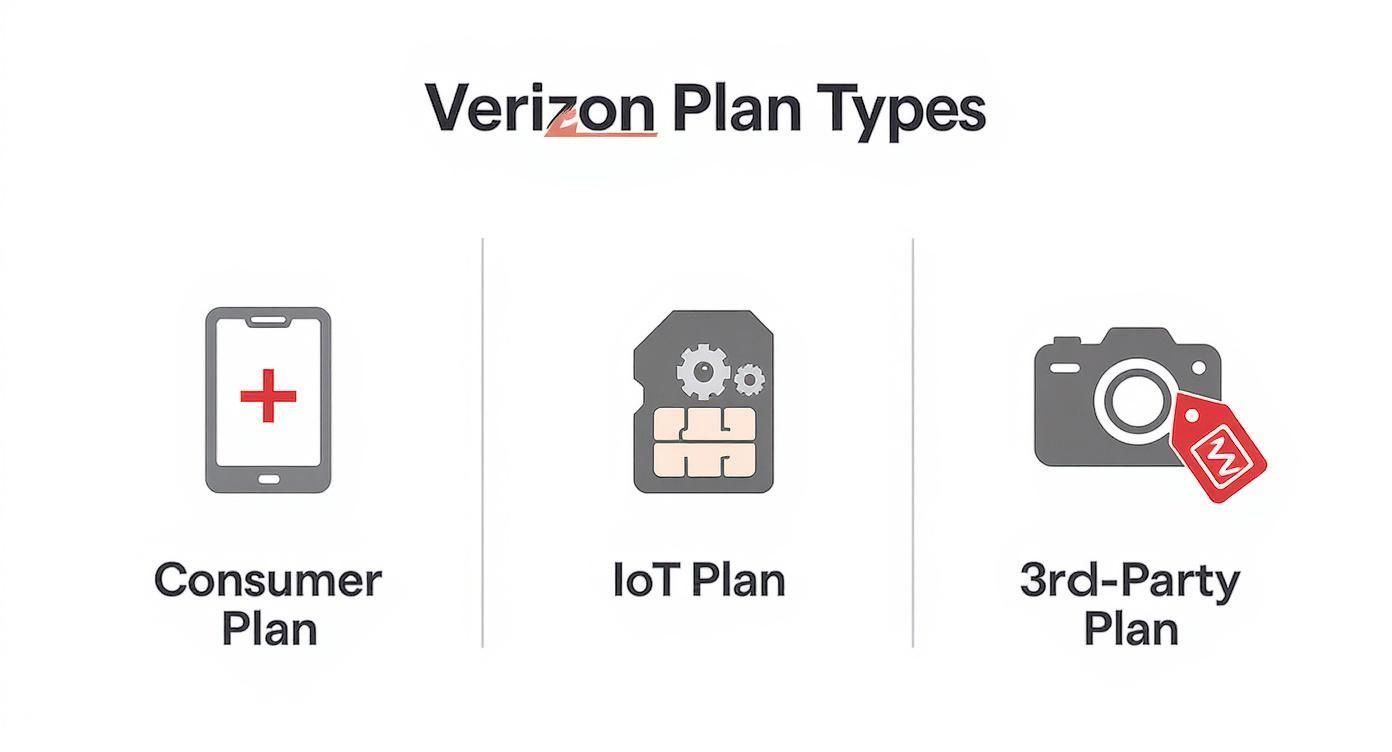
As you can see, your options range from simple consumer add-on lines to more complex IoT plans for multiple devices, with third-party providers offering a more all-in-one experience.
This huge difference in file size is exactly why so many hunters are starting to see why GB-based data plans are better than photo-based plans for trail cameras—they give you way more flexibility.
To put it into perspective, a single Gigabyte (GB) of data can get you a ton of thumbnails or just a handful of HD videos.
Estimated Monthly Data Usage Scenarios
Theory is one thing, but what does this look like in the real world? Let's break down a few common scouting situations to see how data needs can change from one spot to the next.
| Activity Level | Approx. Photos per Day | Photo Resolution | Video Clips per Day | Estimated Monthly Data Usage |
|---|---|---|---|---|
| Low Traffic (e.g., scrape line) | 10 | Standard Thumbnails | 0 | ~90 MB |
| Moderate Traffic (e.g., food plot) | 30 (5 HD requests/month) | Mixed Standard/HD | 0 | ~280 MB |
| High Traffic (e.g., corn pile) | 50 (10 HD requests/month) | Mixed Standard/HD | 2 | ~1.1 GB |
| Video Monitoring (e.g., security) | 15 | Standard Thumbnails | 5 (15-sec clips) | ~1.5 GB |
As you can see, a camera watching a quiet scrape barely sips data. But one set up over a busy bait site that also sends video clips can become a data hog pretty quickly.
Real-World Examples
Let's look at two common scenarios to really drive the point home.
-
Scenario 1: The Food Plot Watcher. You've got a camera watching a field edge that gets moderate traffic. It sends about 30 standard-res photos a day. Over a month, you're looking at around 270 MB of data. A 500 MB plan would be a safe, comfortable fit.
-
Scenario 2: The Rut-Active Funnel. You've hung a camera on a hot funnel during the rut. It's sending you 50 photos a day, and you're requesting 10 of those in HD. This setup will burn through roughly 470 MB a month, making a 1 GB plan the smarter choice to avoid surprises.
Pro Tip: Your camera's location and settings are the two biggest drivers of data consumption. A camera on a corn pile will always use more data than one watching a secluded scrape. Always match your plan to the job you've given the camera.
Luckily, Verizon makes it pretty easy to keep tabs on your usage. You can log into your account and see exactly how much data each connected device, including your trail cam, is using. This proactive approach ensures you're always on the right plan for the job.
Your Step-by-Step Verizon Camera Setup Guide
Getting your trail camera online with Verizon is a lot easier than it sounds. Don't let the technical jargon scare you off. This guide will walk you through the whole process, step by step, so you can get your camera out in the field and sending you pictures in no time.
Think of this as your field-ready checklist. The journey from unboxing your camera to getting that first picture sent to your phone starts with the right SIM card. From there, it's just a quick activation and a simple settings change. Let's get to it.
Step 1: Get the Right Verizon SIM Card
First things first: your camera needs a Verizon SIM card to connect to the network. Popping in an old SIM from a retired smartphone usually won't cut it. You need a SIM card that's set up for a data-only device, which Verizon often calls a "Connected Device" or "IoT" SIM.
You can grab one in a couple of ways:
- Head to a Verizon Store: This is usually the fastest option. Just tell the staff you need to add a cellular trail camera to your account.
- Order It Online: Log into your My Verizon account, add a new line for a connected device, and they'll ship a SIM right to your door.
Before you leave the store or click "buy," double-check the SIM card size. Most new trail cameras use the tiny Nano-SIM format, but it's always smart to confirm what your specific model requires.
Step 2: Activate Your SIM Card and Plan
With the SIM in hand, it's time to bring it to life. Activation is the process that officially connects that little plastic chip to your chosen data plan and your camera's hardware.
You’ll need two key pieces of information:
- The SIM Card Number (ICCID): It's the long string of numbers printed right on the SIM card itself.
- The Camera's IMEI Number: This is a unique 15-digit ID for your camera's modem. You can usually find it on a sticker inside the battery compartment or on the original box.
Navigate to Verizon's "Activate My Device" page online, punch in those two numbers, and select your data plan. Once you confirm, your SIM card is officially live on the network.
Pro Tip: A common mistake is putting the SIM into the camera before activating it. Always activate the SIM through Verizon’s website first. This one small step can save you a big headache later on.
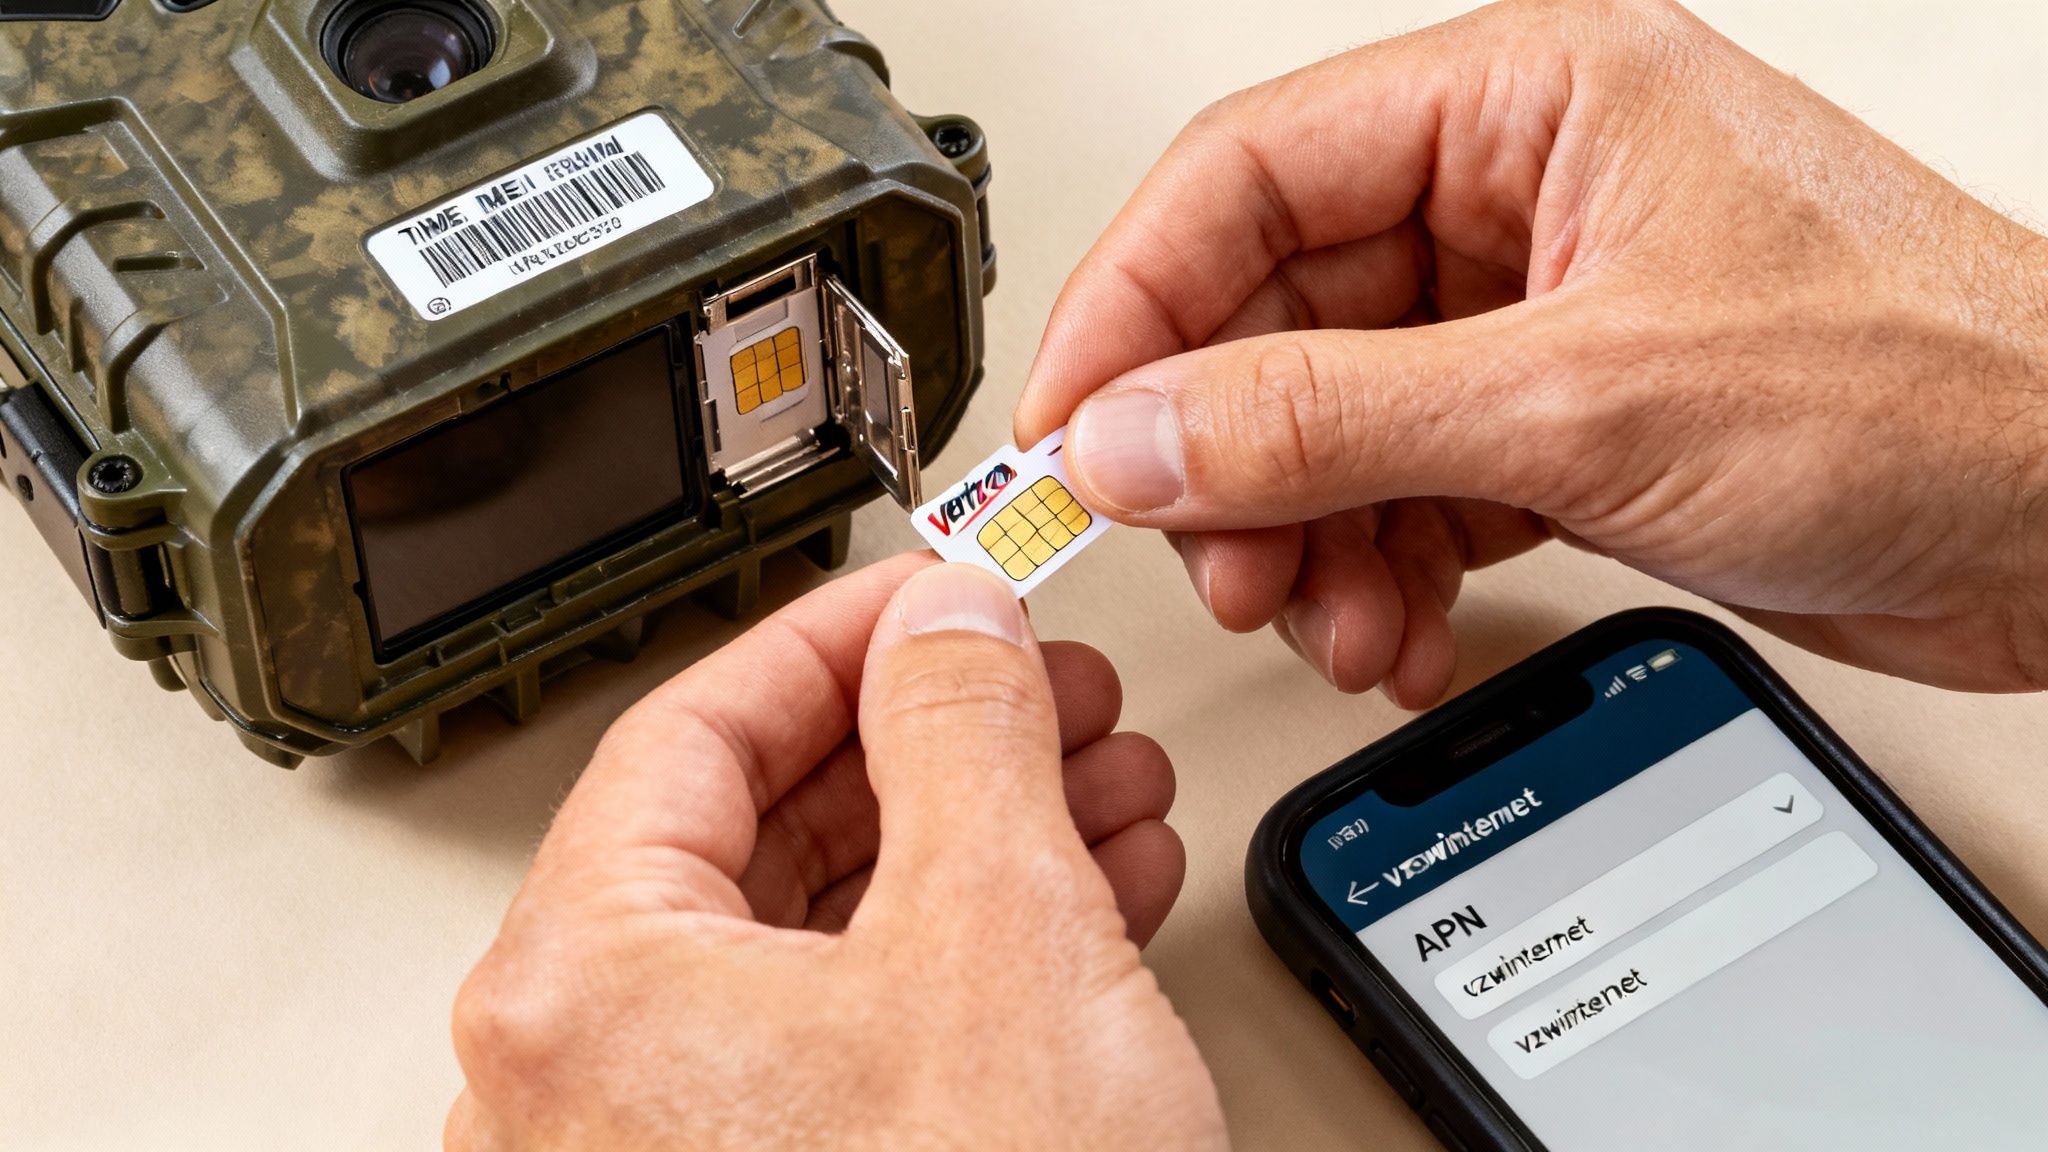
Step 3: Configure Your Camera's APN Settings
This last step is the most technical-sounding, but it's really straightforward. The APN (Access Point Name) is just a setting that tells your camera which digital doorway to use to access Verizon's network. If it's wrong, your camera won't be able to send anything, even with a perfectly good signal and an active plan.
Luckily, Verizon keeps it simple. You’ll find the APN menu inside your camera's companion app, like the one we provide for MAGIC EAGLE cameras.
Just navigate to the network or cellular settings menu and enter this:
- APN: vzwinternet
That’s it. Leave the username and password fields blank unless your camera's manual specifically tells you to enter something. Save the setting, then turn your camera off and back on again. It should connect to the network and be ready to send its first test photo.
For more great tips on optimizing your setup, check out our guide on how to monitor cameras remotely.
How to Maximize Your Signal in Remote Locations
A great Verizon trail camera data plan is only half the equation. It means nothing without a reliable signal to send you those pictures. We've all been there—stuck with a camera in a perfect spot that just happens to be in a remote draw, deep timber, or hilly terrain where service is shaky at best.
The good news is, you can usually overcome it with a few smart strategies. The goal is to turn a spot with one flickering bar of service into a reliable transmission point.
It starts before you even step into the woods. Hop online and pull up Verizon’s official coverage map. While it’s not going to show you the signal strength behind every single tree, it gives you a fantastic high-level view of which areas on your property have the best shot at a solid connection. This digital scouting saves a ton of time and frustration, letting you narrow down promising camera locations before you even put your boots on.
Field-Tested Placement Strategies
Once you’re out in the field, you'll find that small tweaks to your camera's placement can make a massive difference. Think of a cell signal like a radio wave—it travels best when it has a clear, unobstructed path. Your top priority should be minimizing anything that can block or interfere with that signal.
Here are a few simple but incredibly effective tactics to try:
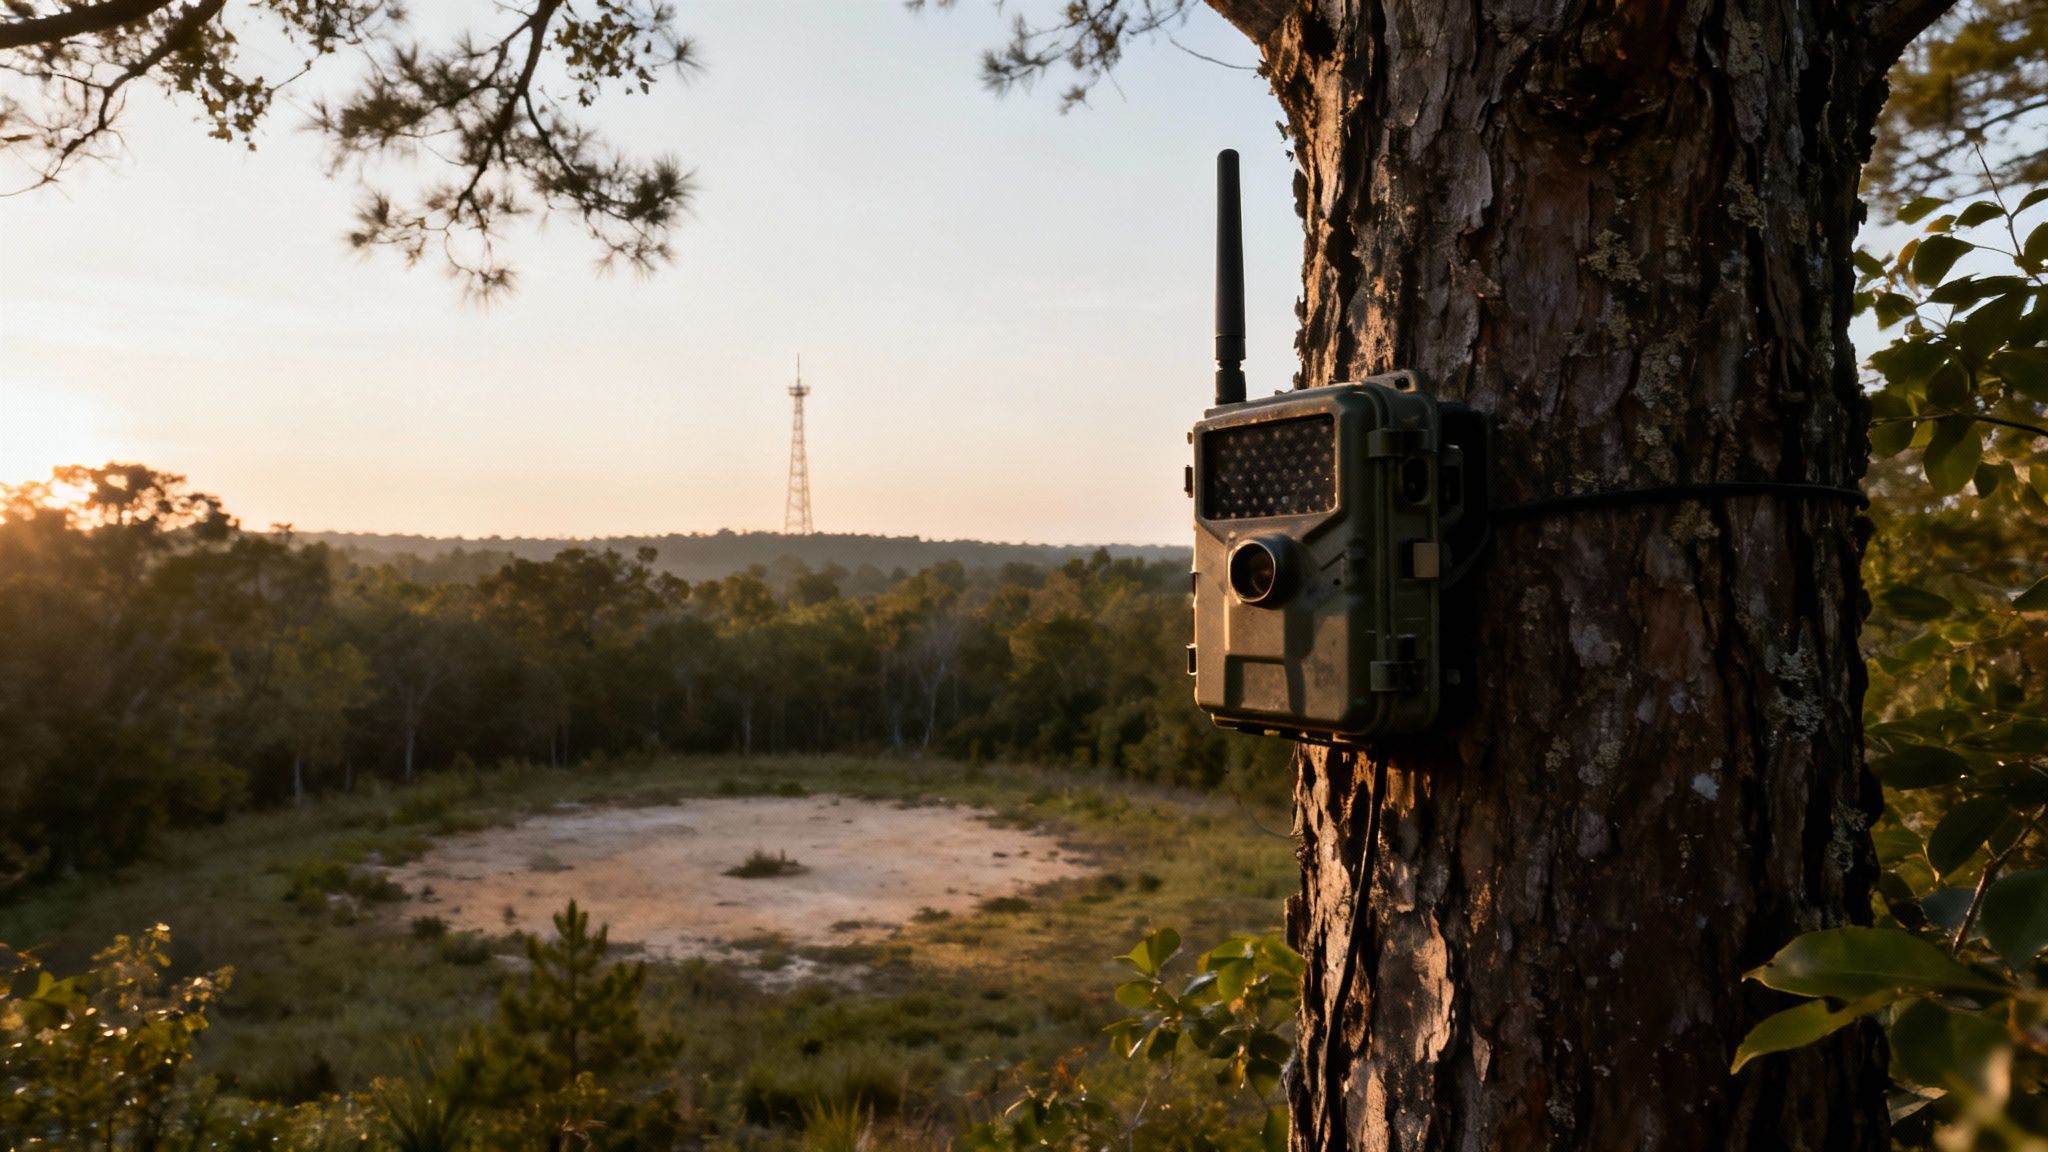
- Go High: Elevation is your absolute best friend. Mounting your camera 10-12 feet up a tree instead of at eye level can lift it above ground-level obstructions and help it catch a much stronger signal.
- Clear the Area: Dense foliage, thick brush, and even heavy tree canopies can weaken a signal. Take a minute to trim small branches or leaves directly in front of the camera to create a clearer line of sight.
- Avoid Valleys: If you can, avoid placing cameras at the bottom of deep draws or valleys. Signals really struggle to penetrate these low-lying areas. Stick to ridges, hillsides, or field edges where the signal path is far less obstructed.
Don’t underestimate the power of a few feet. I’ve seen it dozens of times—moving a camera just ten feet to the left or right on the same tree can be the difference between a successful transmission and a failed one.
Advanced Signal Boosting Tools
So what happens if you’ve tried all the placement tricks and your signal is still on the fringe? For those truly tough spots, it’s time to bring in some specialized hardware. Investing in an external antenna or a cellular booster can transform a dead zone into a dependable camera location.
These tools are designed to grab whatever weak signal is available and amplify it for your camera.
- External High-Gain Antennas: These are the most common and effective solution for most people. They plug right into your camera’s external antenna port and have a long cable, which lets you mount the antenna high up on the tree to grab a stronger signal way above the camera itself.
- Cellular Boosters: This is the more powerful option for extreme situations. A booster kit comes with an external antenna, an amplifier, and an internal antenna. It actively strengthens the signal before sending it to your camera, giving you the most reliable connection possible in the absolute worst service areas.
By combining smart placement with the right tools, you can ensure your verizon trail camera data plans are always put to good use, delivering the critical intel you need, right when you need it.
Troubleshooting Common Connection Problems
It happens to everyone. You’ve got the perfect setup, the camera is in a killer spot, and then… nothing. The pictures stop coming. It’s frustrating, but the fix is usually much simpler than you think. Before you start questioning your camera, your plan, or your sanity, let's walk through the most common connection hiccups you’ll run into with your Verizon trail camera.
When your camera goes silent, don’t immediately assume the worst. The problem often boils down to just a handful of simple culprits. We'll tackle these one by one, giving you the know-how to get your camera back online in no time.
Problem: My Camera Stopped Sending Photos
This is the number one call we get. You know there’s a buck hitting that scrape, but your phone is a ghost town. Before you make the trek out to your spot, let's run through a quick diagnostic checklist you can do right from your app or computer.
Common Causes and Quick Fixes:
-
Weak or No Signal: This is the usual suspect. Pop open your camera’s app and check the last reported signal strength. If it was hovering at one or two bars, it might have dropped its connection. You might need to move the camera to higher ground or think about adding a booster antenna to give it a lift.
-
Expired Data Plan: It’s surprisingly easy to forget a renewal date. The first thing you should do is log into your My Verizon account and make sure your plan is active and paid up. A lapsed plan will shut down transmissions instantly, even if the camera shows a full signal.
-
Incorrect APN Settings: If you recently swapped SIM cards or had to do a factory reset, the camera's APN (Access Point Name) might be blank. This tiny setting is what tells the camera how to talk to Verizon’s network. Make sure it’s set to vzwinternet.
-
Dying Batteries: Sending photos over a cellular network takes a serious amount of power. If your batteries are on their last legs, the camera might have enough juice to snap a picture but not enough to push it through the network. Always start with a fresh set of high-quality lithium batteries for the best performance.
Problem: My Data Usage Seems Way Too High
Ever feel like your data is vanishing into thin air? It’s a jarring feeling, but it’s almost always tied to your camera settings, not a faulty plan. High data consumption with your verizon trail camera data plans can usually be fixed with a few quick taps in your camera’s app.
High-resolution image requests and frequent video uploads are the two biggest data hogs. A single HD photo can use as much data as 100 low-resolution thumbnails, so be strategic about when you hit that "download" button.
Here’s how to rein it in:
- Lower the Image Resolution: Set your camera to send small thumbnails by default. That way, you only request the full-resolution shot when you see a deer that truly deserves a closer look.
- Reduce the Transmission Frequency: Do you really need photos the second they’re taken? Change the "Send" interval from "Instant" to once or twice a day. This bundles the uploads together and is far more efficient on data.
- Limit Video Clips: Videos are the ultimate data killers. Unless you're using the camera for security or it's watching over a critical funnel, stick to photos.
Beyond these specific trail camera tips, getting a handle on general mobile data troubleshooting can give you a better feel for how all cellular devices work. The same core principles apply, whether it’s your phone or your trail cam.
Your Verizon Plan Questions, Answered
Figuring out cellular plans can feel like a chore. To make it easier, we’ve rounded up the questions we hear most often from hunters and land managers about using Verizon for their trail cameras. Here are the straight answers you need to get your setup right.
Think of this as your go-to guide for those last few details. We'll cut through the confusion and give you practical advice to get the most out of your camera.
Can I Just Use a Regular Phone SIM in My Trail Camera?
This is probably the most common question we get, and the answer is a hard no. It seems like a clever way to save a few bucks, but a standard Verizon phone SIM just isn't built for a data-only device like a trail camera. The network sets them up differently, and trying to force it will only lead to headaches.
You'll likely run into connection failures right out of the gate. Even if it does connect, you could see weird charges on your bill, or worse, Verizon might just shut the line down for violating their terms. Do it right from the start: get a dedicated data-only or Connected Device SIM from Verizon. It ensures your camera works, and you only pay for what you actually use.
What Happens if I Go Over My Data Limit?
Everyone worries about this, especially when a hot scrape lights up and starts burning through data. What happens next depends entirely on the Verizon plan you’re on.
- Postpaid Consumer Plans: If your camera is an add-on line to a modern "Unlimited" phone plan, Verizon usually won't hit you with overage fees. Instead, they’ll throttle your connection, slowing your picture transmissions to a crawl for the rest of the month.
- Prepaid and IoT Plans: With these, it’s usually one of two scenarios. Your service will either get cut off completely until you buy more data, or you’ll get billed for the extra data you use—often at a rate of $5 or $10 per additional gigabyte.
Always check the fine print for your specific Verizon trail camera plan. Knowing the overage policy before you need it is the best way to avoid a slow camera or a surprise bill right when the rut kicks off.
Do I Need a New Plan for Each Camera?
Thankfully, no. For anyone running more than a couple of cameras, that would be a nightmare to manage and pay for. This is exactly where Verizon’s more advanced plans shine.
If you’re managing a whole fleet of cameras, a Verizon Business or IoT (Internet of Things) plan is the way to go. These plans are designed for multiple devices and almost always offer pooled data. This means you get one big bucket of data—say, 10 GB—that all your cameras share. The data a camera on a quiet trail doesn’t use can be automatically used by the one watching your main food plot. It’s a much smarter and more affordable way to run things.
Can I Pause My Plan in the Off-Season?
Yes, and this is a huge perk for seasonal users like hunters. With most connected device plans, Verizon lets you suspend your service during the months you aren’t scouting. You get to keep your SIM card and line active without paying the full monthly rate.
There’s usually a small monthly fee to keep the line suspended, but it’s a fraction of what your normal plan costs. When it’s time to start scouting again, you can flip the switch and reactivate the plan online. Just be sure to check the specific suspension rules for your plan, as the terms and fees can differ.
Tired of dealing with SIM cards and separate data plans? Magic Eagle builds the cellular connection right into the camera. Our SignalSync technology automatically locks onto the strongest network signal in the area, so you can spend your time scouting, not troubleshooting. See how the EagleCam 5 makes cellular simple at magiceagle.com.