
A sharp set of images, a lightning-fast trigger, a wide net for detections, and the right way to pull data from the field. Nail these four areas and your trail camera goes from gadget to trusted partner—whether you’re hunting, researching, or keeping an eye on the backyard.
Core Features To Prioritize
Every scenario asks you to juggle image quality, response time, and coverage. Then you need a reliable path to get your snapshots off the device and into your hands.
Skip even one element and the rest can unravel. For example, an 12-megapixel sensor won’t help if the subject moves before the shutter fires. Likewise, a sub-0.4-second trigger is wasted if your detection zone is too narrow.
- Image Clarity: 8–12 megapixels to capture fur patterns or feather details
- Trigger Speed: under 0.5 seconds so you don’t miss the action
- Detection Range: 20–30 meters of coverage, keeping you safely back
- Connectivity Options: cellular for real-time alerts or SD card storage to save on costs
The infographic below lays out a decision tree based on clarity (camera icon), speed (lightning bolt icon), and range (radar icon).
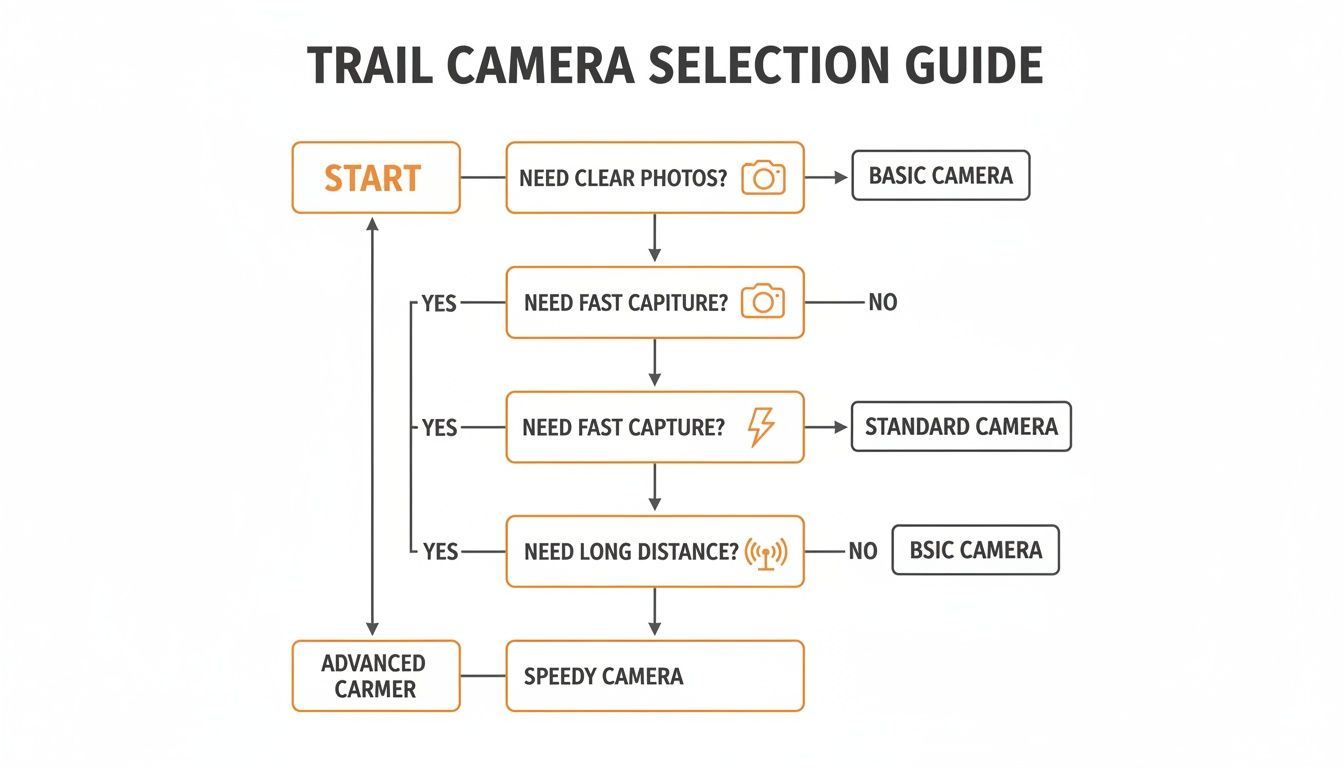
That chart shows how chasing trigger speed leads to ultra-responsive models, while hunting for detail points you toward higher-resolution sensors.
Use Case Scenarios
Hunters tracking deer at first light often crave rapid triggers and no-glow IR so they don’t spook wary bucks. Backyard wildlife enthusiasts tend to favor simple SD cards and extended battery life to minimize visits. Field biologists in remote areas rely on cellular connectivity to cut down travel time and keep data flowing without interruption.
In our tests, Magic Eagle’s EagleCam 5 pulls it off by combining a 12 MP sensor, a 0.3-second trigger, 25 m detection range, and built-in LTE connectivity. It’s the full-suite solution for serious hunters and researchers who need dependable, real-time scouting.
Quick Comparison Of Trail Camera Features
Here’s a snapshot of key specs broken down by what really matters.
| Feature | Recommendation | Why It Matters |
|---|---|---|
| Image Clarity | 8–12 MP | Sharp images aid reliable identification |
| Trigger Speed | ≤ 0.5 second | Freezes rapid animal movement |
| Detection Range | 20–30 meters | Captures activity across wider zones |
| Connectivity | Cellular or SD card | Balances instant alerts and affordability |
Use this chart to match each feature with your primary goal—whether that’s zero-lag reaction time, detailed imagery, or budget-friendly simplicity.
Budget will ultimately guide your decision. Entry-level cameras around $100 often skip cellular capability and rely on SD storage. Stretching to $400 adds instant alerts, AI-powered tagging, and higher resolution. Tune your spend to how often you’re willing to make that trek into the field.
By weighing clarity, speed, range, and connectivity against your unique needs, you’ll land on a trail camera setup that delivers crisp, reliable images with fewer trips outdoors.
Understanding Core Trail Camera Features
A trail camera is like a trusty ATV in the backcountry. It has to run on its own long after you’ve packed up camp. And when that deer decides to sprint by, fast trigger speed snaps the moment without blur. As dusk falls, night vision becomes your headlights, capturing what’s hidden in the shadows. Then there’s connectivity—think of it as a satellite uplink beaming photos to your inbox.
Different users have different priorities. A backyard birdwatcher may opt for endurance over rapid-fire shots. On the other hand, a field researcher needs instant alerts to tweak study plans on the fly. At the end of the day, every feature has to strike a balance: performance, power draw, and stealth.
Core Performance Components
In any use case, four specs separate a solid camera from a mediocre one:
- Battery Life: How long your camera can stay in place without a recharge.
- Trigger Speed: Under 0.5 seconds to freeze fast-moving subjects cleanly.
- Image Resolution: 8–10 megapixels usually hit the sweet spot for clarity.
- Night IR Performance: Stealth illumination range once the sun goes down.
Image resolution, trigger speed, and detection range remain quantifiable core metrics for what users and reviewers label a ‘good’ trail camera: market segmentation shows pixels and sensor classes are meaningful—8–10 MP models dominated consumer preference in 2025. Read the full research about trail camera trends on Fortune Business Insights.
Performance Feature Benchmarks
Before you pin down your next camera, here’s a quick reference to align specs with your objectives:
| Feature | Benchmark | Benefit |
|---|---|---|
| Resolution | 8–10 MP | Crisp images without heavy power draw |
| Trigger Speed | < 0.5 second | Captures fast movement effectively |
| Detection Range | 20–30 meters | Covers a broad area with fewer blind spots |
| Battery Life | 6+ months | Extended deployment without visits |
| Night IR | 15–20 meters no-glow | Stealthy illumination in pitch darkness |
This table gives a clear picture of what to look for, whether you’re monitoring backyard wildlife or logging data from remote sites.
“A balanced trail camera setup matches your exact use case rather than chasing every high-end spec.”
In one scenario, a hunter at dawn might set no-glow IR to keep wary bucks comfortable. Meanwhile, researchers in the field could lean on cellular connectivity to skip weekly SD-card swaps.
Balancing Quality And Power
High resolution delivers extra detail—think antler tines or plumage textures—but it also saps battery and eats up card space. For example, capturing 12 MP files can halve your deployment time versus running at 8 MP. The trade-off: is that extra fidelity worth changing out batteries more often?
On the storage side, a 32 GB SD card paired with 8 MP images can net you 20,000+ shots. And if you pair a sub-0.5 second trigger with a modest sensor, you’ll snag quick action frames without draining power too fast.
Practical Deployment Examples
- A backyard enthusiast mounts an 8 MP camera with AA batteries for 9 months of set-and-forget service.
- A remote researcher adds solar panels to a 10 MP camera with 4G upload, delivering real-time sightings.
- A hunter chooses the EagleCam 5 at 12 MP with a 0.3 second trigger to nail crisp antler rack photos.
Each example shows how clarity, speed, and longevity interlock in the real world.
Tips For Optimal Placement
- Mount your camera 1–1.5 meters off the ground to catch mid-sized mammals at eye level.
- Angle it slightly downward to avoid sky clutter in your shots.
- Use camo straps and low-profile brackets to stay invisible to curious onlookers.
“Stealth and stability matter as much as specs when you’re in the field.”
Understanding these core features—battery endurance, rapid triggers, balanced resolution, and stealthy night vision—sets you on the path to picking what is a good trail camera for your own adventures.
Evaluating Connectivity Options
Connectivity turns your trail camera from a silent observer into a live watchdog, pinging you photos seconds after something moves.
Traditional SD-card models work like a photo album in the woods: they store images locally and wait for you to swap cards on each visit.
Cellular (LTE) cameras, in contrast, beam snapshots straight to your phone or inbox—but they carry monthly data fees and depend on signal strength.
Comparing SD Card And Cellular
SD card cameras typically land under $100 out of pocket, with no ongoing charges. You change cards when you check your site and never worry about spotty service. The downside: you only see what you capture when you collect the card.
LTE-equipped units start at $200 and can reach $400, plus a $10–30/month plan. When the network holds, your images arrive in real time—but coverage can vary by carrier and location.
Here’s a quick breakdown:
Connectivity Options Compared
| Option | Upfront Cost | Subscription | Use Case |
|---|---|---|---|
| SD Card | $80–150 | None | Weekend hunting or birdwatching |
| Cellular (LTE) | $200–400 | $10–30/month | Anti-poaching and research |
Whether you pick a frugal SD setup or an instant-feed LTE model, these numbers help you match the gear to your goals.
“Instant alerts boost success rates by 30% during active field monitoring,” notes a wildlife biologist.
Real World Scenarios
Picture a hunter perched in a stand before dawn. An LTE camera detects movement and sends a push notification before the hunter even climbs down. Meanwhile, a backyard birdwatcher swaps SD cards once a month, thrilled by every robin and finch image.
Hybrid deployments often deliver the best of both. Urgent night-time predator triggers go over LTE, while routine daytime deer photos fill the SD card.
Things to weigh when mixing and matching:
- Network Stability: Scout carrier dead zones in advance
- Battery Draw: LTE can spike consumption by 30–50%, so consider larger packs or solar panels
- Data Caps: Align your trigger rate to plan limits to avoid overages
- Storage Strategy: High-capacity SD cards offload non-urgent shots
Choosing Your Best Option
Your terrain, budget and how often you check your cameras will ultimately decide the winner. Need hands-off, live updates? Cellular is the clear pick. Checking in occasionally? SD cards keep your expenses low.
For a deep dive on cell-based models, see https://magiceagle.com/blogs/knowledge/how-do-cellular-trail-cameras-work.
Magic Eagle’s EagleCam 5 stitches both worlds together—built-in LTE, on-device AI tagging and a lightning-fast 0.3-second trigger in a weatherproof frame. Its SignalSync tech hunts down the strongest network and logs performance to your phone. Add geofence alerts and anti-theft GPS, and you’ve got extra security without juggling multiple units.
Test your location by running a camera in place for a few days. Track any delayed uploads or dropped frames before committing.
Quick Checklist
- Define your monitoring goals and schedule
- Consult carrier coverage maps for dead zones
- Compare subscription fees against trigger frequency
- Budget for both the device and monthly costs
- Pilot a small setup before full deployment
“Match connectivity to your routine instead of chasing every feature,” advises a seasoned guide.
Picking the right connection ensures your camera captures the moments that matter—whether you’re trailing elusive game or gathering data for conservation. With clear priorities and simple tests, your trail cam becomes an active field partner, not just a passive observer.
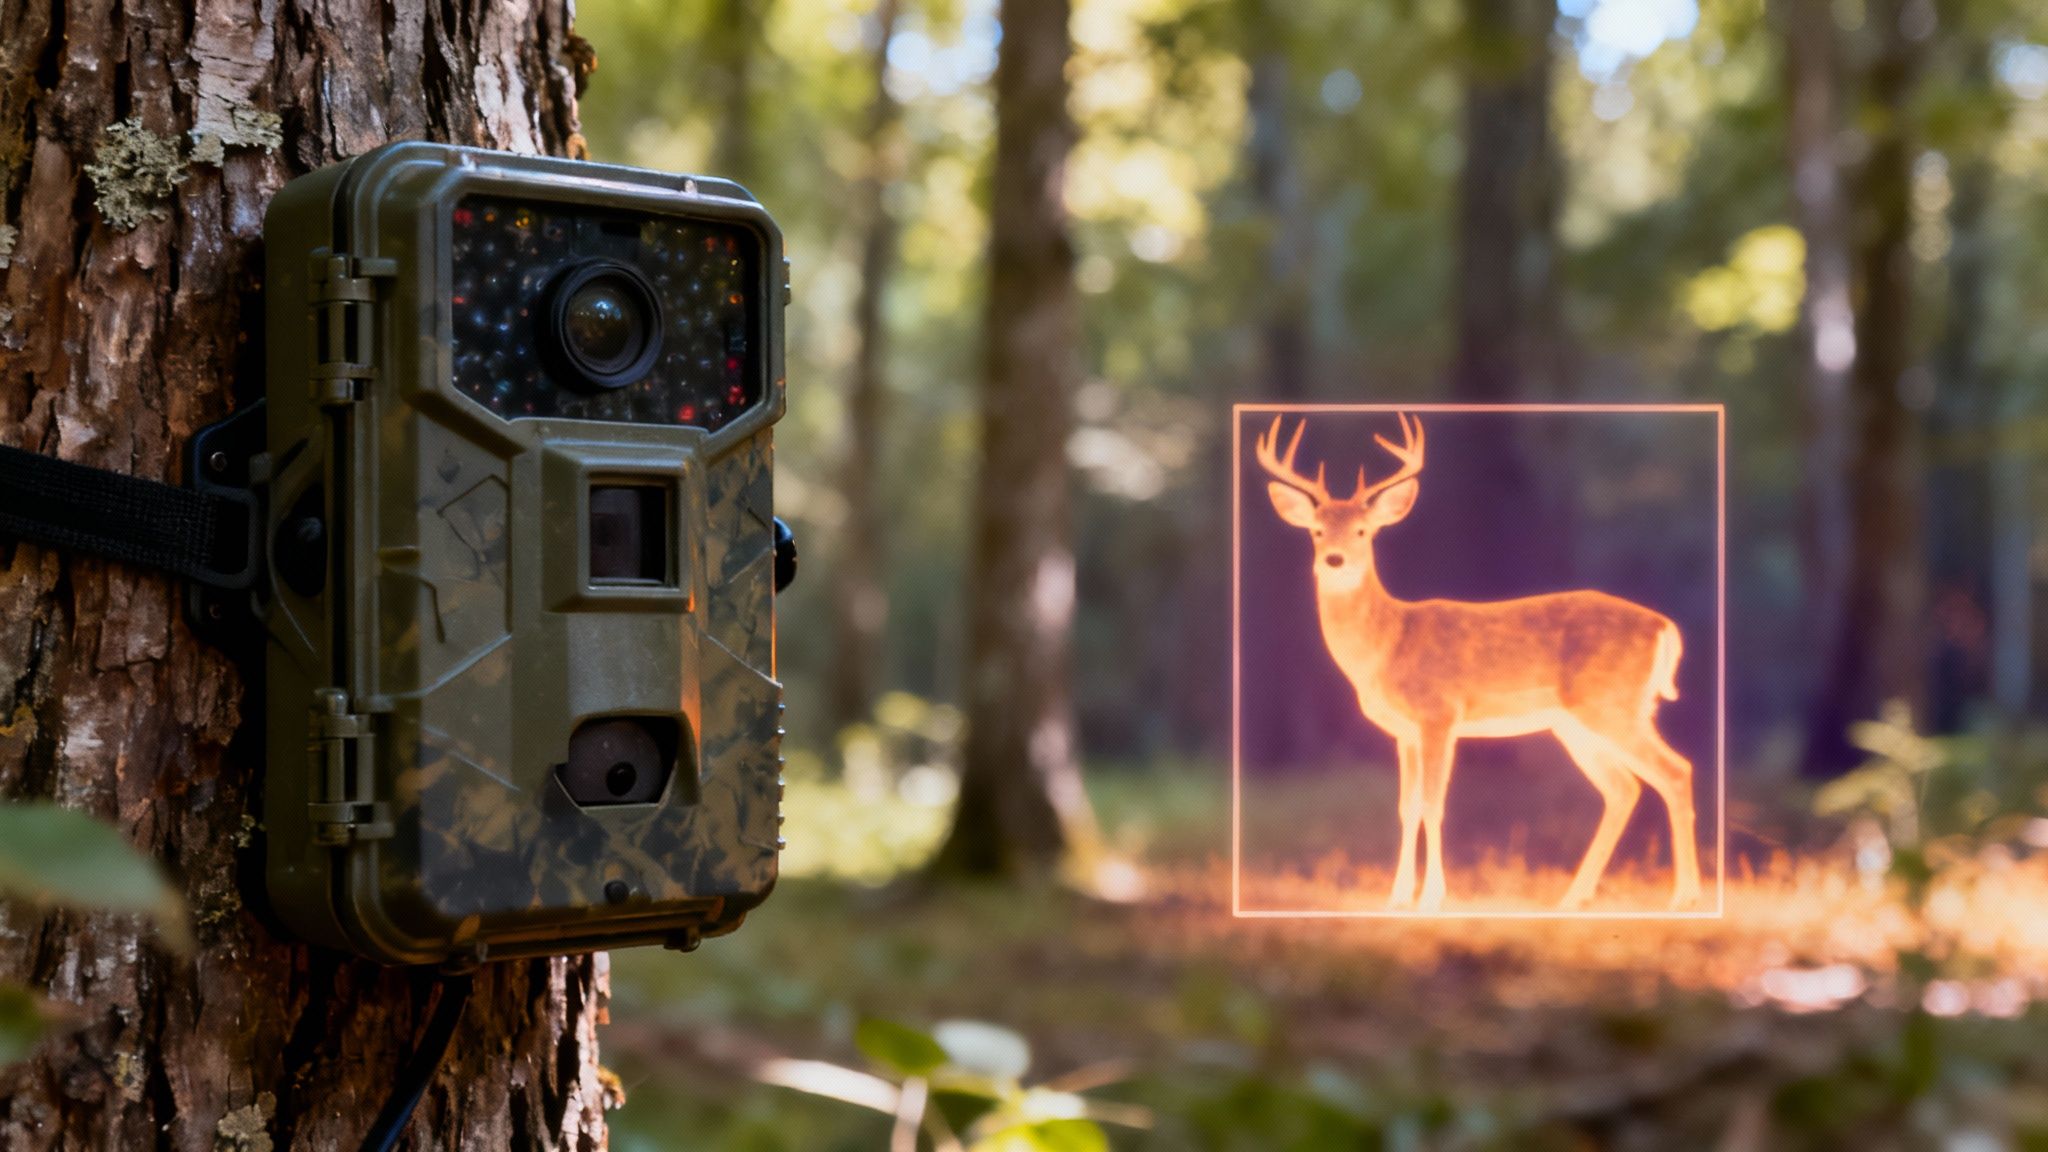
Exploring Sensors And AI Detection
Modern trail cameras do much more than simply snap when something moves. They blend multiple sensors with AI intelligence to focus on the wildlife you care about—and ignore the rest.
PIR sensors pick up on tiny heat shifts as an animal crosses the frame. Active sensors then add a layer of low-power infrared or laser beams, ensuring movement is caught even in colder weather.
Think of these sensors like a home alarm carving a room into distinct zones. Your camera only fires when something steps into a defined area—so you won’t end up with shots of swaying branches. For instance, a deer’s warm body will trigger a PIR sensor far quicker than a gust of wind.
How Sensors Detect Movement
PIR stands for passive infrared, which senses an animal’s body heat. Active sensors work the opposite way: they emit pulses of infrared light and wait for reflections.
Together, they create a two-stage check that slashes missed triggers.
“Combining PIR and active sensors can reduce false triggers by up to 60%,” says a trail cam expert.
Still, storms or shifting sunlight can overwhelm sensors. That’s when onboard AI dives in to sift wildlife from background noise.
Benefits Of AI Filtering
AI filtering uses pattern recognition to ignore repetitive or irrelevant motions. It quickly tags each frame as animal, human, or false based on pixel analysis.
- Battery Saver: Blocks non-animal triggers
- Storage Cut: Prevents unwanted clips
- Quick Review: Automatic tagging speeds up your workflow
- The camera senses motion.
- AI analyzes the image.
- Approved clips upload via cellular or save on SD card.
| Feature | Traditional Sensor | Sensor + AI Filtering |
|---|---|---|
| False Trigger Rate | 40% | 15% |
| Storage Efficiency | 100% | 40% |
| Review Time Saved | 0% | 50% |
Some advanced systems even recognize species—deer, boar or birds—on the fly. That means you skip endless frames of rustling leaves at dawn. Learn more about optimizing PIR settings in our guide on PIR sensitivity for trail cameras.
Real-world tests with Magic Eagle’s EagleCam 5 show 30% higher capture rates when AI filtering is switched on. Its smart algorithm adjusts for fog, heavy foliage or changing light. Mount your camera at 1–1.5 Meters high, angled along game trails, and you’ll align the detection zone exactly where animals pass.
By pairing advanced sensors with AI, your trail camera stops firing at every trivial movement—and hones in on what really matters.
Real World Impact
Field trials across mixed-vegetation sites demonstrate that intelligent sensing can double your useful captures. One study at 50 locations saw false events drop from 25% to 10% once PIR and AI worked together.
Key takeaways from these trials:
- Enhanced Accuracy reduces wasted battery power
- Improved Efficiency means fewer site visits
- Better Insights help you focus on genuine wildlife activity
“Intelligent sensing cuts our manual review time almost in half,” reports a field biologist.
When you combine smart sensors, AI filtering and thoughtful placement, you end up with a trail camera that maximizes capture quality and slashes wasted resources.
Tip: Clean the sensor lens regularly to prevent debris from causing false detections.
Ensuring Durability and Theft Prevention
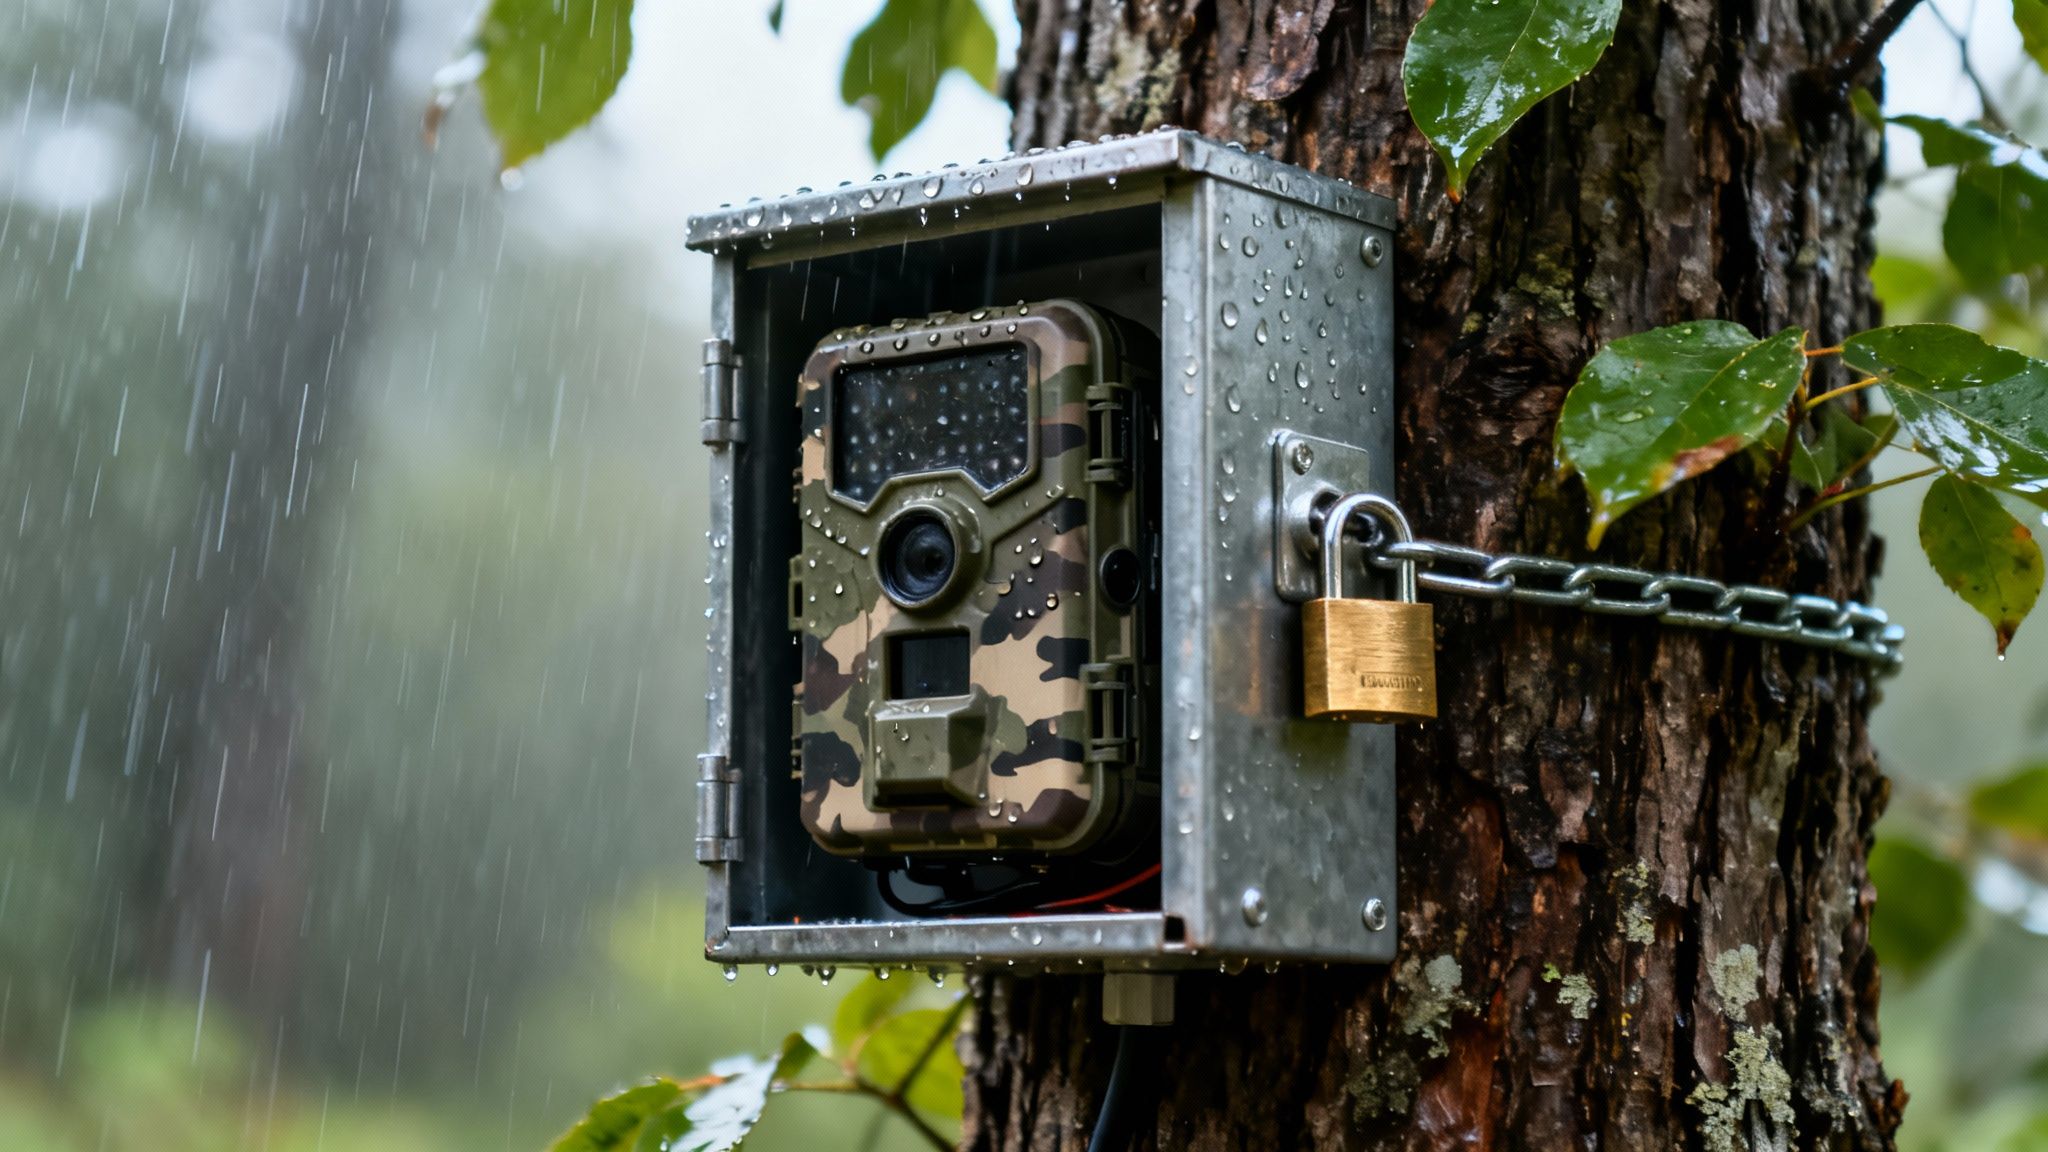
A trail camera isn’t just a lens and a sensor—it’s your eyes in the wilderness. It needs to shrug off driving rain, choking dust, and even the occasional curious critter or passerby.
Think of it like a field scout: if the elements or a mischievous hand knocks it out, all your scouting goes dark.
IP Ratings And Weather Resistance
Start by checking the IP rating—IP66 or IP67 are your best bets. These seals ensure the camera won’t blink when exposed to heavy sprays or billowing dust.
Sturdy shells made from ABS plastic or aluminum alloy behave like a thermos: they keep internal parts stable whether the thermometer reads –10°F or 110°F.
- IP65 resists water jets and large particles.
- IP66 stands up to powerful water sprays.
- IP67 survives immersion up to 1 meter for 30 minutes.
- Rugged cases feature O-ring seals, reinforced seams, and impact-resistant materials.
Stealth Infrared And Rugged Casing
Infrared isn’t one-size-fits-all. No-glow IR is a silent actor—animals won’t spot a thing. Low-glow IR, by contrast, throws a faint red flash that can boost range by 20%, though it may catch a wary deer’s eye.
A tough exterior takes the hits so your electronics don’t:
- Anti-slip textures guard against accidental drops.
- Lockable compartments keep batteries and SD cards under wraps.
- Shock-absorbing mounts cushion every bump.
Mounting Tactics And Hardware Options
A wobbly camera is a missed opportunity. Secure your unit with the right gear and it will sit tight, hidden among the branches.
- Camouflage straps melt into bark and leaves.
- Locking brackets clamp firmly to trunks.
- Security boxes form a steel cocoon around the camera.
- GPS-enabled mounts notify you if someone moves the setup.
For extra peace of mind, add cable locks and anchor systems. Our guide on trail camera locking cables walks you through tried-and-true options.
EagleCam 5 Anti-Theft Safeguards
Magic Eagle’s EagleCam 5 wraps everything in an IP67-rated armor. It uses geofence alerts to ping your phone if it strays from its assigned zone.
Even when powered down, onboard GPS tracking keeps an eye on it. Tamper notifications and dedicated anti-theft brackets make sure the camera stays exactly where you left it.
Key Insight Anti-theft measures can reduce unauthorized removal by 60%, ensuring your device stays exactly where you placed it.
By blending top-tier IP protection, discreet infrared, secure mounts, and locking hardware, you’ve got a setup built for the long haul.
Maintenance Tips For Long-Term Security
A quick walk-through before each season can save you a headache later. Inspect seals, wipe down lenses, and give your mounts a tug to catch any looseness.
- Check O-ring integrity annually to keep waterproofing intact.
- Tighten straps and brackets after storms or wildlife visits.
- Update firmware to close security gaps and boost performance.
Routine care paired with rugged design means your trail camera will stand guard season after season.
What makes a good trail camera? One that weathers every storm and keeps your data under lock and key. Follow these steps, and you’ll dramatically cut downtime and protect your scouting edge in the field.
Buying Guide And Managing Ongoing Costs
Working with a set budget doesn’t mean sacrificing the features you really need. We’ll walk through realistic price tiers and ongoing fees so you can make clear-headed choices.
- Entry-level: USD 80–200 – basic motion detection and SD storage
- Mid-range: USD 200–350 – improved trigger speed, higher resolution
- Cellular-enabled: USD 200–450 – LTE alerts and remote downloads
Most entry-level cameras in the $80–$200 bracket serve casual observation or backyard scouting. They typically rely on SD cards and run off standard AA batteries.
Step up into the $200–$450 zone and you unlock LTE alerts and AI tagging. That extra spend can save you on future trips swapping cards and swapping batteries.
Choosing the right tier from the outset prevents surprise upgrade costs later. Your initial outlay should cover the camera plus essentials like mounts and power accessories.
Price Tiers And Initial Investment
Your budget and intended use are the twin lenses through which you’ll view any purchase. A basic SD-based camera might set you back $80, while a top-tier LTE model can approach $450. Think of it as choosing between a reliable hatchback and an off-road SUV.
Market research shows the global trail-camera market ranged from roughly USD 134 million to over USD 850 million in the mid-2020s. Learn more on Cognitive Market Research.
| Tier | Price Range | Key Features |
|---|---|---|
| Entry-level | $80–200 | SD storage, basic PIR sensor |
| Mid-range | $200–350 | Faster trigger, higher resolution |
| Cellular-enabled | $200–450 | LTE alerts, AI tagging |
Recurring expenses tend to fall into three buckets: data plans, batteries, and memory cards. Cellular plans can range from $5 to $30 per month. AA battery packs run about $15 per set, while solar panels add $50–100 upfront.
- Check signal strength with a test run before full deployment
- Rotate batteries or add a solar panel to extend uptime
- Format SD cards every few weeks to prevent data errors
Solar panels can stretch field life from months to years, depending on sun exposure. Regular firmware updates and lens cleaning nip many hiccups in the bud.
Tip Upgrading to solar power can cut battery replacement visits by 70%.
Well-maintained trail cameras can retain up to 50% of their original value after two years. Opting for modular designs with replaceable batteries or memory modules makes future upgrades far simpler.
Maintenance And Upgrade Strategies
Treat firmware updates like oil changes—they keep performance smooth and roll out new features. Aim to check for updates every quarter.
A dust-free lens prevents false triggers and blurred shots. When you pull the unit, use a soft cloth and mild cleaner on the lens and housing.
- Inspect weather seals and apply silicone grease annually to preserve waterproofing
- Test battery voltage with a multimeter before deployment to avoid surprise shutdowns
- Replace old SD cards every two seasons to reduce the risk of file corruption
Modular trail cameras let you swap batteries or sensors instead of replacing the whole unit. Over time, this can save 20–30% on upgrades and keep you focused on the field.
FAQ
Before you hang your next camera, these quick answers cut through the confusion and get you in the field faster. These pointers help you dial in the right gear before heading into the woods.
What’s the Difference Between No-Glow and Low-Glow Infrared?
No-Glow models rely on LEDs invisible to the human eye (and most wildlife). Low-Glow units put out a subtle red flash you’ll spot at close range.
Go with no-glow when you can’t risk spooking your subjects. If budget is tight but you still need extra reach, low-glow can stretch your dollar a bit farther.
How Do I Manage Cellular Data Subscription Costs?
Align your data plan with the number of photos you expect. Look for pay-as-you-go or seasonal packages that match hunting seasons and downtime.
- Send thumbnails only, then download full-resolution images in a batch
- Group cameras by purpose to keep data costs from overlapping
Key FAQ Highlights
- Stealth vs. Range: No-glow for silent performance, low-glow for a longer detection envelope.
- Data Plans: Choose a cap that fits your shutter clicks.
- Mounting Tips: Ratchet straps or locking brackets excel on uneven ground.
- AI Cameras: The extra investment buys fewer false alarms and on-device species IDs.
Mounting And AI Benefits
What Mounting Tips Work on Uneven or Slippery Surfaces?
Ratchet straps around tree trunks and locking brackets on stakes keep things rock-steady. On rocky patches, slip the camera into a camo housing and secure it with bungee cords to logs or stones. A sturdy setup not only protects your gear but also keeps thieves at bay.
“Balancing hardware and hide techniques stops theft and ensures stable shots.”
Are AI-Enabled Trail Cameras Worth the Extra Cost?
Built-in AI sifts through false triggers and tags species automatically, slashing your sorting time. In busy corridors where cameras snap hundreds of images daily, these features quickly pay for themselves. Plus, periodic firmware updates fine-tune AI accuracy over time.
These FAQs strip away the mystery around choosing the right trail camera for your adventure. Now you can pick the camera that fits your trail, your budget, and your style.
Ready to upgrade to a camera that answers these FAQs and more?
Experience scouting with Magic Eagle