
When you're looking for a good trail camera for the money, it's easy to get fixated on the price. But the best investment isn't the cheapest camera on the shelf—it's the one that becomes a reliable tool, consistently delivering clear, actionable intel from the field without surprise costs or headaches. It’s all about finding that sweet spot between essential features and an affordable price to get the most out of your scouting.
What Defines a Good Trail Camera for the Money
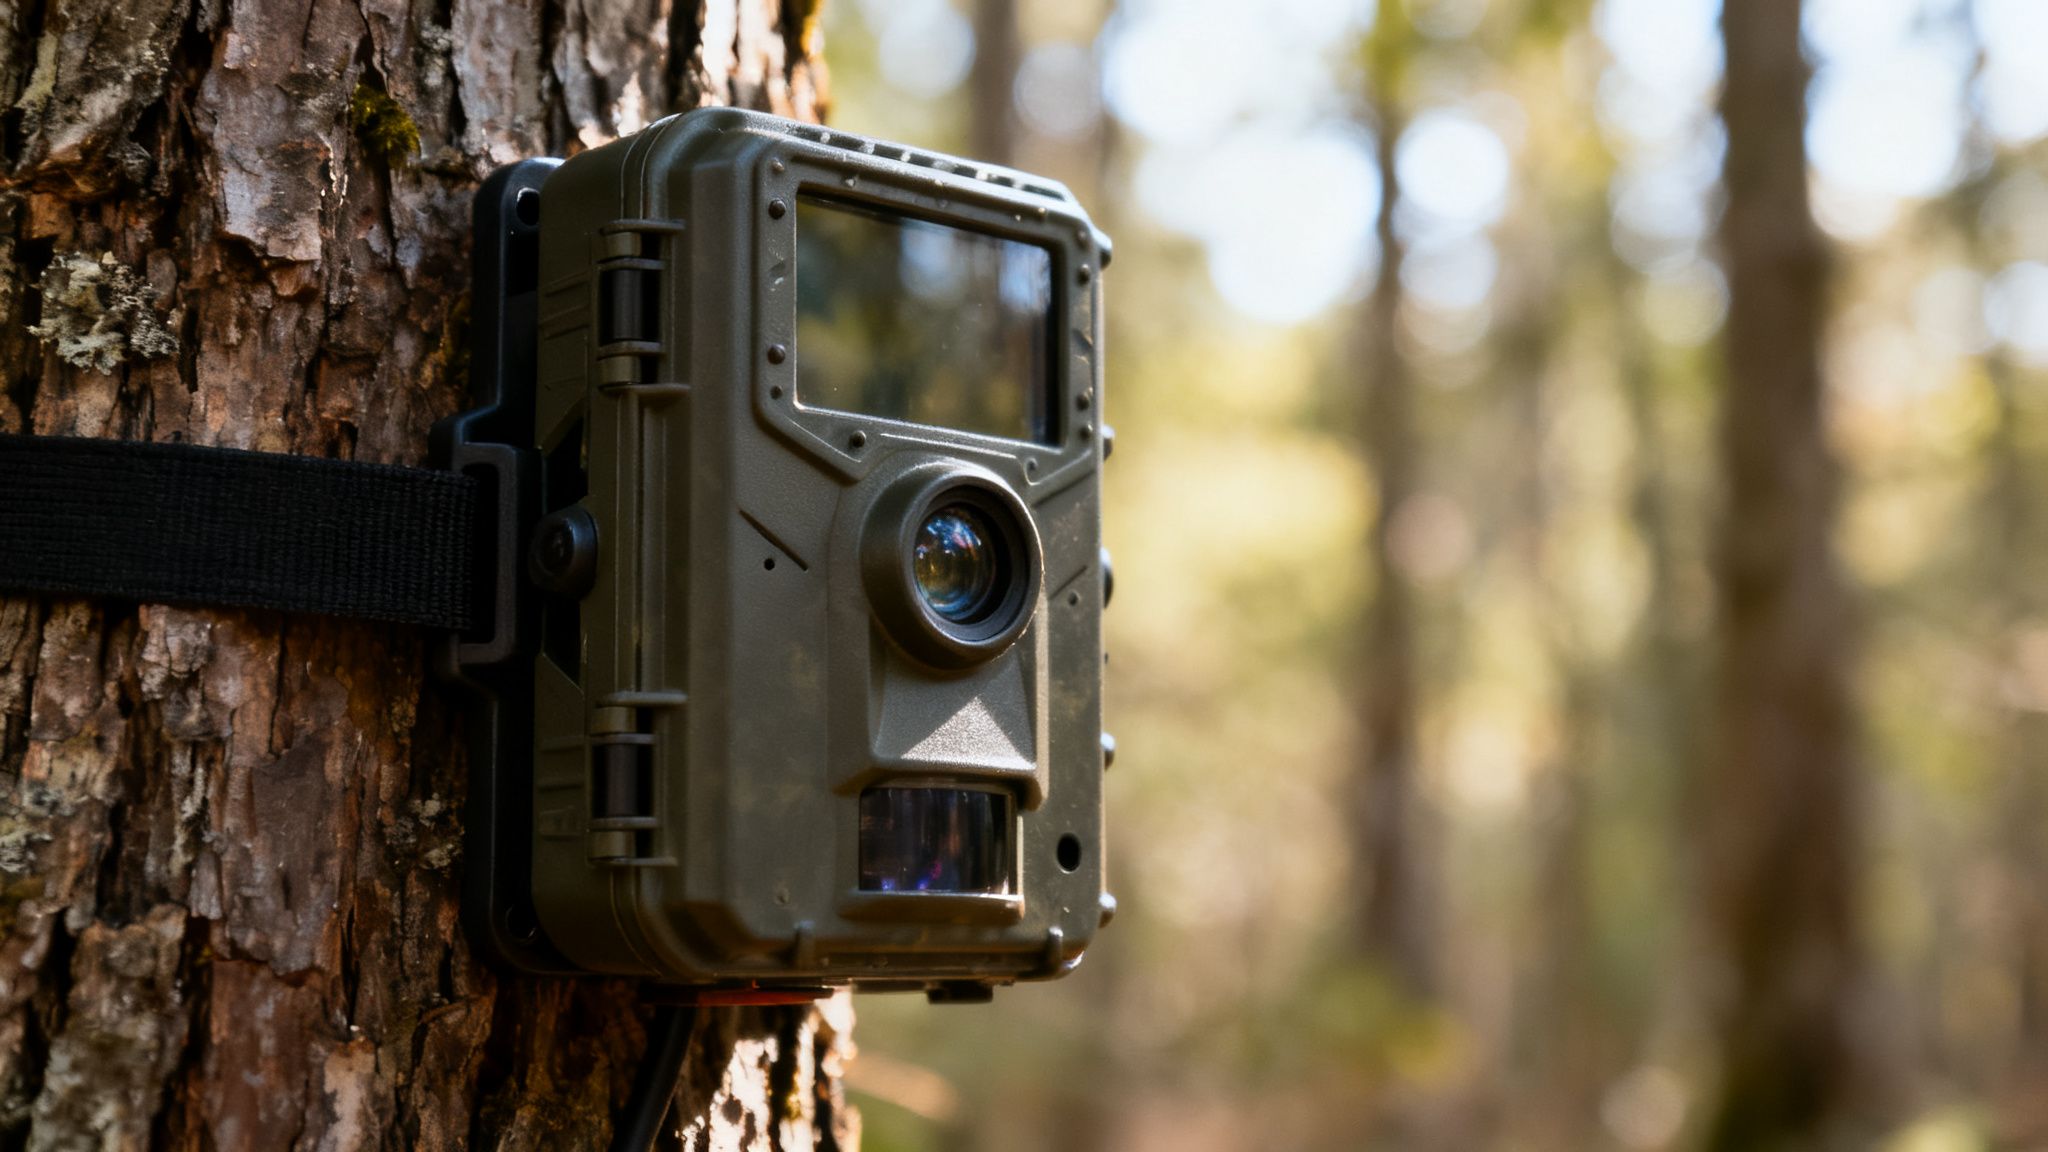
True value in a trail camera comes down to its ability to do its job without fail, saving you time and preventing those gut-wrenching missed opportunities. A cheap camera that doesn’t catch that crucial shot of a target buck or quits working in the first cold snap isn't a bargain. It's a wasted investment.
This is where the idea of "field-ready value" comes in—focusing on cost-effectiveness over the camera's entire lifespan.
It means prioritizing the features that actually help you succeed, whether you're scouting, securing property, or conducting research. To put it in perspective, think about the criteria used for picking the best drone with camera options for getting incredible footage. In both cases, the real goal is dependable performance that makes the cost worth it.
Moving Beyond Price to Performance
The trail camera market is absolutely booming, and there's a good reason for it. Valued at USD 125.7 million in 2025, it's on track to hit USD 211.3 million by 2033. That growth is being driven by serious hunters and wildlife managers who are tired of ineffective scouting tools.
Cellular models are at the heart of this shift. Traditional cameras just don't cut it in remote areas, but 4G all-in-one setups give you instant photos and sometimes even live video. Since over 70% of hunts happen where cell service is spotty, features like automatic network switching are no longer a luxury—they're a necessity. This one feature helps avoid the dead zones that plague an estimated 30% of budget cameras.
A truly good trail camera for the money isn't the one with the lowest upfront cost. It's the one that eliminates the hidden costs of wasted trips, missed animal sightings, and frustrating equipment failures.
To get a clearer picture of what separates a budget-bin gadget from a true field asset, let's break down the features. The table below compares what you typically get with a basic, low-cost camera versus a high-value, cost-effective model that’s built for performance.
Key Features Defining Trail Camera Value
| Feature Category | Basic (Low-Cost) Camera | High-Value (Cost-Effective) Camera |
|---|---|---|
| Connectivity | None (SD card only) or single-carrier 4G with poor signal. | Multi-carrier 4G with automatic network switching; stable app connection. |
| Image Quality | Low-resolution images, grainy night photos, slow shutter speed. | High-resolution photos (24MP+), clear IR or black flash night vision. |
| Trigger Speed | Slow (0.8s+), often misses fast-moving animals. | Fast (under 0.5s), captures the subject in the frame. |
| Detection | Basic motion sensor prone to false triggers (wind, leaves). | Smart detection with adjustable sensitivity and AI species recognition. |
| Power Source | Requires frequent battery changes (8-12 AAs every few weeks). | Efficient power use; compatible with solar panels for extended life. |
| Durability | Flimsy plastic housing, poor water resistance (IP54 or lower). | Rugged, weatherproof casing (IP66+) built for harsh conditions. |
As you can see, the "high-value" camera isn't just about fancy bells and whistles. Each feature is designed to solve a real-world problem, saving you time, money, and frustration in the long run.
The Core Components of Field-Ready Value
So, what should you really be looking for? It all boils down to a handful of practical, performance-driven features that give you the highest return on your investment. These are the things that separate a frustrating gadget from a powerful field companion.
- Reliable Connectivity: A cellular camera that actually sends images consistently saves you countless hours and gas money. It delivers intel when you need it most.
- Intelligent Motion Detection: Advanced sensors paired with AI species recognition filter out the noise—no more alerts for swaying branches or squirrels. This saves your battery and your data plan.
- Durability and Weatherproofing: Your camera has to survive rain, snow, and brutal temperatures. A well-built, weatherproof housing protects your investment for seasons to come.
- Efficient Power Consumption: Long battery life, especially when paired with a solar panel, means fewer trips to your spot and ensures your camera is always watching.
By focusing on these practical benefits, you can find a camera that delivers outstanding performance for its price. For an even deeper dive, you can also check out our guide on what makes a trail camera good.
The Seven Pillars of Trail Camera Performance
To find a trail camera that’s genuinely a good deal, you have to look past the flashy numbers on the box and focus on what actually works in the field. It’s a lot like buying a truck—you wouldn't judge its towing capacity by its paint job. In the same way, a camera’s real-world performance comes down to a handful of core components. Think of them as the engine and transmission, not just the shiny chrome.
These seven pillars are the foundation of any trail camera worth its salt. Understanding them will help you cut through the marketing noise and find a camera that delivers lasting value, season after season.
Let's break down what really matters.
1. Image and Lens Quality
The megapixel myth is the most common trap people fall into. A huge megapixel count looks great on paper, but it means absolutely nothing if the lens and image sensor are junk. It’s like having a giant bucket to catch rainwater (the megapixels) but sticking it under a tiny, dirty funnel (the lens).
A smaller, high-quality lens will always give you a sharper, clearer image than a big, cheap one. This is especially true at night, where a good lens and a powerful infrared (IR) or black flash are critical for getting a clear shot. Look for examples of nighttime photos that are crisp and well-lit, without that grainy, washed-out look you see on so many budget models.
2. Trigger Speed and Recovery Time
Picture this: a trophy buck walks quickly down a trail. A camera with a slow trigger speed—the time it takes to snap a photo after sensing motion—will give you a perfect picture of its backside. Or worse, an empty frame.
A fast trigger speed, ideally under 0.5 seconds, is non-negotiable if you want to capture animals on the move. It's the difference between knowing a buck was there and having a definitive photo to prove it.
Just as important is recovery time, which is how fast the camera can take a second picture. A quick recovery means you get a whole sequence of useful shots, not just one fleeting glimpse.
3. Cellular Connectivity and App Experience
The days of hiking into the woods just to swap SD cards are numbered. Modern cellular connectivity is the single biggest time-saver for any serious hunter or landowner. It sends real-time intel straight to your phone, saving you gas, time, and—most importantly—keeping your scent out of the area.
The market is shifting fast to reflect this. Sales of GSM-enabled models are projected to jump from USD 99.1 million in 2021 to USD 146.3 million by 2025. Hunters in huge markets like North America, where an estimated 62% of 15 million hunters use trail cams, are demanding this kind of efficiency. A solid system, like Magic Eagle's EagleCam 5, comes with built-in 4G that automatically finds the strongest signal, maintaining up to 98% uptime even in remote spots. You can dig deeper into the growing market for these cameras in this detailed industry report.
4. Battery Life and Power Efficiency
A trail camera with dead batteries is just a plastic box strapped to a tree. Constantly buying and changing batteries isn't just expensive; it also means more trips to your camera site, which defeats the whole purpose of remote scouting. A high-value camera is built to be power-efficient, easily lasting months on a single set of AAs.
For the ultimate in field longevity, look for models that work with external power sources:
- Solar Panels: A small, dedicated solar panel can trickle-charge your camera, keeping it running almost indefinitely in most conditions.
- External Battery Packs: These larger, rechargeable packs can power a camera through an entire season on a single charge.
5. Durability and Weatherproofing
Your trail camera lives outside, 24/7. It has to endure everything nature can throw at it—scorching heat, freezing rain, snow, and humidity. The housing has to be tough enough to handle it all without failing.
Look for an IP rating (Ingress Protection) of IP66 or higher. This number tells you how resistant the camera is to dust and water. An IP66 rating means it’s completely sealed against dust and can take a beating from powerful jets of water, so you know it will stay dry and functional through the worst storms.
6. Smart Detection and AI Features
How many times have you scrolled through hundreds of pictures of a swaying branch or a curious squirrel? It’s a massive waste of your time and the camera's battery. Modern cameras are starting to solve this with smart features that filter out the noise.
Advanced systems now use AI-powered species recognition to automatically sort your photos by animal—buck, doe, turkey, or coyote. This lets you jump straight to the images that actually matter. This is a game-changer for finding a good trail camera for the money, as it directly saves you hours of work and makes your scouting far more effective.
7. Anti-Theft and Security Measures
Finally, remember that your camera is a valuable piece of gear left unattended in the woods. Theft is an unfortunate but very real risk. A basic lockbox is a decent start, but today's technology offers much better ways to protect your investment.
Look for a camera with a built-in security suite. The most useful features include:
- GPS Tracking: Pinpoints your camera's exact location on a map if it gets stolen.
- Geofence Alerts: Sends an instant notification to your phone if the camera leaves a specific area you’ve defined.
- Remote Disabling: Lets you lock the camera from your app, making it completely useless to a thief.
These seven pillars are the true measure of a trail camera's worth. If you prioritize them, you can confidently invest in a tool that will perform when it counts and deliver the results you're looking for.
How to Match Your Budget to Your Mission
Finding the best trail camera for the money isn't about chasing the lowest price tag. It's about matching your investment to your specific mission out in the field. A camera that’s perfect for keeping an eye on your property might completely fail a serious hunter, and what works for a researcher is often overkill for a weekend hobbyist.
Think of it like buying a truck. You wouldn’t get a one-ton dually for a daily city commute, and you wouldn't try to haul a cord of wood in a small pickup. The trick is to figure out your job first, then find the right tool—and budget—for it. By defining your profile, you can sidestep paying for features you'll never use or, even worse, cheaping out and getting a camera that lets you down when it counts.
The Weekend Hunter and Property Watcher
For this user, reliability and simplicity are king. You’re not trying to pattern a ghost buck across a thousand acres; you’re watching a food plot, keeping tabs on a feeder, or making sure the back gate of your property is secure. Your mission is simple observation without the high stakes of a once-in-a-lifetime hunt.
The features that really matter here are the basics, done well:
- Decent Image Quality: You just need photos clear enough to tell what’s walking by, day or night. A solid 12-20MP camera with a good lens is plenty.
- Dependable Durability: The camera has to survive whatever mother nature throws at it. Look for a minimum IP66 weatherproofing rating to handle rain, snow, and dust.
- Good Battery Life: You might only check it once a month, so you need a camera that sips power.
Things like cellular connectivity or fancy AI are usually more than you need. The real value here is a tough, set-it-and-forget-it camera that just plain works.
The Serious Big-Game Hunter
Your mission is completely different. You're not just watching; you're gathering intel to build a strategy. Every piece of data matters, and disturbing your hunting spot as little as possible is non-negotiable. For you, advanced features aren't luxuries—they're essential tools that directly impact your odds of success.
This is where spending a little more pays off big time. A cellular camera isn’t just a nice-to-have; it's a must. Getting photos sent to your phone in real-time means you don't have to make scent-spreading trips to pull SD cards, which can easily push a mature buck to go nocturnal or leave your property altogether.
For the serious hunter, a cellular plan isn't an extra cost; it's an investment in stealth and efficiency. The fuel and time saved from just a few avoided trips can often cover the annual subscription fee.
Here are the key investments for this profile:
- Reliable Cellular Connectivity: A camera with a multi-carrier system that automatically finds the strongest signal is critical. You can't afford to miss an image because of spotty service.
- Fast Trigger Speed: A trigger of 0.3 seconds or less is what you need to catch a clear image of a buck moving quickly down a trail, not just his back half.
- AI Species Recognition: This feature is a game-changer. It filters out the endless pictures of squirrels and swaying branches, saving your battery, your data, and your sanity.
This flowchart breaks down the main decision-making process for anyone who needs timely information from their cameras.
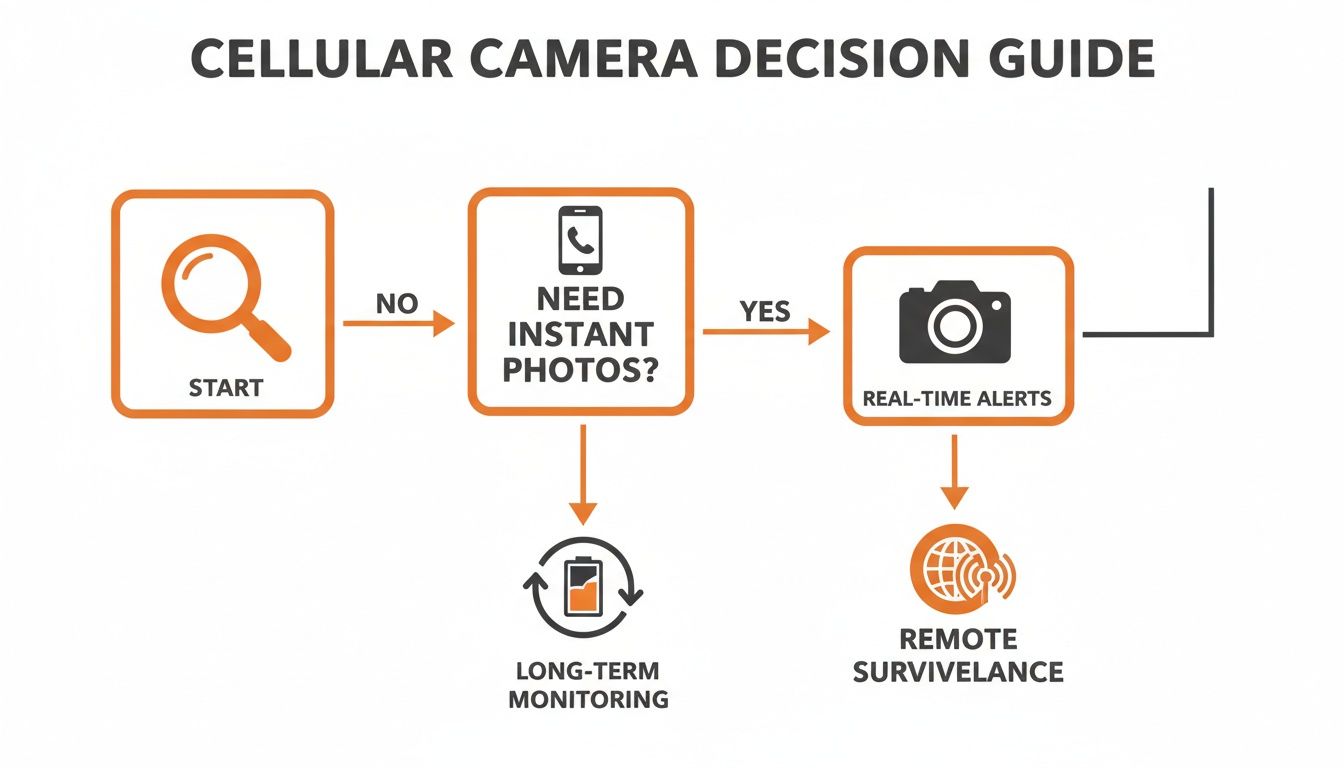
As you can see, the need for immediate intel is what really pushes people toward a cellular model. Thankfully, this technology has become far more accessible. If this sounds like your situation, you might want to check out our guide on finding an affordable cellular trail camera that delivers without breaking the bank.
The Professional Outfitter and Researcher
At this level, your trail camera stops being a hobbyist tool and becomes a professional data-collection device. Outfitters need to give clients the latest intel on animal movement, while researchers need bulletproof, reliable data for their studies. The stakes are higher, and so are the demands on the gear.
Your mission requires the absolute best in performance, durability, and features. Downtime is not an option, and with a fleet of cameras in the field, security becomes a real concern.
Top-tier features you should be investing in include:
- Live-Streaming Capability: The power to pull up a live feed from a stand location on-demand is a massive advantage for outfitters and serious property managers.
- Advanced Data Overlays: Getting info like temperature, moon phase, and barometric pressure stamped on every photo is crucial for deep pattern analysis.
- Robust Anti-Theft Suite: When you have thousands of dollars in cameras spread across a large area, features like GPS tracking and geofence alerts aren't optional—they're essential.
For this user, the upfront cost of the camera is secondary to its ability to perform without fail and deliver rich, actionable data. It's a direct investment in your business or your research, where true value is measured in reliability and advanced function.
Smart Setup and Placement for Maximum Results
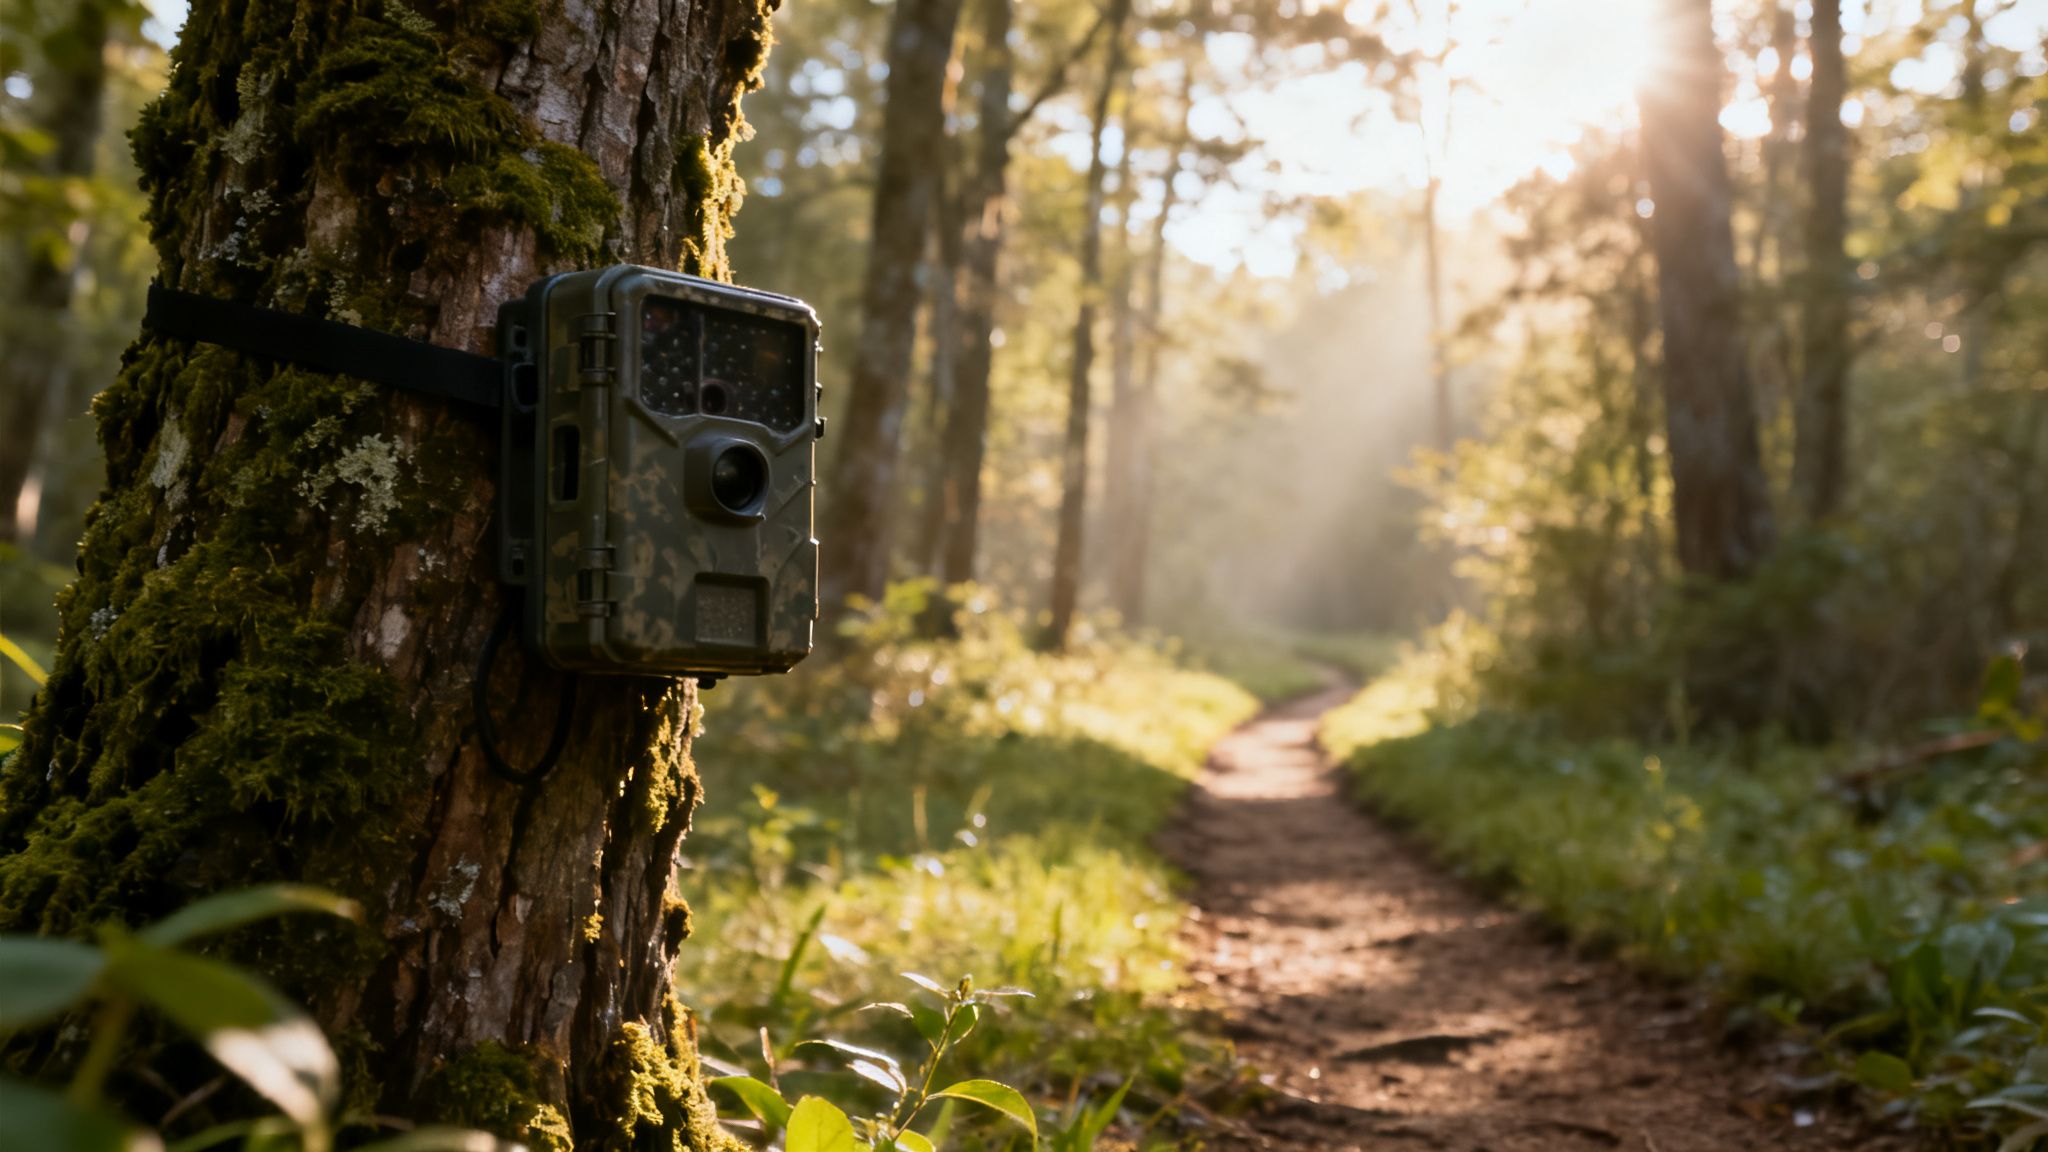 Even the most sophisticated trail camera on the market is basically useless if you put it in the wrong spot. Think of your camera as a silent scout—its success hinges entirely on where you position it and how you tell it to watch. Smart setup is what turns a good trail camera for the money from a simple gadget into a powerful intelligence-gathering machine.
The real goal is capturing clear, useful images while cutting down on those annoying false triggers. This means avoiding rookie mistakes like pointing it directly into the sunrise or sunset, which washes out photos and tricks the motion sensor. It’s a game of angles, height, and getting inside an animal's head.
Choosing the Ideal Location
First thing's first: you have to find high-traffic areas where animals naturally travel or hang out. Just sticking your camera on a random tree is like fishing in a dry lakebed. You need to focus on natural funnels and points of interest that concentrate animal movement.
A few spots that almost always deliver:
- Game Trails: Look for those well-worn paths, especially where multiple trails cross. These are the highways of the animal world.
- Water Sources: Creeks, ponds, and springs are magnets for wildlife, particularly in dry seasons. They're excellent places to monitor.
- Food Sources: Set up your cameras overlooking food plots, farm fields, or anywhere you find a heavy drop of acorns or fruit.
- Bedding Areas: Those transition zones between thick cover (where they sleep) and feeding areas are prime real estate for catching deer moving at dawn and dusk.
Once you’ve found a promising area, look for a sturdy, straight tree to mount your camera. A solid base is non-negotiable for preventing shaky videos and blurry photos when the wind picks up or a curious bear decides to use the tree as a scratching post.
The secret to great trail camera placement isn't just finding where animals are; it's about predicting where they will be and setting your camera to intercept that movement perfectly.
Fine-Tuning Height and Angle
With your location picked out, the next step is nailing the height and angle. This is where a lot of people mess up, ending up with an SD card full of swaying branches or just the tops of antlers. The trick is to aim your camera from the animal’s perspective.
As a rule of thumb, mounting the camera three to four feet off the ground is a great starting point. This height is generally level with a deer's body, giving you a clean, broadside view. If you’re watching a bait site where animals might stick around, however, placing the camera a bit higher and angling it down can keep it out of their direct line of sight.
Whenever you can, face the camera north or south. This simple move prevents the rising and setting sun from blasting directly into your lens, which is one of the biggest culprits behind washed-out images and false triggers. For more advanced tips, you can explore resources on strategic surveillance camera placement to really learn how to maximize your field of view.
Configuring Settings for Your Scenario
A truly high-value camera gives you the power to tweak its settings for each specific spot. A one-size-fits-all approach just doesn't work out here. You need to match the camera's behavior to the environment and what you're trying to learn.
Let’s break down a few common scenarios:
- On a Fast-Moving Trail: You’ll want to use burst mode (3-5 photos) with a very short delay (15-30 seconds). This makes sure you get multiple shots of an animal as it cruises by.
- At a Feeder or Mineral Lick: Here, you can switch to video mode or use a much longer delay (1-5 minutes) between photos. Animals will be hanging around longer, so this saves battery life and prevents you from getting hundreds of nearly identical pictures.
- Monitoring a Large Field: Crank up the sensitivity setting to detect movement farther away, but just know you’ll probably get more false triggers from wind and small critters.
Taking a few extra minutes to dial in these settings ensures every bit of data your camera collects is actually worth something. If you're just getting started and want to dig deeper, check out our guide on how to set up a trail camera for more detailed instructions.
Managing Your Data and Maintaining Your Gear
A trail camera is an intelligence-gathering machine, but its real power is wasted if you can't make sense of the data it collects. Getting hundreds of photos is one thing; turning them into a successful hunt or a detailed wildlife report is another. Proper data management and routine gear maintenance are what protect your investment and turn raw information into a real strategic advantage.
Think of your camera's output as raw ingredients. Without a recipe, you just have a pile of groceries. Modern cellular cameras with their dedicated apps are the cookbook, helping you organize, sort, and analyze everything your camera sees.
Turning Raw Photos into Actionable Intel
The days of just dumping thousands of photos into a single folder on your computer are long gone. The best value comes from a system that helps you see the bigger picture, and this is where a robust mobile app and cloud storage become essential tools, not just fancy add-ons.
With a smart system, you can start connecting the dots. AI-powered tagging automatically sorts images by species—buck, doe, turkey—saving you countless hours of manual review. From there, you can filter your captures to see only what matters most to your mission.
Better yet, mapping features let you drop pins for each camera, feeder, and key sighting on an interactive map. This visual log helps you understand how animals are moving across your property in relation to terrain and food sources, revealing patterns you'd otherwise miss.
By analyzing time, date, and weather data overlaid on your images, you can move from simple observation to predictive analysis. You’ll start to see exactly when and under what conditions that target buck is most likely to show up.
Creating a Simple Maintenance Routine
Your trail camera lives a tough life outdoors, battling rain, snow, heat, and humidity. A few minutes of preventative maintenance can dramatically extend its lifespan and ensure it performs flawlessly when you need it most. After all, a good trail camera for the money is one that lasts for many seasons, and proper care is key to making that happen.
Here’s a simple checklist to run through every time you visit your camera:
- Clean the Essentials: Gently wipe the camera lens, PIR sensor, and flash cover with a soft microfiber cloth. A clean lens is crucial for sharp photos, and a clear sensor ensures accurate motion detection.
- Check the Seals: Inspect the rubber gaskets around the camera's housing. Make sure they are clean, pliable, and free of any cracks or debris that could compromise the weatherproof seal.
- Secure the Mount: Give the mounting strap or bracket a firm tug to ensure it’s still tight. Trees can shift, and straps can stretch over time, potentially altering your camera's carefully aimed view.
Preparing Your Gear for the Off-Season
When the season ends, don’t just toss your camera in a bin and forget about it. Proper off-season storage is critical for battery health and long-term durability, ensuring your gear is ready to go next year.
Follow these simple steps before putting your camera away:
- Remove All Batteries: This is the most important step. Leaving batteries in during long-term storage can lead to corrosion that will permanently damage the camera's internal electronics.
- Format the SD Card: Before storing, it's a good practice to format the SD card. This clears any potential file errors and gives you a fresh start for the next deployment.
- Store in a Dry Place: Keep your camera in a cool, dry location away from extreme temperatures. A plastic tote in a closet or basement works perfectly.
This simple routine ensures that when you pull your gear out next season, it will work just as reliably as the day you put it away.
Answering Your Top Trail Camera Questions
Even after you've got the basics down, picking the right trail camera always brings up a few last-minute questions. This is where we clear the air on those lingering "what ifs" and "is it worth its" that always seem to pop up right before you pull the trigger. My goal is to make sure you walk away feeling 100% confident in your choice.
By tackling these common questions head-on, we can lock in the key ideas of value, performance, and what’s actually practical out in the field.
Are Cellular Trail Cameras Worth the Extra Money?
For anyone serious about scouting, the answer is a firm yes. The initial cost and the data plan are higher than a standard SD card camera, sure, but the real payoff is in the time you save and the power of getting intel in real-time.
Think of it this way: every trip to check a camera costs you fuel and, more importantly, your time. It also puts more human pressure on your spot, which can absolutely change how game animals behave. A cellular camera gets rid of all those trips.
Start thinking of a subscription plan as an operational expense, not a luxury. It's an investment in efficiency, stealth, and timely information—one that often pays for itself in a single season by putting you in the right place at the right time.
For landowners, those instant notifications offer priceless peace of mind, letting you know about trespassers or confirming deer movement the second it happens. Modern cameras with a built-in, multi-carrier SIM card make it even easier, taking the headache out of finding and activating a separate cell plan.
How Important Is Trigger Speed for Good Photos?
Trigger speed is one of the most critical specs, but it’s also one of the most overlooked. It’s that tiny fraction of a second between the sensor detecting motion and the shutter actually firing. A small difference here makes a massive difference in your results.
A slow trigger—anything over 0.5 seconds—is the main reason people get frustrating photos of a deer’s back end leaving the frame. Or worse, an empty shot where you know something was just there. The camera was just too slow to catch it.
When you're monitoring an active game trail, a trigger speed of 0.3 seconds or less is the gold standard. That speed ensures you get a clean, centered shot of the animal, giving you the best possible intel. A true high-value camera will always have a fast trigger and a quick recovery time, so you never miss the shot.
What Is the Biggest Mistake with Budget Cameras?
The single biggest mistake people make with cheap trail cameras is getting wowed by a huge megapixel number while completely ignoring the sensor and lens quality. It's a classic marketing trick that plays on the "bigger is always better" myth.
Plenty of low-cost brands will slap a huge number like 40MP on the box, but if the camera's core optics are junk, the images will be blurry, grainy, and useless, especially at night. This is usually the result of interpolation, where software just blows up a low-quality image to make it seem bigger without adding any real detail.
A high-value camera with a quality 12MP sensor and a good lens will take far sharper, more useful pictures than a cheap camera claiming twice the megapixels. Always look for real-world photo samples from other users, pay close attention to the night shots, and trust brands known for optical quality over inflated numbers.
How Can I Protect My Trail Camera from Theft?
Camera theft is a frustrating reality for anyone who puts gear in the woods, but today’s tech offers way better solutions than a simple lockbox. A steel security case is a good first step, but the best defense is a camera with smart, built-in anti-theft features.
These features turn your camera from a sitting duck into an active security device that can help you get your property back.
- GPS Tracking: This is the game-changer. It lets you see your camera's exact location on a map in your app, even if a thief moves it miles away.
- Geofence Alerts: You can draw a virtual circle around your camera's location. If the camera ever leaves that zone, you get an instant alert on your phone.
- Remote Photo Capture: Some of the best systems can be triggered to take a photo on command or will automatically send you a picture of the thief when it detects tampering.
These smart security tools provide incredible peace of mind and seriously increase your odds of recovering stolen gear. They turn a potential loss into a solvable problem, making them a must-have feature on any camera worth your money.
Ready to invest in a camera that delivers on all these fronts? The Magic Eagle EagleCam 5 offers the field-ready value you need, combining reliable cellular connectivity, AI-powered sorting, and a robust anti-theft suite to protect your investment and maximize your scouting success.