
A trail camera and its viewer app are a killer combo for modern scouting. This setup pairs a tough, field-ready camera with a powerful app right on your smartphone. It’s what lets you get images and videos from miles away, check your camera’s battery life, and even tap into a live feed without ever stepping foot in your hunting spot. Think of it as your digital eyes in the woods, connected directly to your phone.
From the Box to the Backwoods: Getting Started Right
When you unbox a new cellular trail camera, the first instinct is to race out to the woods and strap it to a tree. But trust me, a little prep work at home will save you a world of frustration later. This isn't just about popping in some batteries and an SD card; it's about making sure you have a rock-solid connection that will last you all season.
Today's integrated 4G cameras, like the Magic Eagle, have really simplified what used to be a headache. You no longer have to mess around with finding and activating a separate SIM card from a cell provider. Now, the activation is handled right through the camera's app, creating a clean link from the get-go.
The Critical First Activation
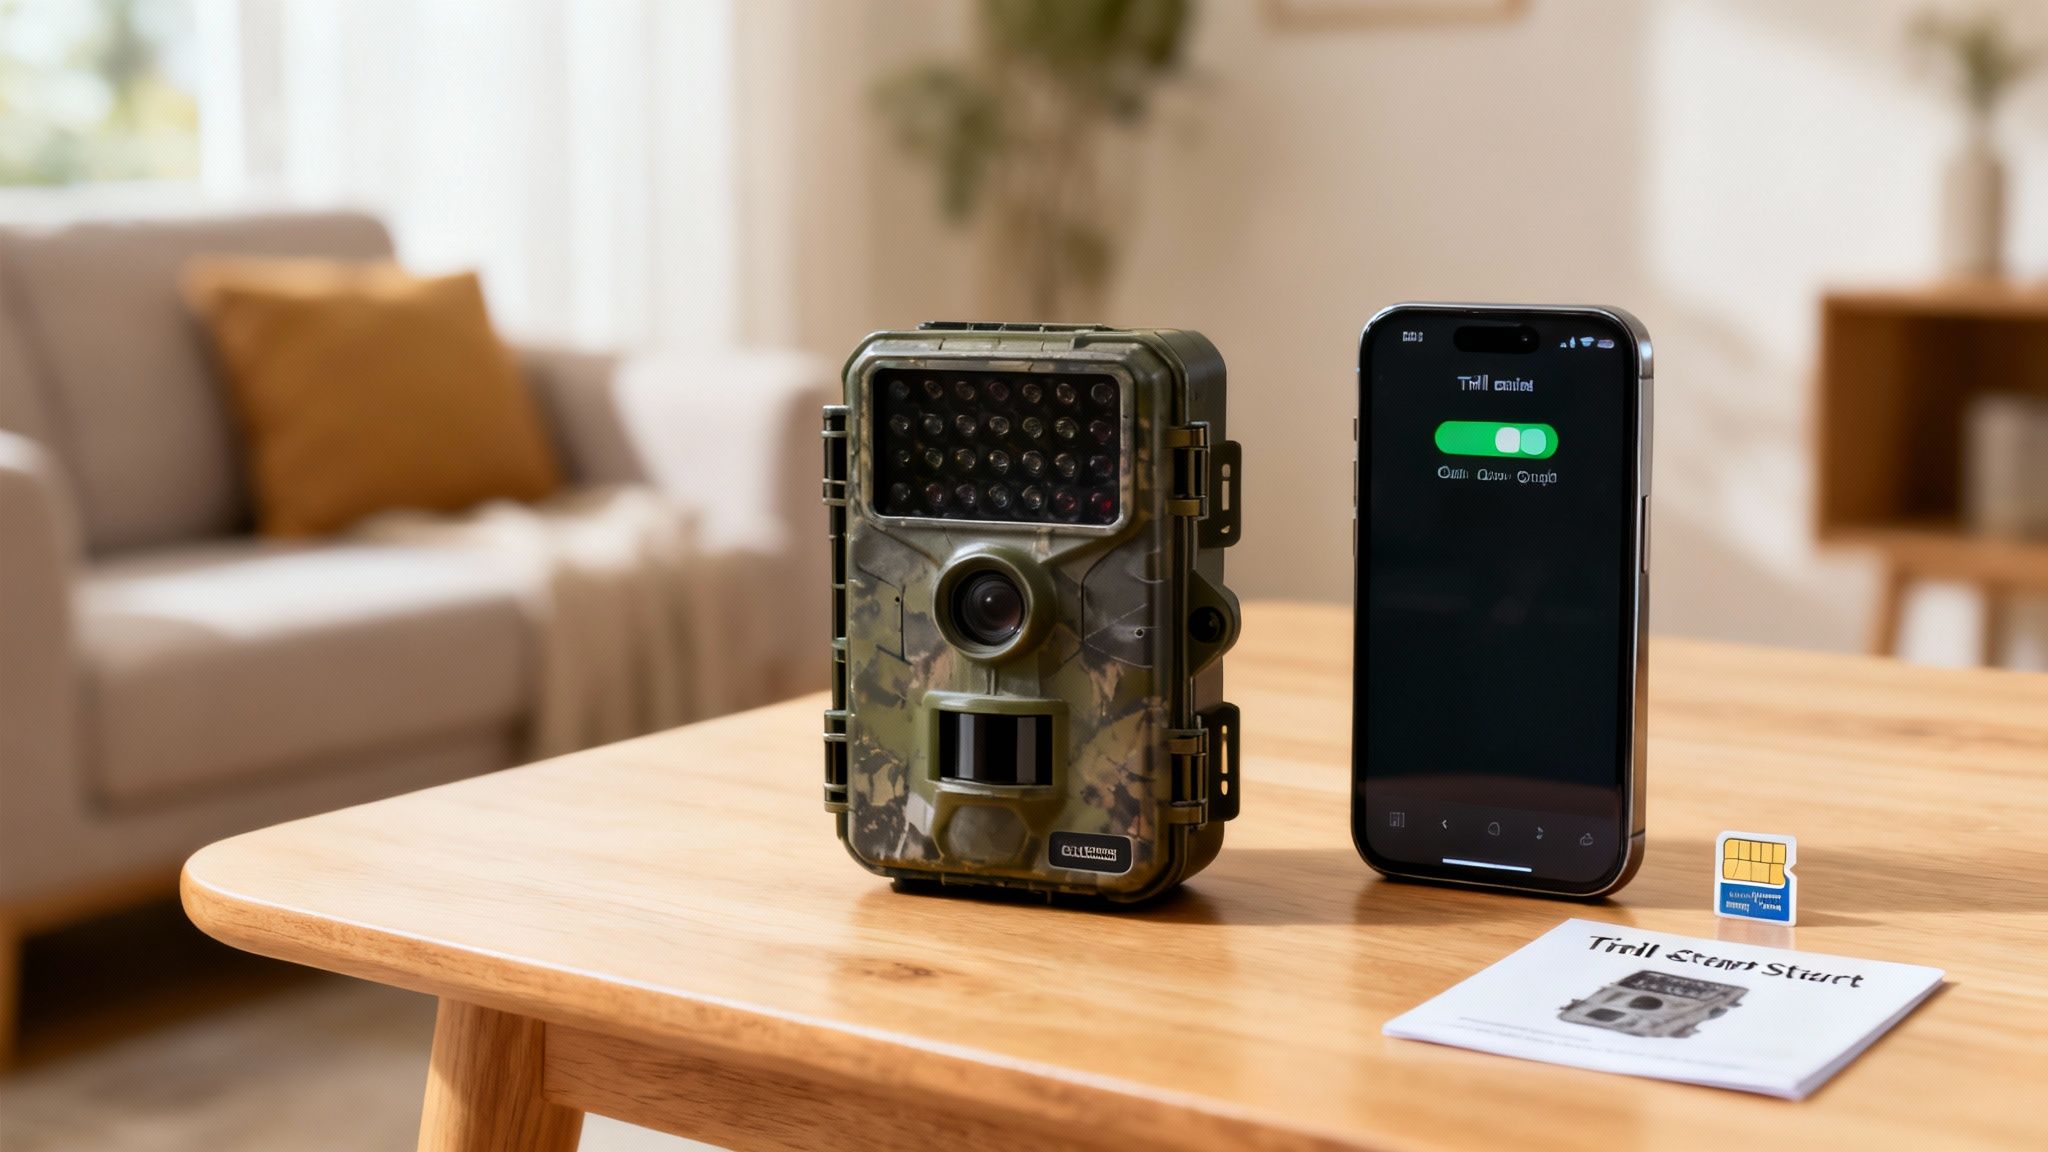
Your number one priority is to power on and activate the camera where you have a strong, reliable cell signal—your living room or backyard is perfect for this. Trying to activate it for the first time deep in a holler with a spotty signal is a recipe for disaster. A successful activation at home confirms two things: the camera's hardware works, and it can talk to the network properly.
Once you power it on, watch the indicator lights. They aren't just for show; they're your first diagnostic tool.
- A solid green light is what you want to see. It means you’ve got a strong 4G connection.
- A blinking or yellow light usually means the connection is weak, or the camera is still hunting for a network.
- A red light is the bad news bear. It typically means there's no signal, or you’ve got an activation problem.
This simple workflow is the key to a successful setup: power it on, get it activated, and run a test before you leave the house.
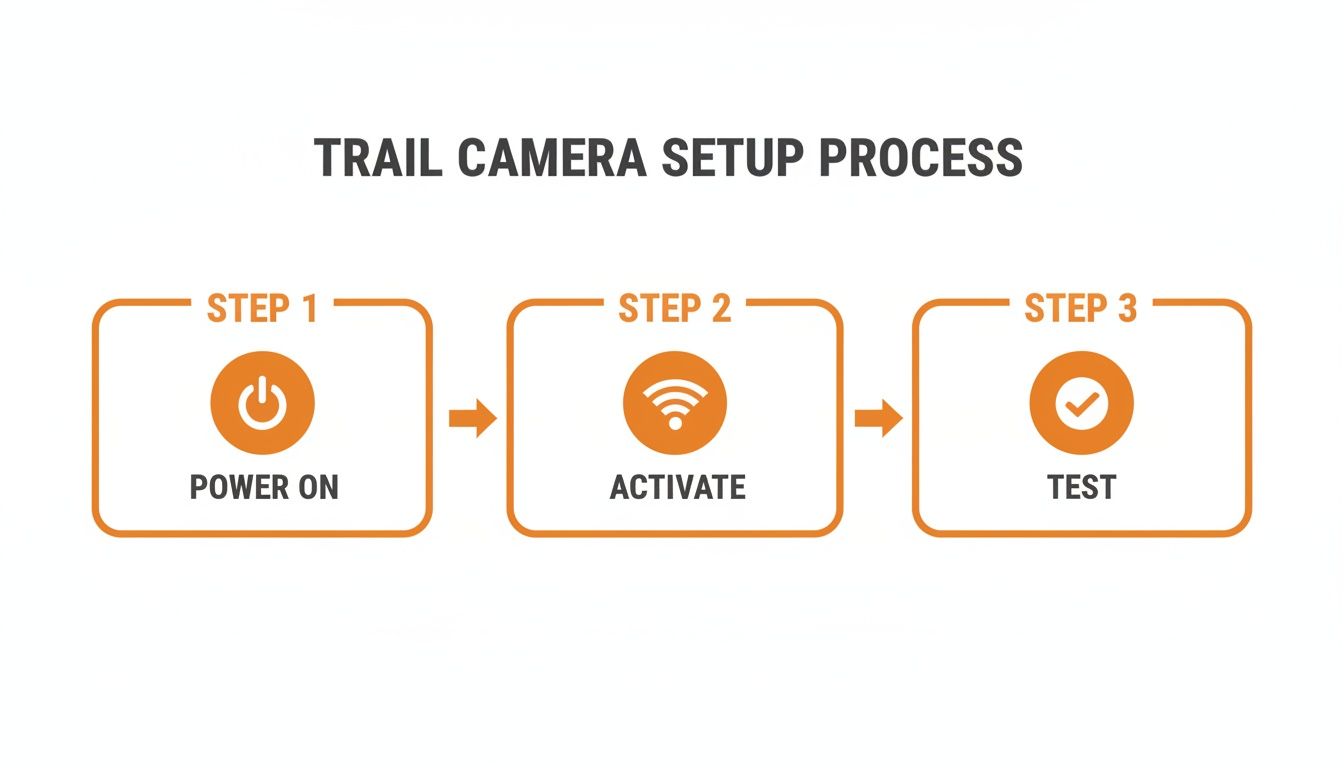
This highlights that a good field deployment always starts with a methodical check at home to ensure every piece of the system is communicating like it should.
If I can offer one piece of advice, it’s this: never leave for the field until you’ve received at least one test photo on your phone. That single action verifies that everything—from the camera’s trigger to the app’s notification—is working perfectly.
Taking these initial steps guarantees your trail camera and viewer are truly ready for the backwoods.
Alright, with your hardware prepped and ready to go, it’s time to create the digital link between your trail camera and its viewer app. This connection is the absolute lifeline for every piece of intel you’ll gather out there, turning a standalone camera into a powerful scouting tool you can check from your couch.
The whole process is pretty straightforward and designed to get you up and running fast.
First thing’s first: head to your phone’s app store and search for the Magic Eagle app. Once it’s downloaded, you’ll need to create an account. This is what securely stores your photos and videos in the cloud so you can access them from anywhere. Inside the app, look for an "Add Device" button or a big "+" icon—that's your starting point.
The QR Code Handshake
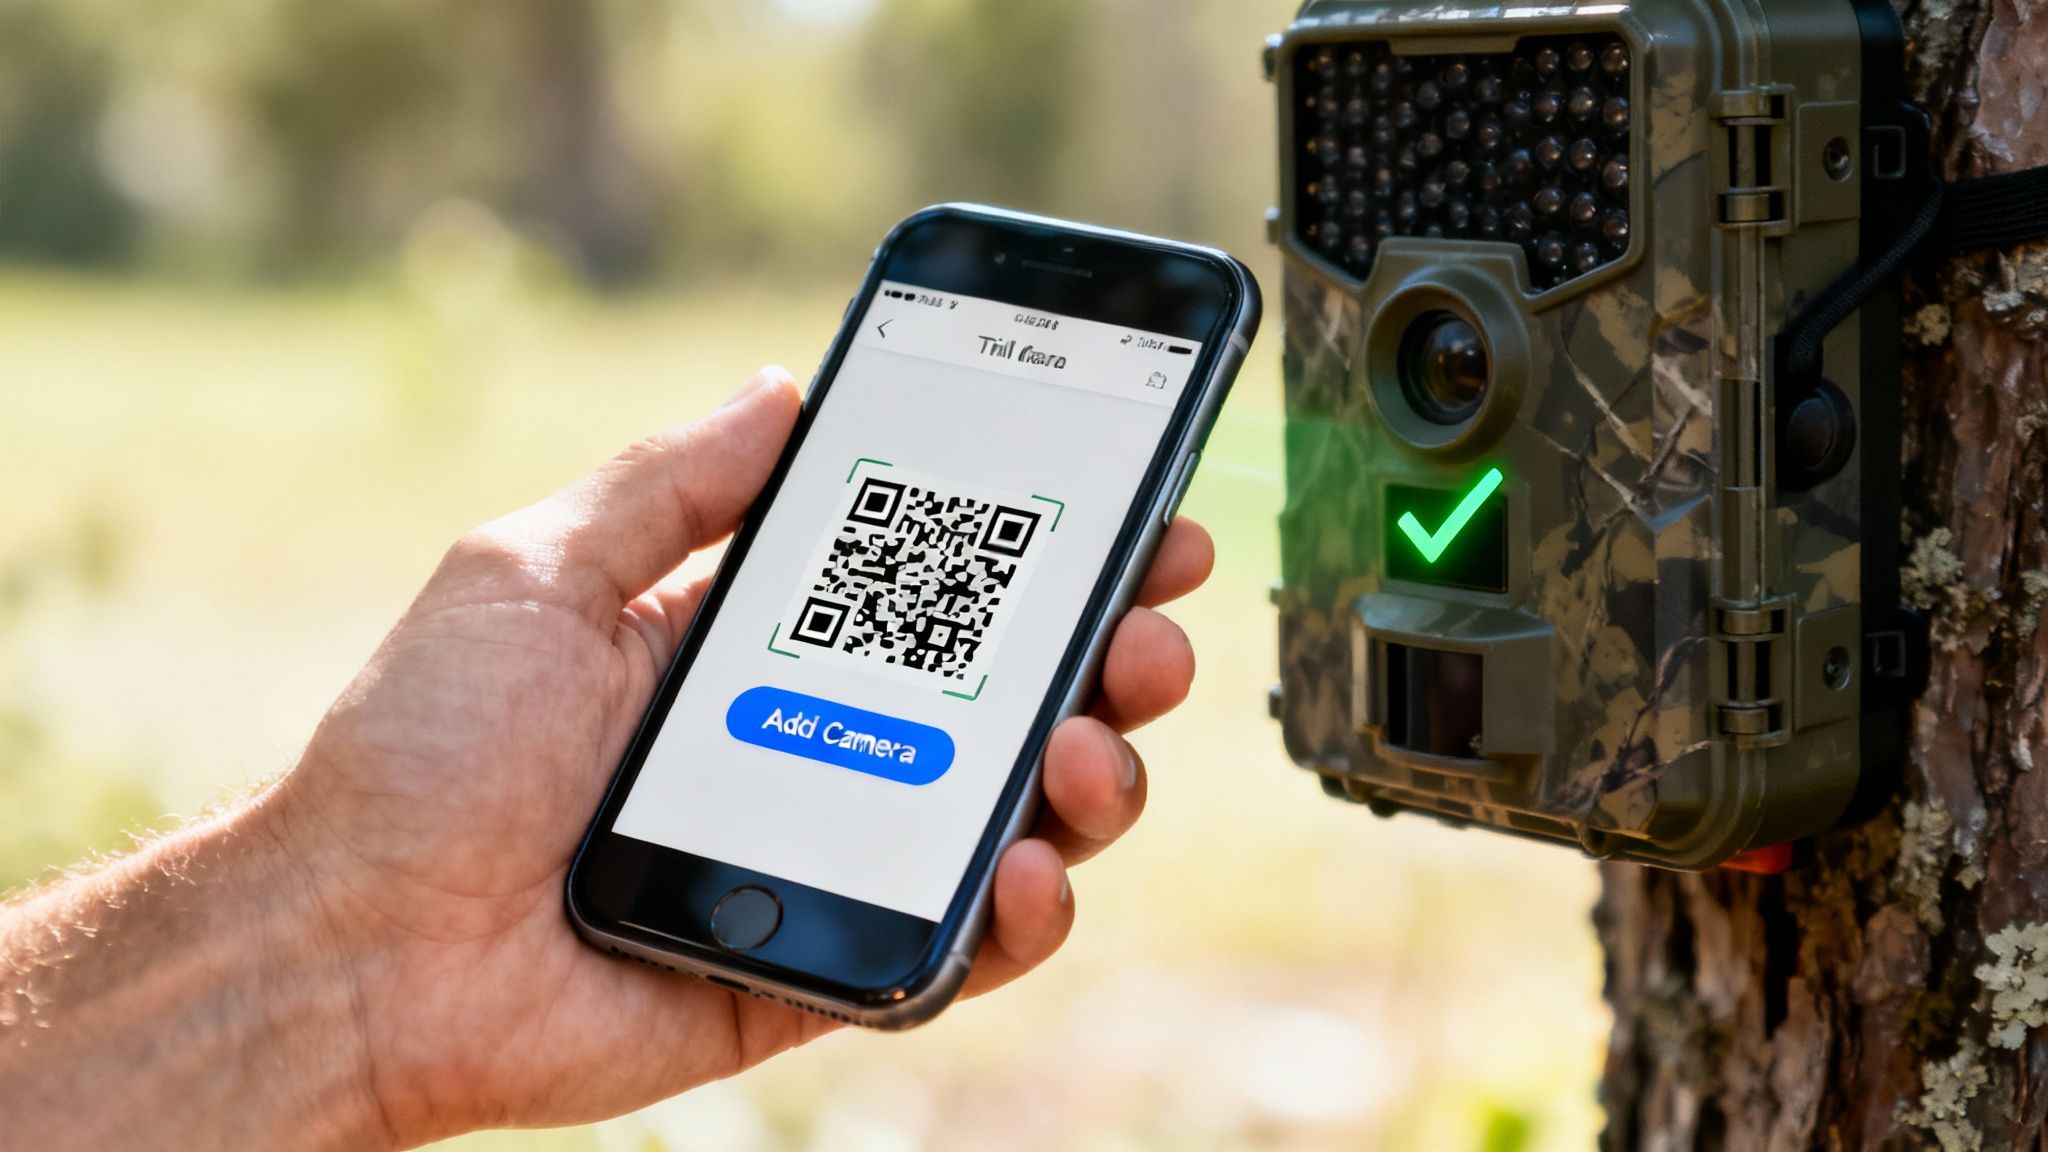
Most modern cellular cameras, including ours, use a QR code to make pairing painless. You’ll usually find this code on a sticker inside the camera's battery compartment or maybe in the manual. The app will ask for permission to use your phone's camera to scan it.
Just point your phone at the QR code, and the app should instantly recognize the camera’s unique ID and link it to your account. This is way better than the old days of manually typing in long, complicated serial numbers and getting it wrong. Think of it as a quick, secure handshake that confirms you're linking the right camera to your account.
Once it's synced, you'll see your new camera pop up on the app's dashboard, ready for you to configure. This successful sync also means the camera is now tied exclusively to your account, which is a fantastic anti-theft and data security feature.
Finalizing the Connection
After the scan, the app will ask you to name your camera. This seems like a small step, but trust me, it’s more important than it sounds. Give it a descriptive name like "Back 40 Ridge" or "Creek Bottom Feeder" instead of just "Camera 1." When you're running multiple cameras and trying to piece together movement patterns, this little bit of organization pays off big time.
Pro Tip: Don't skip the final test. Once the camera is named and the app shows it as "Online," walk in front of it and wave your hand to trigger the sensor. In a minute or two, you should get a notification on your phone with the test photo.
Getting that first photo is your green light. It confirms the entire system is working perfectly—from the camera's sensor to the cell network and all the way to your phone. If you want a deeper dive, check out our guide on how to connect a trail camera to your phone.
Now you can deploy your camera with total confidence, knowing that digital link is rock solid.
Turning Photos and Live Feeds Into Actionable Intel
Your camera is out, the connection is solid, and now the real work—and the fun—begins. This is the moment your trail camera and viewer app stop being just a gadget and become your eyes in the woods. This isn't about passively getting pictures; it's about actively turning that flood of data into a clear story of animal behavior.
Tapping into a live stream is easily one of the most powerful features of a modern cellular setup. With a single button in your app, you can get a real-time video feed straight from your camera's location. This is invaluable for immediate checks.
For example, you can confirm if a feeder is still throwing corn after a big storm, check if a mineral site got hit overnight, or even watch a buck work a scrape in real time. It’s a quiet, non-intrusive way to see exactly what’s happening at that very moment without leaving your scent all over the place.
Mastering the Media Gallery
Beyond the live feed, you'll spend most of your time in the app’s media gallery. Think of it as your digital command center for every single photo and video captured. A disorganized gallery is just noise; a well-managed one is a goldmine of patterns and intel.
The first step is to stop endlessly scrolling. Get familiar with the sorting and filtering tools. Nearly every quality app lets you organize your media by:
- Date and Time: Pinpoint activity during specific hours, like that magic window at sunrise, midday, or just after dusk.
- Camera Name: This is essential for comparing activity between different locations, like your "Back 40 Ridge" and "Creek Bottom Feeder" cameras.
- Media Type: Quickly separate videos from photos to analyze behavior versus just confirming an animal’s presence.
Your goal isn't just to see what was there, but to understand when and why. By filtering for photos taken between 7 AM and 9 AM over the past two weeks, you might discover a consistent travel corridor that was completely invisible before.
From Thumbnails to Trophies
Thumbnails are great for a quick scan, but the devil is in the details. When you see a promising image, don’t hesitate to request the high-resolution version. This is absolutely crucial for accurately aging a buck by examining its body or zooming in to identify unique rack features.
For instance, a low-res photo might just show a "decent buck." The full-resolution image, however, might reveal that it's the specific 10-pointer you've been after all season. That level of detail confirms whether an area holds the caliber of animal you're targeting.
It's also a smart move to download and save these key images. Create a dedicated album on your phone for "Target Bucks" or "Coyote Problems." This organizes your intel for quick reference, helping you build a visual history of the animals on your property. This strategic use of your trail camera and viewer is what elevates scouting from a guessing game to a precise science.
Using AI and GPS to Outsmart the Woods
Your viewer app does more than just show you pictures; it turns your trail camera into an intel-gathering machine. The days of sifting through thousands of photos of swaying branches or the same pesky raccoon are over. Today’s tech, especially AI and GPS, is a massive leap forward for anyone serious about scouting. It turns a flood of raw data into a real advantage.
The biggest time-saver, hands down, is AI species recognition. Instead of you having to sort every single capture, the app’s AI does it for you. It scans each image and tags what’s in it—deer, turkey, hog, you name it. That means with one tap, you can filter your entire gallery to show only mature bucks. This feature alone can cut your review time from hours down to minutes.
Building Your Digital Scouting Map
Beyond just identifying animals, the GPS baked into your trail camera and viewer app is where your strategy really comes to life. It lets you build a live, interactive map of your property. Forget paper maps and pins; this is a whole different level.
You can drop virtual pins right on the map to mark everything that matters:
- Camera Placements: Know the exact spot of every unit you’ve got in the field.
- Key Sign: Drop pins for fresh scrapes, rub lines, and core bedding areas the moment you find them.
- Food and Water Sources: Mark those white oak flats dropping acorns, hot agricultural fields, or critical creek crossings.
- Animal Sightings: Log where you see deer to start connecting the dots on their travel corridors.
This digital map becomes a living, breathing document of your hunting area. It shows you the patterns—how deer and other wildlife use the terrain as the season changes.
A well-maintained digital map is your single greatest asset for understanding property dynamics. It connects a buck's scrape line to his bedding area and shows you the perfect ambush point in between, all visualized in one place.
Geofencing for Unbeatable Security
Let’s be honest: one of the biggest worries for any camera owner is theft. Setting up a geofence is your best line of defense. It’s a simple feature that lets you draw a virtual boundary around your camera's location on the app’s map.
If that camera ever gets moved outside the zone you set, you get an instant alert on your phone. The camera’s GPS then starts broadcasting its location, letting you track it in real-time. It’s a proactive security measure that means even if someone tries to walk off with your gear, you’ll know immediately and have a real shot at getting it back. For a deeper dive, our guide on a trail camera with GPS tracking breaks down all the details.
To help you get these powerful features up and running, here’s a quick-start table for the Magic Eagle app.
Magic Eagle App Advanced Feature Setup
| Feature | Setup Action | Benefit for User |
|---|---|---|
| AI Species Tagging | Navigate to Settings > AI Filters and toggle ON for desired species (e.g., Buck, Doe, Turkey). |
Automatically sorts your gallery, saving you hours of manual review. Find target animals instantly. |
| GPS Location Pinning | When setting up a new camera, allow the app to access your phone's GPS. Tap 'Set Location' to drop a pin. | Creates an accurate map of your entire camera network for strategic placement and retrieval. |
| Geofence Security | Go to Camera Settings > Security > Geofence. Drag the pin to your camera's location and set a radius (e.g., 500 feet). |
Receive instant mobile alerts if the camera is moved, enabling real-time tracking and theft recovery. |
| Smart Notifications | In Notifications, customize alerts to trigger only for specific species (e.g., "Buck Only"). |
Reduces phone buzz from non-target animals, ensuring you only get alerted for what truly matters. |
Setting up these features takes just a few minutes but pays off all season long. You’ll scout smarter, protect your investment, and spend less time managing data and more time planning your hunt.
These AI and GPS tools are much more than just cool add-ons; they are essential for efficient, effective scouting. To maximize the insights gained from your trail camera data, it’s worth considering how diverse AI tools for content creation might be adapted to analyze images, videos, or even environmental data, providing a broader perspective for smarter scouting. By making these functions part of your routine, you can stop guessing and start hunting based on hard data.
Field Strategies for Power, Placement, and Performance
Your fancy new trail camera and its app are only as good as your setup in the field. I've seen it a hundred times: a poorly placed camera delivers nothing but washed-out photos and false triggers from a waving branch. A dead battery? Well, that means you get nothing at all.
Mastering the craft of in-field setup is what separates getting a few random pictures from gathering consistent, reliable intel all season long. Let's dig into what really matters.
The first thing I always consider is the sun. Pointing a camera directly east or west is a rookie mistake that guarantees backlit, useless images at sunrise and sunset—precisely when deer are moving most.
Always, always aim your camera north or south whenever possible. This keeps the sun at the camera's back, dramatically improving your image quality and making sure you can actually count the tines on that buck walking by. It's a simple adjustment that makes a world of difference.
Choosing Your Power Source
Next up is power, a decision that can make or break your entire season. Your two main options are high-performance lithium batteries or a dedicated solar panel setup. Each one has its place, and the right choice depends entirely on your specific scenario.
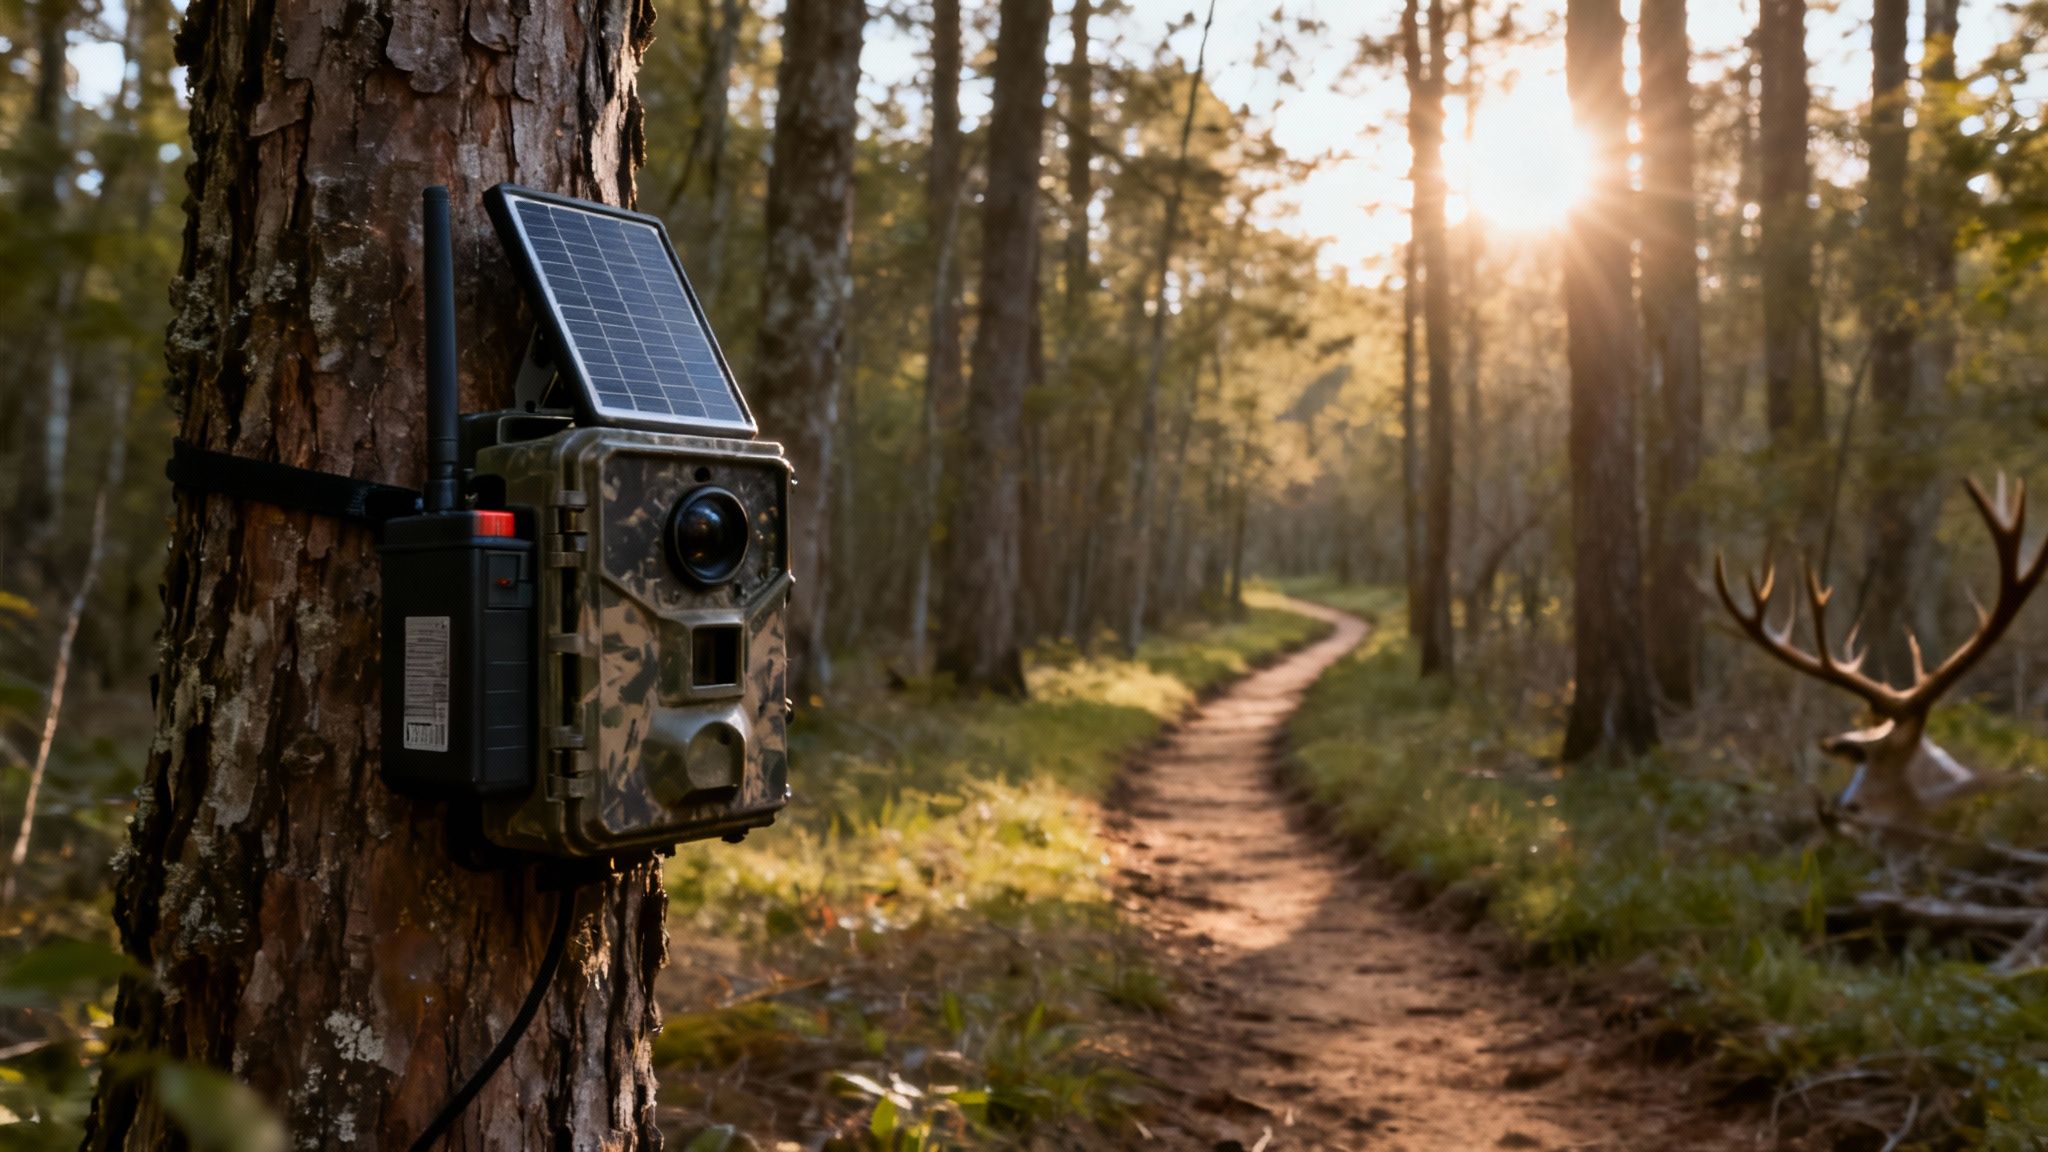
- Lithium Batteries: These are my go-to for rock-solid reliability, especially in extreme temperatures. They keep chugging along in the deep cold where alkaline batteries just give up. Their long life makes them perfect for those set-and-forget locations you won't be able to visit for months.
- Solar Panels: A small solar panel hooked up to a rechargeable battery pack is a fantastic long-term solution. It's especially useful for high-traffic areas like feeders or mineral sites where your camera is transmitting constantly. As long as the panel gets a few hours of direct sunlight each day, it provides a constant trickle charge for nearly indefinite power.
My rule of thumb is this: for remote, hard-to-reach spots I only check once or twice a season, I trust lithiums. For cameras on food plots or bait sites I can get to more easily, a solar setup is a total game-changer that pays for itself in saved battery costs.
Setting the Right Height and Angle
Getting the camera's height and angle right is just as vital as power. For whitetail deer, the standard is about three to four feet off the ground, aiming for a nice chest-level shot.
But you have to adapt to your target species. If you're after bears, you might want a higher, downward-angled placement. For turkeys, a lower position is far more effective. The goal is to capture the animal's whole body, not just its legs or back. Using versatile mounting solutions can make all the difference here. If you're looking for ideas, check out our guide on trail camera stands.
Finally, don’t blow your budget by overlooking your data plan. The global trail camera market was valued at around USD 330 million in 2024, a number driven by hunters like us demanding more and better connectivity. It's no surprise when you hear that roughly 62% of North American hunters now rely on trail cameras for scouting.
Choose a plan based on how you scout. If you plan to live stream often and pull down high-resolution videos on demand, you'll need a bigger data bucket than someone who's just getting a few photos a day. Matching your plan to your actual usage is the best way to prevent surprise bills and ensure your camera stays connected when that monster buck finally shows up. You can read more about the growth of the trail camera market on verifiedmarketreports.com.
Solving Common Field Issues from Your Phone
Even the most dependable gear hits a snag out in the woods. The good news? With a modern cellular trail camera and viewer app, you can solve most problems without ever leaving your couch. This is a massive advantage—saving you time, fuel, and unnecessary trips that could spook game in your core area.
The most common—and frustrating—issue is sudden radio silence. No new pictures for hours, or even days. Before you panic and assume the camera is dead, pop open the app and run through a quick diagnostic checklist. This is your first line of defense and solves the problem 90% of the time.
The Remote Diagnostic Checklist
Your app's dashboard is packed with real-time status updates that can tell you exactly what’s going on. Before you do anything else, check these three critical data points:
- Battery Life: This is the number one culprit, hands down. A camera that’s transmitting frequently or fighting cold weather will chew through batteries. If the app shows power is low, you’ve found your issue.
- Signal Strength: A weak or spotty signal can stop a camera from sending images, even if it's still snapping them. If your app shows one or two bars, the camera might be struggling to upload, especially bigger video files.
- Data Plan Status: Did you burn through your monthly photo limit? It’s an easy thing to overlook, especially during the rut. Your app should clearly show your data usage and whether the plan is active.
This simple three-point check can instantly pinpoint the cause of a silent camera, all from your phone.
Fixing Blurry Images and Laggy Streams
Another headache is blurry photos, particularly at night. More often than not, this isn't a camera flaw but something in the environment. A single stray spiderweb or a dangling leaf in front of the lens can wreak havoc on the autofocus and infrared flash. While you can't wipe it off from home, you can use the live stream feature to confirm if something is blocking the view before you make the trip.
A laggy or failing live stream is almost always a signal issue. Don't just give up. Try dropping the video quality in the app settings from HD to SD. This reduces the data demand and can often forge a stable connection, even with a weaker cellular signal.
On that same note, if you're getting hammered with "false triggers"—endless photos of a swaying branch—you can adjust the motion sensitivity remotely. Dropping the sensitivity from high to medium can slash these unwanted images, saving both battery life and data. By using the app as your remote control, you can fine-tune performance and troubleshoot problems effectively, keeping your boots out of the woods until it's actually time to hunt.
Ready to gain complete control over your scouting from anywhere? The Magic Eagle EagleCam 5 gives you the power to diagnose issues, adjust settings, and get live intel without leaving home. https://magiceagle.com