
A trail camera reader is your bridge from the woods to your screen. It's the device that lets you pull photos and videos from your camera's SD card and view them on your phone or computer. Whether you're using a physical card reader or a modern cellular app, this is how you turn field intel into actionable scouting data.
From Field to Phone: Instantly Accessing Your Trail Cam Photos
Getting your hands on those trail camera photos is where the real excitement begins. Nothing beats the anticipation of checking a camera that’s been soaking in a prime location for weeks. There are two main ways to get this done, each with its own rhythm and set of advantages.
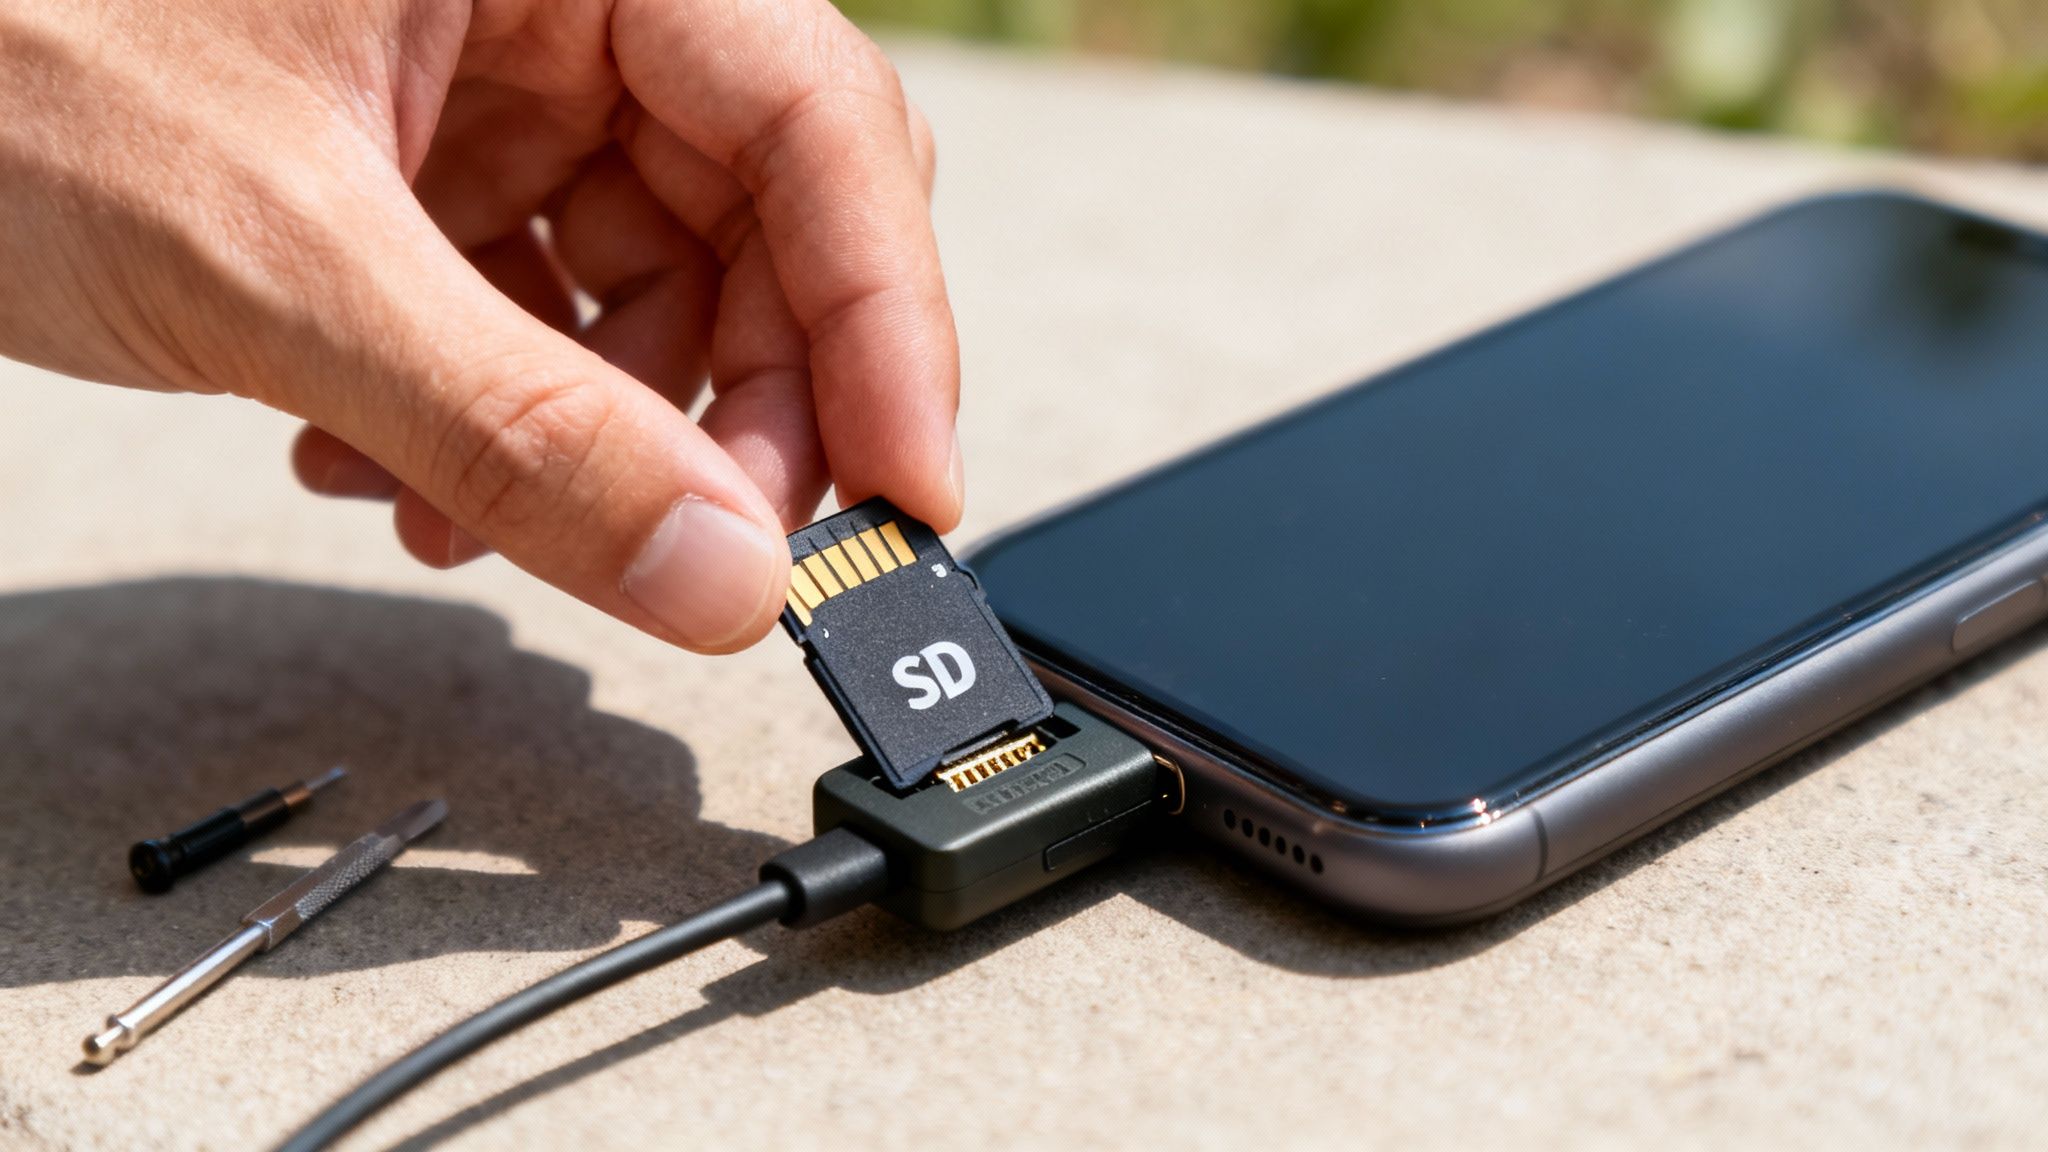
The first is the classic, hands-on approach: using a physical SD card reader. This method is straightforward—you swap cards in the field, plug the reader into your phone (via Lightning or USB-C) or computer, and start scrolling. It’s reliable, doesn’t depend on batteries, and gives you total control over the process.
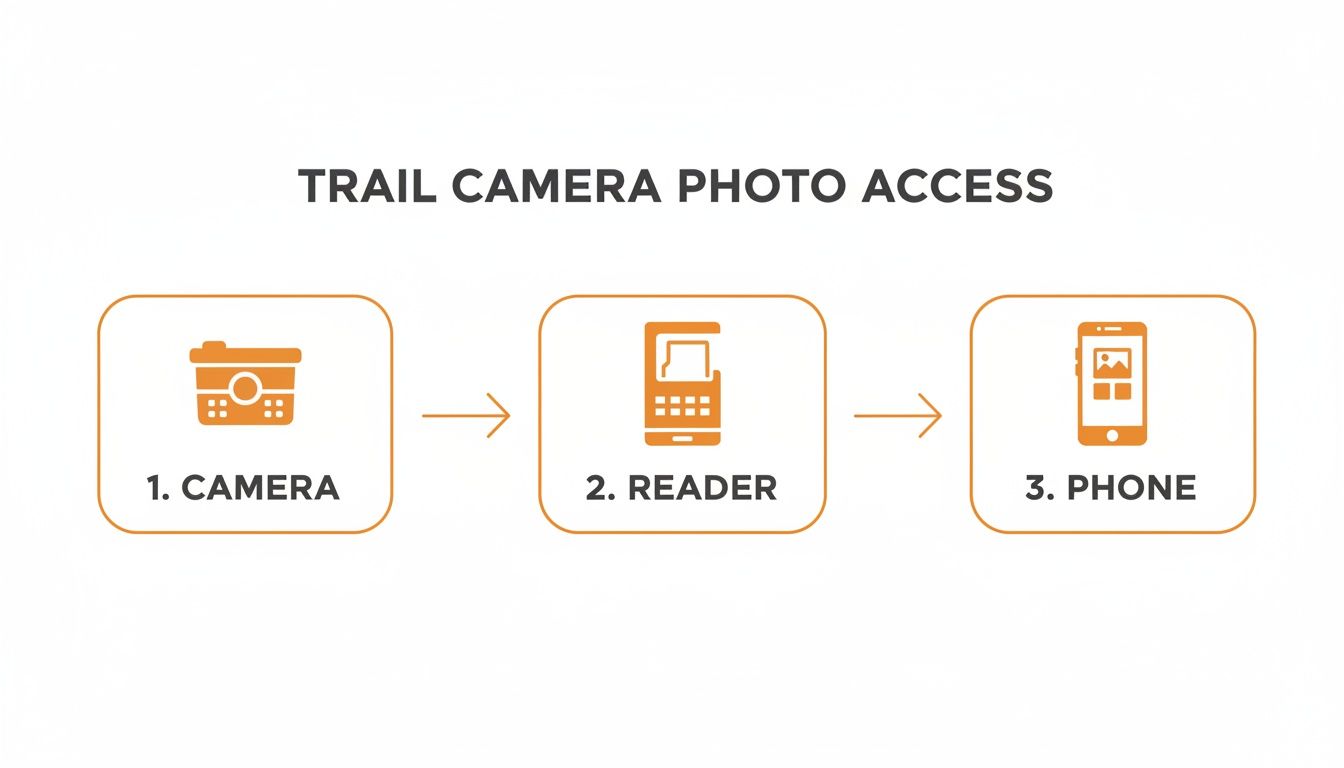
This simple diagram breaks it down perfectly: the camera captures the image, the reader transfers it, and your phone displays it. It's a proven workflow that just works.
The Convenience of Cellular
The second path is all about modern convenience, using cellular trail cameras to bypass the physical reader entirely. Instead of pulling cards, the camera automatically sends photos and videos straight to a dedicated app on your phone, like the one we've built for MAGIC EAGLE cameras. This gives you real-time updates without ever having to step foot in the woods and risk disturbing your spot.
For a deeper dive into this setup, check out our detailed guide on connecting a trail camera to your phone.
Trail Camera Reader Methods At a Glance
So, which method is right for you? It really depends on your scouting style. This table breaks down the key differences to help you decide.
| Feature | SD Card Reader (Manual) | Cellular Camera App (Automatic) |
|---|---|---|
| Speed of Access | Delayed; requires physical visit to camera site. | Near-instant; photos transmit in real-time. |
| Convenience | Requires swapping cards and carrying a reader. | Completely hands-off; view from anywhere. |
| Disturbance | High; requires entering the area to pull cards. | Zero; no need to visit the camera. |
| Cost | One-time purchase of a reader. No recurring fees. | Monthly or annual data plan subscription required. |
| Best For | Local spots, budget-conscious scouting, areas with no cell service. | Remote properties, security monitoring, time-sensitive scouting. |
Ultimately, deciding between a manual card pull and the ease of a cellular system comes down to your personal strategy. Do you enjoy the ritual of checking cameras in person, or is the immediate feedback from an app more valuable for your hunt?
This technology is exploding for a reason. The global trail camera market is projected to hit USD 203.3 billion by 2032, showing just how essential this gear has become. In North America, where an estimated 62% of hunters use trail cameras, having a reliable way to access photos is no longer a luxury—it’s a necessity.
The following sections will give you practical, in-depth guidance on mastering both of these methods, so you can make the most of every capture.
Mastering the Manual Card Pull with an SD Reader
For a lot of us, there's a certain satisfaction that comes with the manual card pull. It’s that hands-on process of walking your property, swapping out SD cards, and feeling the weight of potential scouting intel right there in your pocket. This method is as reliable as it gets, giving you total control without having to worry about cell signals or monthly subscriptions.
But to do it right, you need an efficient system. And that system starts with the right gear—specifically, the trail camera reader that connects your camera's captures to your phone or laptop.
Choosing Your Reader Device
The market is flooded with options, but they really boil down to three types based on what you're plugging them into. Your choice is simple: what device will you use to view your images?
- For iPhones: You'll want a reader with a Lightning connector. These are made to plug straight into your iPhone or iPad, letting you pull up your images directly in the Photos app.
- For Androids: The vast majority of modern Android phones use a USB-C connection. A USB-C card reader is your best bet for speed and compatibility.
- For Laptops: A standard USB-A or USB-C reader will do the job. A lot of newer multi-function readers come with several different connectors, which is a great all-around choice if you find yourself switching between your phone and a computer.
Pay attention to build quality when you're buying. A cheap, flimsy reader might quit on you in the cold or just break from bouncing around in your pack. Spending a few extra bucks on a durable, weather-resistant model is always a smart move.
Creating an Efficient Field Workflow
An organized approach in the field saves a ton of time and prevents silly mistakes. Don't be the person who just shows up with a pocketful of loose SD cards.
Come up with a simple system. I keep a small, waterproof case with labeled slots for each of my camera locations. When I get to a camera, I pull the "full" card and immediately pop in a fresh, empty one. This keeps my time at the site to a minimum, which also means I'm leaving less scent behind.
Pro Tip: Always format your SD card in the trail camera itself, not on your computer. This guarantees the card is perfectly set up for that specific camera model and dramatically cuts down on the risk of corrupted files. It’s a tiny step that prevents major headaches.
The quality of your memory card is just as crucial as the reader. A slow or unreliable card can lead to missed photos or, even worse, lost data. If you're looking for top performance, our guide on choosing the best SD card for a trail camera has some expert recommendations.
Troubleshooting Common Connection Problems
Even with the perfect setup, things can go wrong. So, what do you do when you plug in your trail camera reader and get... nothing?
First, check the simple stuff. Make sure the reader is seated all the way in the port and that there's no dirt or pocket lint blocking it. Sometimes just unplugging it and plugging it back in does the trick. If that fails, try restarting your phone or computer.
If you can see the files but they won't open, you might be dealing with a corrupted card. This often happens if the card was pulled while the camera was still in the middle of writing data. Always power your camera down before you take out the card.
By creating a smooth, repeatable process, the manual card pull becomes an effective—and honestly, enjoyable—part of your scouting strategy.
The Modern Workflow of a Cellular Trail Camera App
Forget trekking out to your camera spot just to pull an SD card. The old way of doing things is officially dead. Today, the best trail camera reader is an app on your phone, and it’s completely changed the game for hunters and anyone scouting property.
Cellular trail cameras deliver photos and videos straight to you, which isn't just a matter of convenience—it’s a huge strategic advantage. Instead of finding out a monster buck walked past your stand two weeks ago, you get a notification the second it happens. This real-time intelligence lets you adapt your strategy on the fly, basing decisions on what’s happening now, not on old, stale information.
From Activation to First Photo
Getting a cellular camera up and running used to be a headache, but it’s become incredibly simple. Most modern cameras, like the MAGIC EAGLE EagleCam 5, have a dead-simple activation process handled right inside their app. You’ll usually just scan a QR code on the camera, pick a data plan that fits your needs, and the camera automatically hooks up to the strongest local cell network. No fuss.
Once it's set up and strapped to a tree, the camera does all the work. The sensor gets tripped, it snaps a photo or records a video, and immediately starts sending it to the cloud. A few moments later, your phone buzzes with a push notification, and the new image is waiting for you in the app’s gallery. It’s that easy.
Navigating the App Interface
A good cellular camera app is way more than just a place to look at pictures. It’s your scouting command center. The whole experience is built around giving you immediate access to your intel and making it easy to sort through, turning what used to be a simple reader into a serious analytical tool.
Here are a few key features you’ll almost always find:
- Live Photo Gallery: New captures pop up in chronological order. Most apps also let you filter everything by camera, date, or even the type of animal.
- Video Playback: You can watch your video clips right inside the app, so there’s no need to download massive files to your phone first.
- Camera Settings: Tweak your camera’s settings from anywhere. Want to change the photo resolution, switch to burst mode, or adjust the trigger sensitivity? You can do it from your couch.
This market is exploding for a reason—the technology works. Cellular trail cameras are a booming business, with the global market projected to hit USD 375.16 million by 2034. Features like SignalSync technology are delivering up to 95% uptime in remote spots, while built-in weather data helps hunters predict animal movement with uncanny accuracy, seriously cutting down on wasted time in the stand.
Advanced Features That Change the Game
The real magic of a cellular app is in its advanced analytical tools. These features dig into your photos and pull out insights that would take you hours of manual work to uncover. For anyone curious about the tech making this possible, understanding the basics of internet of things applications development fundamentals offers some great context.
Here's where things get really interesting:
- AI Species Recognition: This is a massive time-saver. The app's AI scans every photo and automatically tags the animal it sees, sorting your deer from raccoons and turkeys from coyotes. No more scrolling through hundreds of pictures of squirrels—just filter for "buck," and you're good to go.
- Interactive Mapping: Many apps let you drop pins for your cameras on a satellite map of your property. You can also add pins for scrapes, rubs, food sources, and sightings. Over a season, this builds an incredible visual database of how animals are moving across your land.
- Data Overlays: This is where you can really start patterning animals. The app pulls in weather data, moon phase, and barometric pressure for the exact time and location of each photo. You’ll quickly learn what specific conditions get the deer moving at your spots.
Turning Photos Into Actionable Scouting Intel
Every trail camera photo is more than just a picture of an animal; it’s a data point. A single image contains a wealth of hidden information that, when you learn how to read it, transforms a simple gallery into a powerful scouting database. Moving beyond just admiring the buck to understanding the story around it is what separates good hunters from great ones.
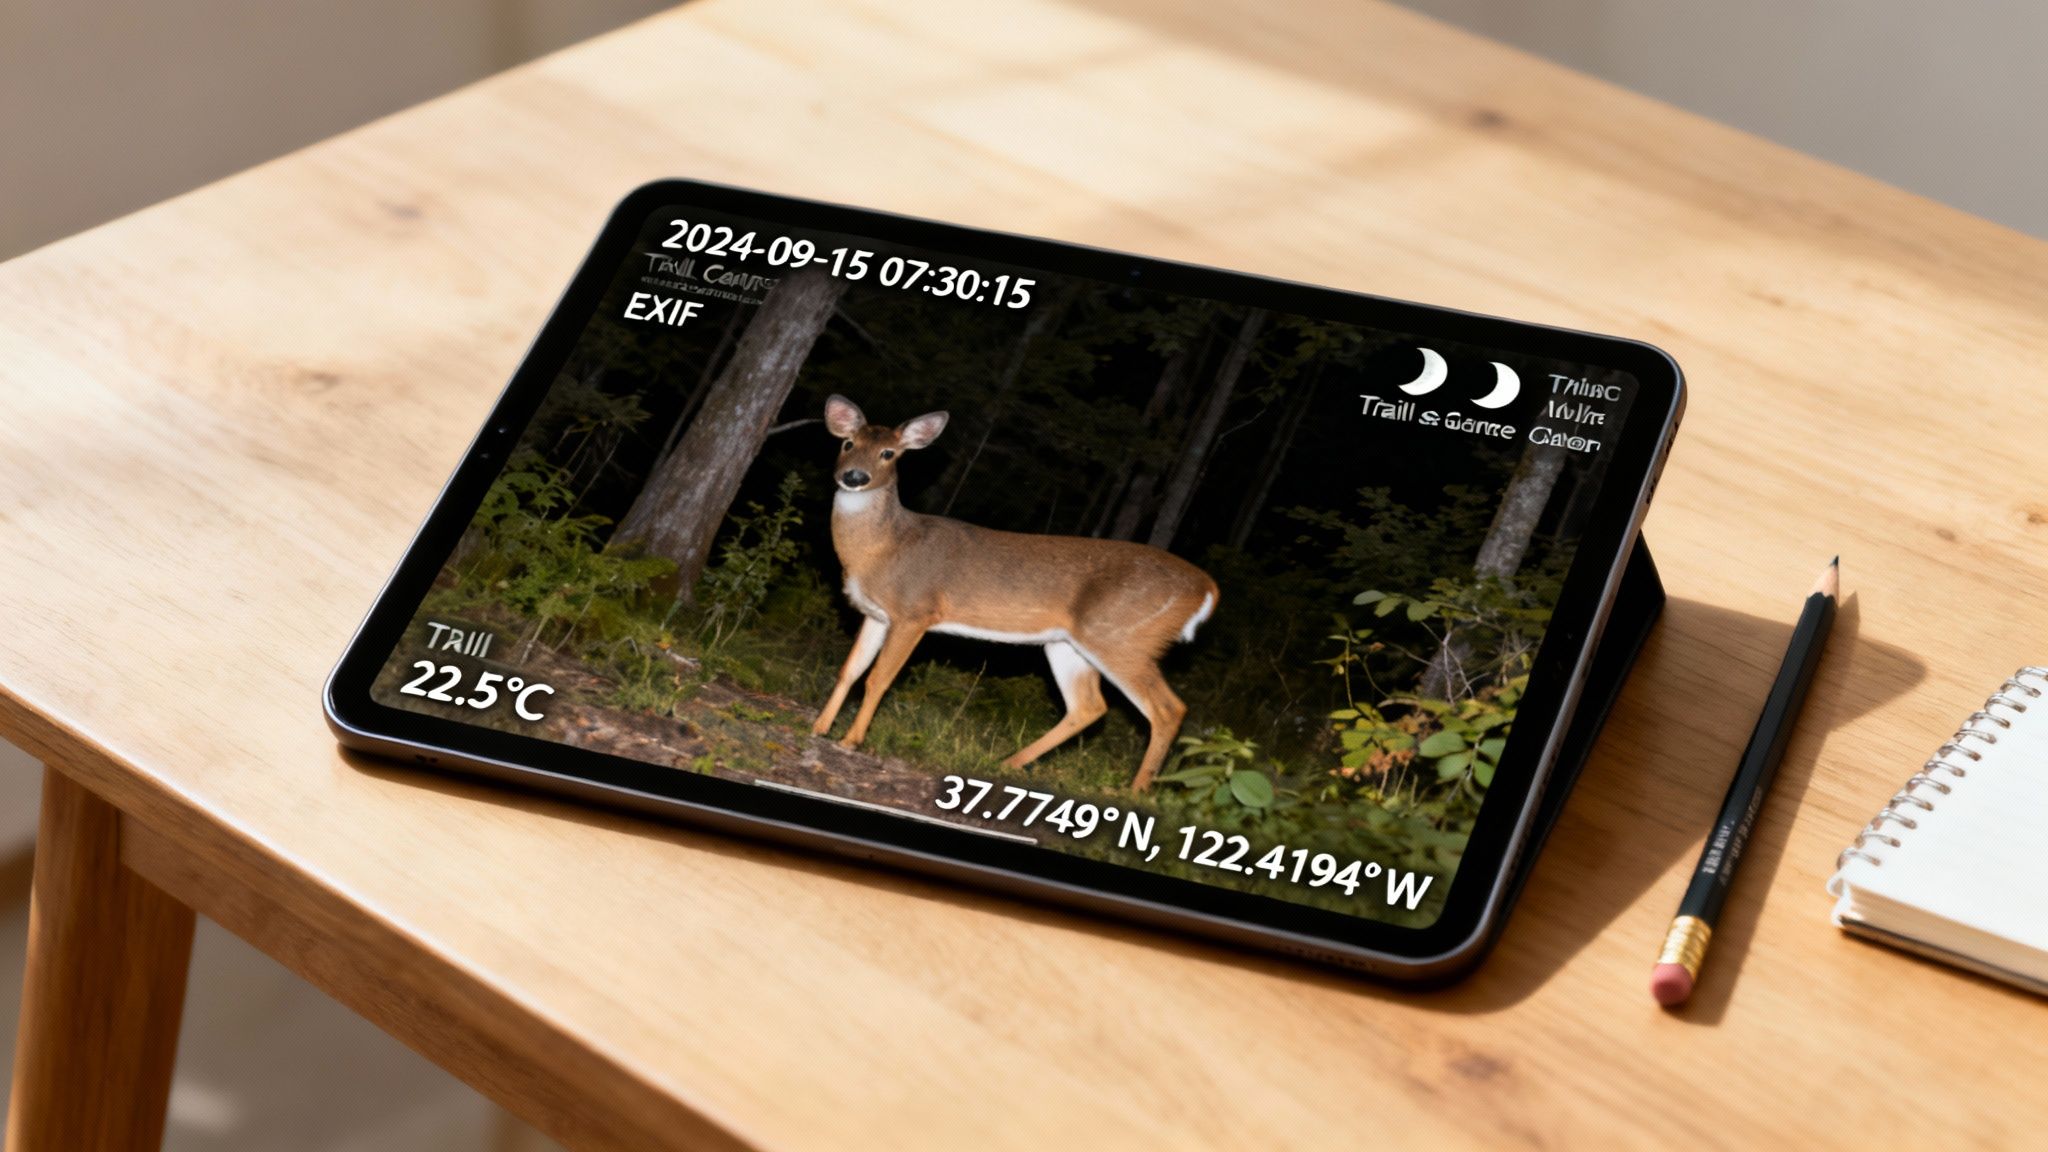
This whole process starts by unlocking the metadata embedded within each image file. Think of this data, often called EXIF data, as a digital fingerprint for every single capture.
Demystifying the Data in Your Images
Whether you're pulling an SD card and using a physical reader or checking a cellular app on your phone, this information is right there waiting for you. Sure, most photo apps on your computer or phone can display it, but a dedicated trail camera app lays it all out in a much more useful way.
Here’s the key information you should be looking for:
- Timestamp: The exact time and date tell you precisely when animals are on their feet.
- Temperature: Correlating temperature swings with deer movement is one of the most powerful patterns you can find.
- Moon Phase: A lot of old-timers swear by the moon, and this data lets you prove or disprove those theories for your specific property.
Once you start analyzing this data across hundreds or even thousands of photos, trends will jump out at you. You might discover that a target buck only visits a specific scrape in daylight when the temperature dips below 40°F after a cold front. That’s not just a photo anymore. That’s a game plan.
Your trail camera reader is the key that unlocks this intelligence. It’s no longer about just viewing photos; it’s about extracting every bit of environmental data to build a predictive model of animal behavior.
Leveraging GPS and Advanced App Features
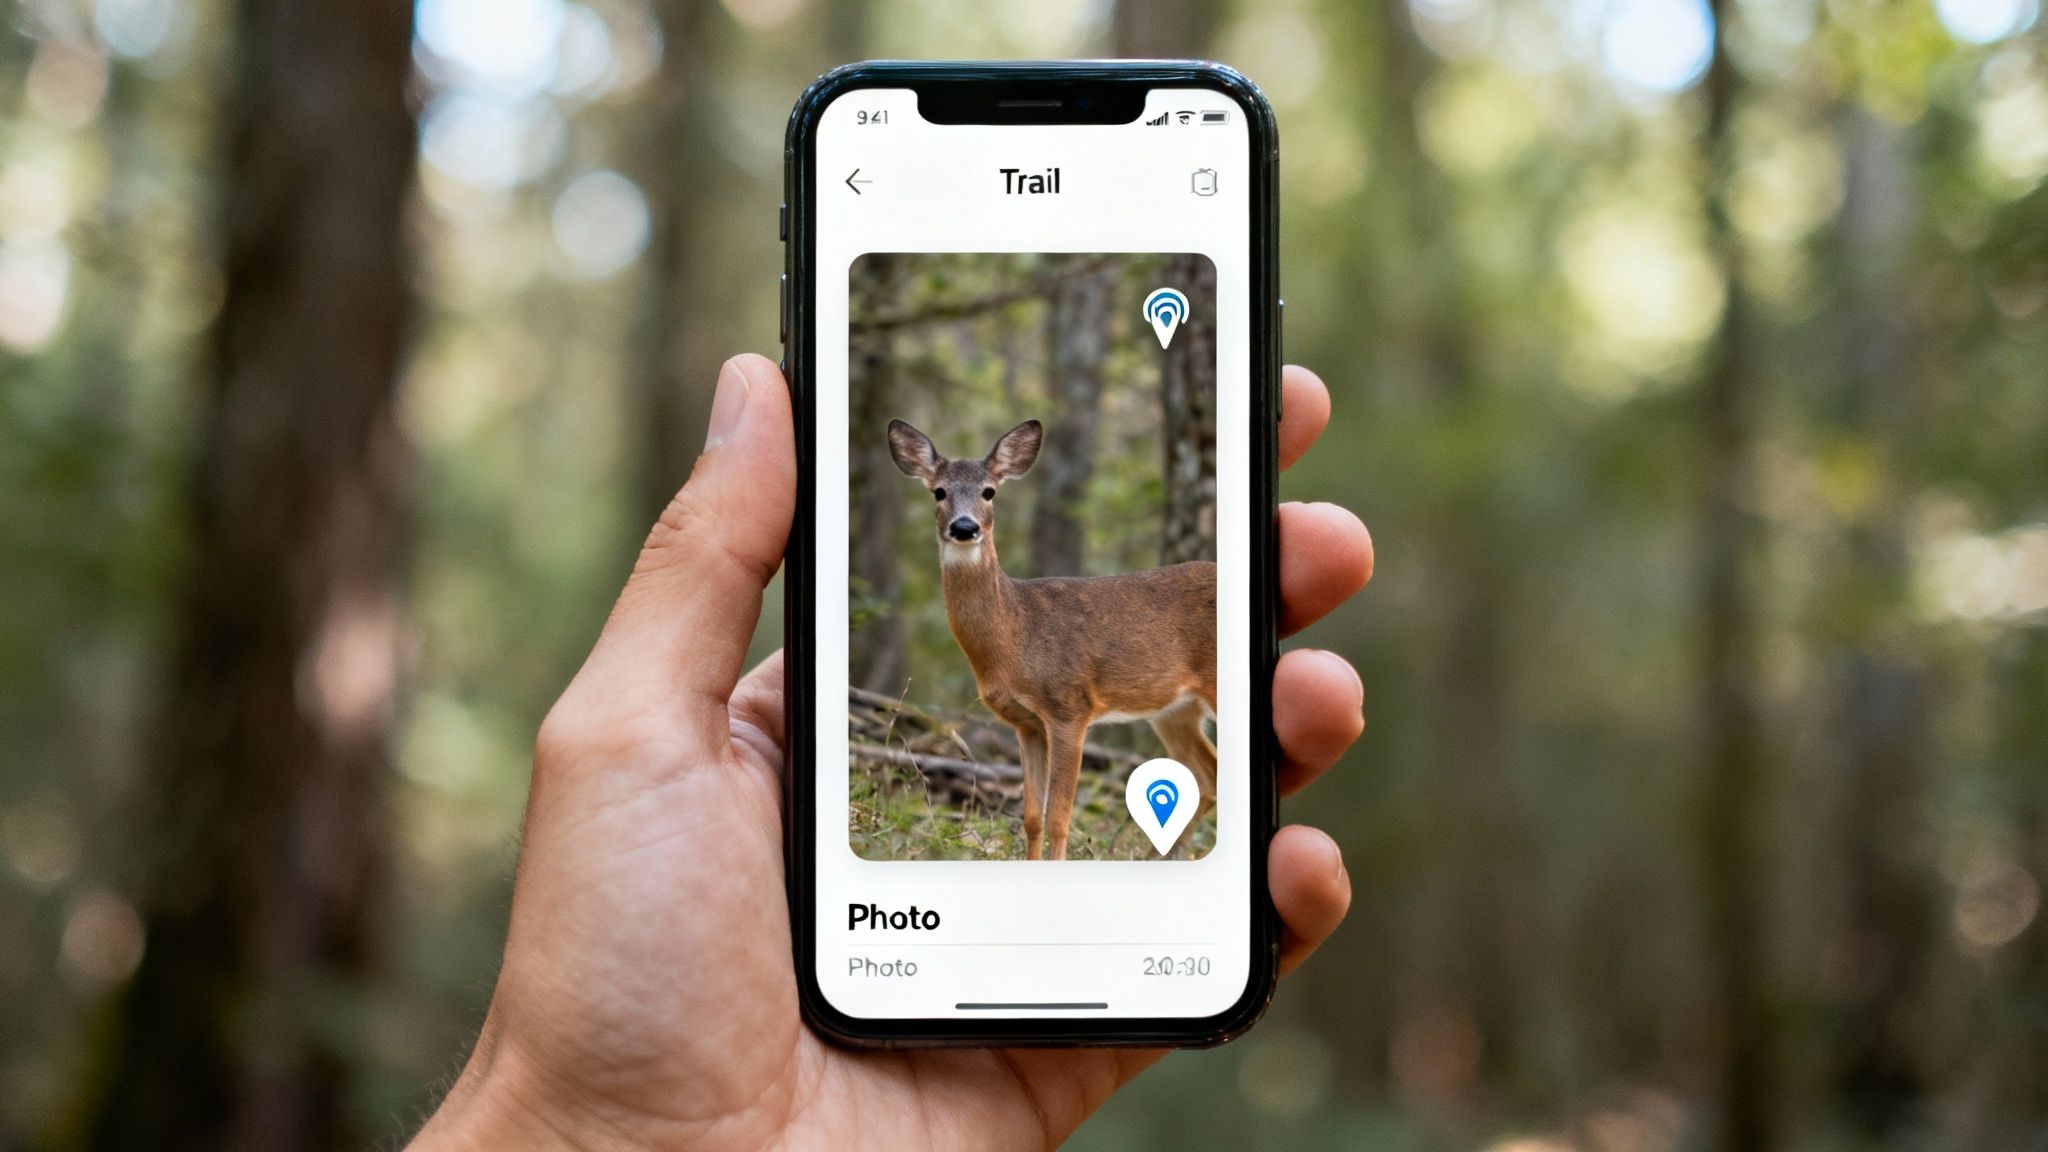
Cellular cameras take this intelligence gathering to a whole new level. Because the camera has a built-in GPS unit, every photo gets geotagged with precise coordinates. A quality app, like the one for MAGIC EAGLE cameras, will actually plot these photos on an interactive map of your property.
Suddenly, you can visualize movement corridors between bedding areas, pinch points, and food sources. It gets even better. The app can overlay cloud-based weather data—like wind direction and barometric pressure—for the exact moment of each capture. Now you’re starting to see not just when a mature buck moves, but why he moves.
For a deeper dive into how modern camera software makes this happen, check out our introduction to AI species identification technology for smarter scouting.
When you combine all these data points—time, temp, moon, location, and weather—you stop reacting to old sign and start anticipating future movement. This proactive approach, driven by the data you unlock with your trail camera reader, is the very essence of modern, effective scouting.
Solving Common Trail Camera Reader Problems
Sooner or later, every hunter runs into a technical glitch. One minute you’re buzzing with anticipation, ready to see that monster buck, and the next you’re staring at a blank screen or an error message. It’s frustrating, but getting your scouting data shouldn't be a battle.
Good news is, you can usually solve the most common issues right there in the field with a few simple checks.
When your trail camera reader won’t cooperate, the fix is often way easier than you think. The key is to avoid panicking and just work through the problem logically, starting with the simplest cause.
Issues with Physical SD Card Readers
Let's start with the classic manual card pull. You've just swapped cards, plugged the reader into your phone, and… nothing. Before you assume the card is fried or the reader is toast, run through this quick mental checklist.
- Check the Connection: Is the reader plugged in all the way? I’ve lost count of how many times pocket lint and dirt have gotten in the way. A quick puff of air or a careful cleaning of your phone’s port can solve this instantly.
- Reboot Your Device: It's a cliché for a reason. The old "turn it off and on again" trick works wonders. Restarting your phone or tablet can clear temporary software bugs that stop it from recognizing external devices like your card reader.
- Inspect the SD Card: Take a look at the small copper contacts on the back of the card. If they look smudged or dirty, a gentle wipe with a clean, dry cloth is all it takes. A poor physical connection right there is a common culprit.
Now, what if you can see the file names but the photos won't open, or they look scrambled? You’re likely dealing with a corrupted file. This is a classic symptom of pulling a card while the camera is still writing data to it. Always, always power down your camera before you eject the SD card.
Pro Tip: The best fix is prevention. Get in the habit of formatting your SD card in the trail camera itself—not on your computer—before you deploy it every single time. This ensures the card is perfectly configured for that specific camera model and dramatically cuts down the risk of file corruption.
Troubleshooting Cellular Camera and App Problems
Cellular cameras bring a whole different set of potential headaches, and most of them trace back to connectivity. If your camera suddenly goes silent and stops sending pictures, don't assume the worst.
First thing to do is check the camera's battery level in the app. A weak battery is the #1 reason transmissions fail, period. If the power looks good, then your problem is probably signal strength. Trees, hills, and even dense summer foliage can block the signal. Sometimes, just moving the camera a few feet higher up a tree is all it takes to find a clear connection.
If the camera seems fine but your app isn't syncing or showing the latest photos, try these steps in order:
- Force close and reopen the app. This clears up most minor syncing glitches.
- Check for app updates in your phone's app store. An outdated app can cause all sorts of problems.
- Log out and log back in. This forces a fresh connection to the server and can pull in any missing data.
I've learned from experience that most reader problems feel bigger than they actually are. The table below covers the most frequent issues I see and the first thing you should try to fix them.
Quick Fixes for Common Reader Problems
| Problem | Potential Cause | First Solution to Try |
|---|---|---|
| Reader not detected | Debris in port or loose connection | Clean your device's port and firmly re-insert the reader. |
| Files visible but won't open | File corruption | Format the SD card inside the trail camera before next use. |
| Cellular camera not sending | Low battery or weak signal | Check battery level in the app; if good, try moving the camera. |
| App not showing new photos | Syncing error | Force close the app on your phone and then reopen it. |
| Slow transfer speeds | Old or low-class SD card | Upgrade to a Class 10 or U3 rated SD card. |
Working through these common snags methodically will save you a ton of frustration and get you back to what matters most—analyzing your intel and planning your next hunt.
Organizing and Protecting Your Scouting Photos
A productive season can leave you with thousands of images and videos. If you don't have a system in place, that flood of valuable scouting intel quickly turns into an unmanageable digital mess. Staying organized isn't about being tidy for its own sake—it's about making your data easy to find, analyze, and use year after year.
The trick is to create a simple, repeatable folder structure the moment you transfer files from your SD card reader or download them from a cellular app. A chaotic desktop folder filled with files named "IMG_1234.JPG" is where good intel goes to die.
A Simple and Effective Folder Structure
You don't need a complicated system here. The goal is clarity and consistency. Over the years, I've found the most effective method is a nested folder system organized by year, then by camera location, and finally by the date of the card pull.
This straightforward approach looks something like this:
-
2024 Season (Main Folder)
-
Oak Ridge North (Camera Location)
- 2024-10-15 (Date of Card Pull)
- 2024-11-01 (Date of Card Pull)
-
Creek Bottom (Camera Location)
- 2024-10-20 (Date of Card Pull)
-
Oak Ridge North (Camera Location)
This structure makes it incredibly easy to go back and compare activity at a specific spot across different months or even different years. You’ll instantly know where and when every photo was taken just by looking at the file path. No guesswork needed.
Safeguarding Your Scouting Data
Losing a whole season's worth of photos to a corrupted SD card or a crashed hard drive is just devastating. All that work, gone in an instant. Your scouting data is far too valuable to exist in only one place, which means regular backups are absolutely non-negotiable.
A great rule of thumb is the 3-2-1 backup strategy: keep at least three total copies of your data, store them on two different types of media (like your computer's hard drive and an external drive), with at least one copy kept off-site (like in the cloud).
Cloud storage services are perfect for that off-site copy. After organizing your photos into the folder structure, just upload the main season folder. This protects your intel from physical damage, theft, or simple accidents. To truly protect your valuable scouting photos, especially when they are transferred wirelessly, it's worth understanding how modern apps are implementing end-to-end encryption.
Physical Security for Your Gear
Protecting your digital files is one thing, but what about the camera itself? On public or shared land, theft is a very real concern. Thankfully, modern cellular cameras offer some powerful anti-theft features that help safeguard your investment and the intel it gathers.
Look for cameras with these key features:
- GPS Tracking: Pinpoint your camera's exact location if it gets moved.
- Geofence Alerts: Get an instant notification if the camera is taken outside a predefined area.
- Off-Power Protection: Some units can continue sending location data even if a thief powers them down.
These features don't just help you recover stolen property; they also act as a strong deterrent, protecting your entire scouting operation from the ground up.
Ready to streamline your scouting with a system that organizes, protects, and delivers intel in real-time? The Magic Eagle EagleCam 5 combines AI-powered organization with advanced anti-theft GPS, all managed through one simple app. Discover a smarter way to scout at https://magiceagle.com.