
When you’re looking to run a game camera on Verizon’s network, your first big decision comes down to the hardware. You’ve got two main paths to choose from: bringing your own Verizon SIM card to a compatible camera, or going with a modern, all-in-one camera that has multi-carrier connectivity baked right in.
Frankly, for sheer reliability out in the woods, cameras that automatically pick the strongest signal—whether it's Verizon or someone else—are almost always the better bet. They cut out the setup headaches and save you from discovering a dead zone the hard way.
Selecting the Best Verizon Game Camera for Your Needs
Before you can even think about data plans, you need the right camera. This isn't just about picking a brand you’ve heard of. The real difference lies in how the camera connects to a cell tower and gets those crucial images back to your phone.
Comparing Verizon Camera Compatibility
Let’s break down the two types of cellular cameras you’ll find and see how they stack up when it comes to using them on the Verizon network.
| Feature | Bring-Your-Own-SIM Camera | All-in-One Integrated Camera |
|---|---|---|
| Setup Process | Requires purchasing a Verizon SIM and activating a data line through Verizon. | Comes with a pre-installed SIM; activation is done through the camera's app. |
| Network Flexibility | Locked to the Verizon network only. | Automatically connects to the strongest signal available (Verizon, AT&T, etc.). |
| Ease of Use | Can be complex; may require dealing with Verizon's device portal. | Extremely simple. Turn it on, and it connects on its own. |
| Coverage Reliability | Only works where you have a solid Verizon signal. | Best possible coverage by switching carriers as needed. |
Ultimately, while the bring-your-own-SIM route might seem cheaper initially, the all-in-one models offer a level of convenience and reliability that’s hard to beat in the field.
Differentiating Camera Connectivity
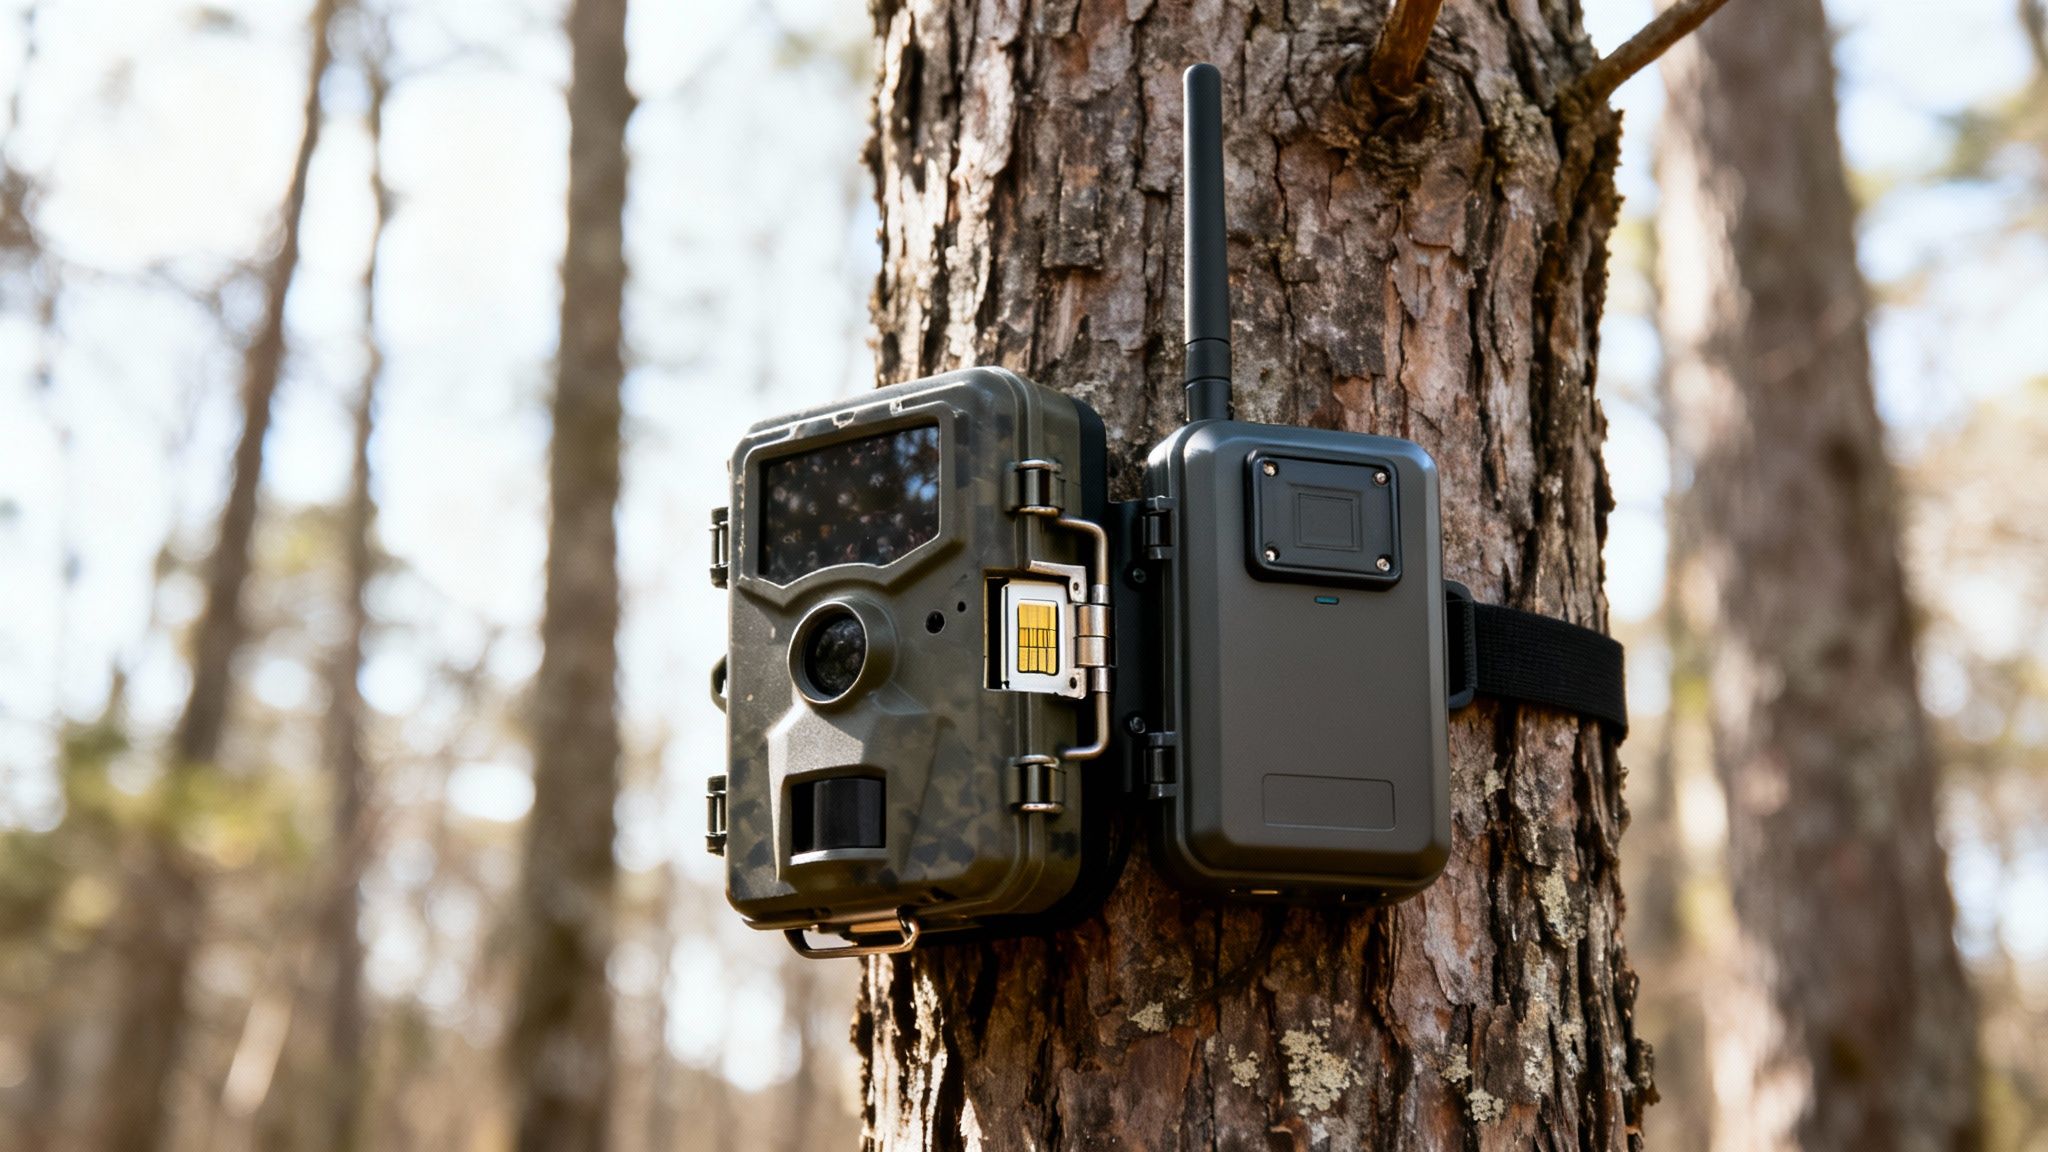
The first option is the old-school "Bring-Your-Own-SIM" camera. With these, you’re responsible for getting a Verizon SIM card and adding a new line of data to your phone plan. It sounds straightforward, but it often means wrestling with Verizon's activation portal and double-checking that your specific camera model is even certified to work on their network.
The second, and much simpler, approach is the all-in-one camera with an integrated, multi-carrier SIM. Models like the Magic Eagle camera are designed for pure simplicity. They ship with a SIM already inside that isn’t locked to a single provider. The camera just boots up, finds the strongest signal in the area—be it Verizon, AT&T, or another carrier—and connects. No guesswork, no extra steps. For a deeper dive, our guide on a trail camera with a SIM card explains exactly how this technology gives you an edge.
Key Features Beyond Just a Connection
A solid cell signal is your foundation, but the real magic happens with the features built into the camera. To make your camera a true scouting powerhouse, look for these game-changers:
- AI Species Recognition: This is a huge time-saver. The camera’s AI automatically sorts your photos by animal, so you can filter for bucks, does, or predators without scrolling through hundreds of pictures of squirrels.
- Live-Streaming Video: Getting a notification is one thing. Being able to tap a button and watch a live feed from your stand location to confirm it’s the buck you’re after? That’s invaluable.
- GPS and Anti-Theft Protection: Let’s be honest, these cameras are an investment you leave unattended in the middle of nowhere. GPS tracking and geofence alerts give you peace of mind and a real shot at getting your gear back if it gets stolen.
A camera’s real worth isn’t just in the pictures it takes, but in the intelligence it provides. A top-tier Verizon game camera delivers actionable data that helps you decipher animal patterns, hunt smarter, and keep an eye on your property.
It’s no surprise that demand for these smarter cameras is booming. The global game camera market was valued at US$112.20 million in 2023 and is projected to hit US$185.69 million by 2031, with North America leading the charge. This growth is fueled by hunters and landowners who know that reliable 4G connectivity and smart features are what turn a simple camera into a must-have tool. Discover more insights about the game camera market growth. Choosing a camera with these functions ensures your investment pays dividends for seasons to come.
Getting Your Camera Live on Verizon’s Network
Getting your new cellular game camera online shouldn’t be a headache. Depending on the model you bought, you’ll either be adding a new device to your personal Verizon plan or breezing through a simple in-app setup. One way is a bit clunky, the other is dead simple.
Let's walk through what to expect with both types, so you can get your eyes in the woods with as little fuss as possible.
The Two Ways to Activate
The path you take to get your camera transmitting images comes down to its built-in tech.
- Bring-Your-Own-SIM Cameras: This is the old-school method. You'll need to get a Verizon-compatible SIM card and then add a new "line" to your existing Verizon account. This usually means logging into your Verizon customer portal, finding the "Add a Device" or "Bring Your Own Device" option, and plugging in the camera's unique IMEI number. It works, but it can feel like you’re jumping through hoops on a carrier’s website.
- All-in-One Integrated Cameras: This is the modern, hassle-free approach. Cameras from brands like Magic Eagle come with a pre-installed SIM that isn’t locked to a single network. Activation happens entirely inside the camera's mobile app. You just create an account, scan a QR code on the camera itself, and pick a data plan right there. The camera automatically handles connecting to the strongest signal, whether that's Verizon or someone else.
For almost everyone, the integrated, app-based activation is way faster and far less likely to cause a technical migraine. It takes the carrier out of the equation and lets you manage everything in one spot.
Dialing in Your Initial Camera Settings
Once your game camera Verizon connection is active, the real work begins: configuring it through the app. Don’t just roll with the default settings. A few minutes of tuning is the key to balancing clear images, data usage, and battery life.
Your goal here is to capture useful intel without blowing through your data plan or killing the batteries in the first week. Start with conservative settings; you can always get more aggressive once you learn the patterns on your property.
A classic rookie mistake is setting the camera to instantly send every single photo at the highest resolution. This is the fastest way to burn through data and batteries. A much smarter strategy is to get low-res thumbnails first, then only request the full-quality version of the shots that matter.
Here are the key settings to tweak right away:
- Photo Resolution: Start in the middle, around 8MP. This gives you plenty of detail for identifying an animal without creating huge files that hog data.
- Transmission Frequency: Instead of "Instant" sends, try a batch upload schedule, like once every hour or even just twice a day. This is a game-changer for battery conservation.
- Video Length: If you’re capturing video, keep the clips short—10-15 seconds is a great starting point. Long, high-def videos are the number one data killer. You can always use the app to request a longer clip if you see something interesting.
For a deeper dive into how these settings affect your monthly usage, check out our complete guide to Verizon trail camera data plans. It has some great insights to help you match a plan to your specific needs.
Field Test Before You Walk Away
Never, ever hang a camera and just assume it’s working. After you strap it to a tree, stick around for 15-20 minutes to make absolutely sure the connection is solid and transmissions are coming through.
It’s simple: walk in front of the camera a few times to trigger it. Pull out your phone and confirm the photos are showing up in the app. Next, use the "Request Photo" or "Take Photo Now" feature in the app. This tests the two-way communication, proving the camera can not only send but also receive commands.
This one little test can save you the massive frustration of coming back a week later only to find out the camera never sent a single image.
Getting the Most Out of Your Camera in the Field
A cellular camera is only as good as its connection to the network and the juice keeping it alive. Out in the field, weak signal and dead batteries are the two biggest culprits that can shut down your scouting efforts before they even begin. If you can master camera placement and power management, your game camera Verizon connection will stay rock-solid, delivering the intel you need all season long.
This flow chart breaks down the simple path from buying your camera to putting it to the test.
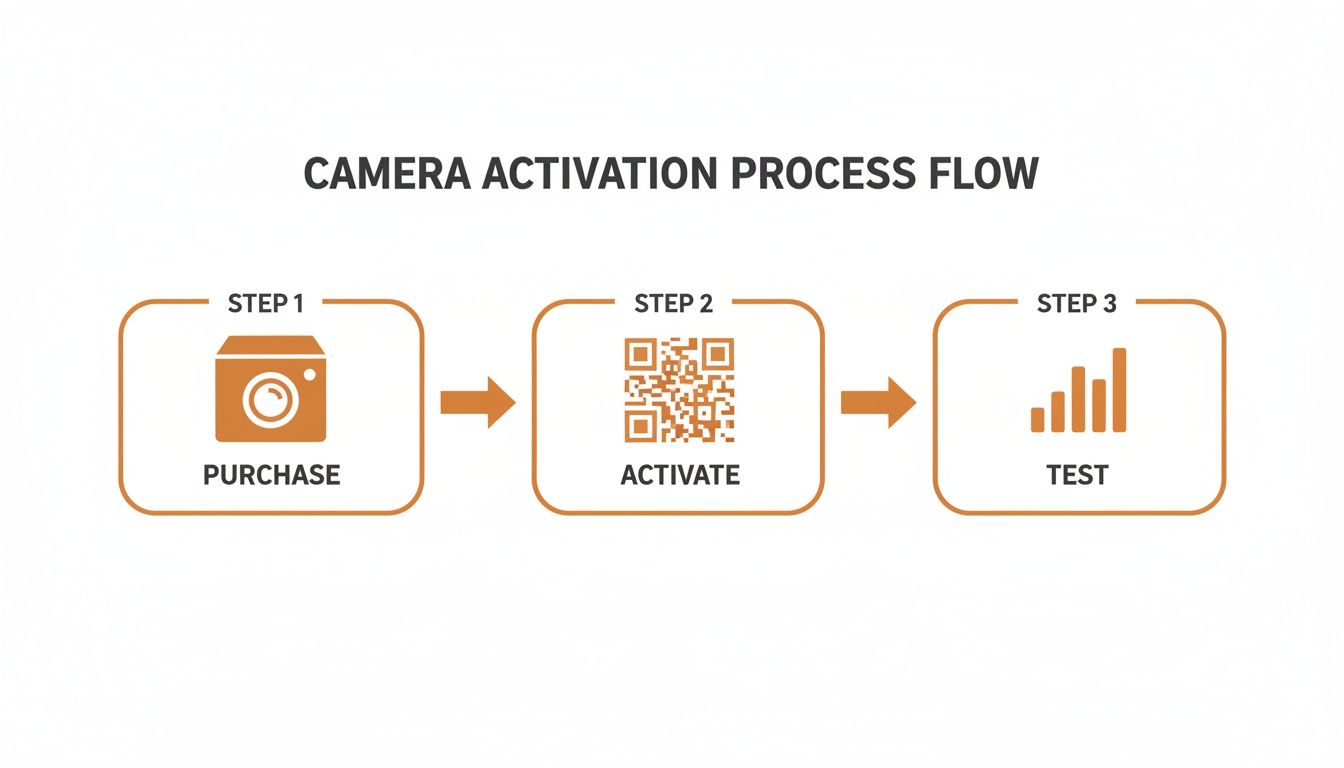
The key takeaway here is that successful deployment isn't just about activation. It's a three-part process, and that final on-site test is just as critical as the initial setup.
Scouting for the Strongest Verizon Signal
Before you even think about strapping a camera to a tree, you need to think like a signal wave. Cellular signals travel in a line of sight, and anything that gets in the way—hills, dense foliage, deep ravines—is going to weaken them.
When you're scouting a spot, don't just look for deer sign. Pull out your phone and check the signal bars. A camera placed high on a ridge will almost always get a better connection than one tucked into a creek bottom.
- Elevation is Your Friend: Sometimes, just moving a camera a few feet higher up a tree can make a huge difference in its ability to connect with a distant tower.
- Avoid Natural Barriers: Thick stands of pine or deep, shadowy valleys are notorious signal killers. Try to find spots on the edges of these features rather than deep inside them.
- Look for a Clear Line of Sight: If you can, face the camera in the general direction of the nearest town or known cell tower location. Every little bit helps.
If you’re curious about the infrastructure that makes this all possible, learning about modern cell tower construction can give you a better sense of how the network operates in your hunting area.
Choosing the Right Power Source
Your camera’s power source is its lifeblood, and your choice here directly impacts its reliability. There’s no single "best" option; it’s all about matching the power solution to your camera settings and the environment.
Keep in mind that high-transmission settings, frequent video uploads, and brutal cold will all put a serious strain on your batteries.
The most common reason a camera goes offline isn't a bad signal—it's dead batteries. Always invest in quality power solutions. Cheaping out here will cost you in missed photos and frustrating trips back to the woods.
Let's break down the most common options:
| Power Source | Pros | Cons | Best For |
|---|---|---|---|
| Alkaline AAs | Cheap and you can find them anywhere. | Short lifespan, terrible in the cold. | Short-term deployments in mild weather. |
| Lithium AAs | Last a long time, excellent in extreme cold. | Higher initial cost. | All-season use, especially in cold climates. |
| Solar Panels | Potentially infinite power, eco-friendly. | Needs direct sunlight, higher upfront cost. | Open areas and long-term, set-it-and-forget-it setups. |
For most serious users, lithium batteries are the gold standard. They provide consistent, reliable power even through freezing temperatures, ensuring your camera works when deer are most active during those late-season hunts. For a much deeper dive, check out our guide on the best batteries for trail cameras.
When to Add a Cellular Booster Antenna
So you’ve tried everything—you’ve optimized the placement, you’ve cleared obstructions—and your signal is still just barely hanging on. A cellular booster antenna is your next move. These external antennas are designed to grab a faint signal much more effectively than the camera's small internal one.
You don't need an antenna for every camera. They're specifically for those fringe areas where your phone might show one bar of service, but the camera just can't seem to hold a stable connection. Installation is a breeze: just screw it into the camera’s external antenna port and mount it as high as you can, ideally above any nearby leaves or branches. This simple upgrade can turn a frustrating, unreliable camera into a consistent performer.
The push for better performance is real. North America now represents over 40% of global trail camera revenue, with an incredible 62% of hunters using them for scouting. That kind of dependency drives the need for strong network performance to support all the real-time features we've come to rely on.
Using Advanced Features for Smarter Scouting
Getting your game camera on the Verizon network is just the first step. The real magic happens when you move beyond just checking for new pictures and start digging into the advanced features baked into modern cameras and their apps.
This is where you go from being a passive observer to an active analyst. These tools are built to turn a flood of raw images into clear, actionable intelligence, helping you understand what wildlife is doing on a much deeper level.
AI Species Recognition Saves You Hours
Let's be honest, nobody enjoys manually sifting through thousands of photos of squirrels and raccoons just to find the one buck you're after. That’s where AI-powered species recognition changes the game completely.
Instead of a mountain of unsorted images, the camera's software automatically analyzes and tags each photo by species. With a single tap, you can filter your gallery to see only bucks, does, turkeys, or even predators. This feature alone can give you back hours of your life, letting you spend more time planning your hunt and less time sorting photos.
Think of your camera app not as a photo album, but as a data dashboard. The goal isn't just to see what walked by, but to understand when, where, and why it happened so you can predict what will happen next.
Interactive Mapping for Pattern Analysis
A top-tier camera app, like the one from Magic Eagle, will include interactive mapping features that are absolutely critical for connecting the dots. It’s one thing to get a photo of your target buck; it’s another to see his entire movement pattern laid out across your property.
This is where you can start logging crucial information directly onto a satellite map of your hunting area.
- Pin Sightings: Every time a key animal shows up, drop a pin on the map at that camera's location. Before long, you'll have a visual heatmap of core activity zones.
- Track Movement: By connecting the dots between sightings at different cameras, you can start to identify the exact travel corridors between bedding areas, food sources, and water.
- Log Key Sign: Use the map to mark scrapes, rubs, and bedding areas as you find them while scouting. Suddenly, your digital intel and your boot-on-the-ground observations are all in one place.
This integrated approach gives you a powerful bird's-eye view of how animals are actually using the landscape, making your stand placements far more strategic.
Turning Data Overlays into Predictions
The best systems take this a step further by overlaying crucial environmental data right onto your map. Remember, your camera isn't just snapping pictures; it's recording valuable metadata with every single trigger.
For instance, many cameras have on-board sensors that log the temperature and humidity for every photo. A good companion app pulls in even more data, like barometric pressure, wind direction, and upcoming weather fronts. When you cross-reference this information with your deer sightings, you can uncover some incredibly powerful patterns.
You might discover that your target buck only shows up at a certain food plot in daylight when the temperature drops below 40 degrees and the wind is blowing from the northwest. That's not a guess—that's a data-driven insight that tells you exactly when and where to be.
Modern camera features can be applied in very specific ways to give you a strategic edge, whether you're a hunter or a wildlife manager.
Scouting Applications for Advanced Camera Features
| Feature | Hunting Application | Wildlife Management Application |
|---|---|---|
| Live-Streaming | Confirm a target animal is present at a stand location moments before you walk in. | Observe animal behavior at a bait site in real-time without disturbing them. |
| AI Filtering | Instantly review all photos of mature bucks to create a hit list and track their condition. | Quickly conduct a herd census by filtering for does and fawns to check population health. |
| Weather Overlays | Correlate deer movement with specific wind directions or temperature drops to predict peak activity. | Study how different species respond to major weather events, like snowstorms or heatwaves. |
These features transform your camera from a simple monitoring device into a sophisticated field research tool.
Using Live Video for Real-Time Confirmation
Finally, the ability to live-stream video on demand is one of the most powerful tools for making immediate decisions. Imagine getting a notification that a deer is working a scrape near your evening stand. Instead of guessing if it's a young buck or your primary target, you just tap a button and get live video confirmation.
This feature is a game-changer for making last-minute adjustments to your hunting plan. It eliminates guesswork and ensures you're putting your time and effort in exactly the right place at the right moment.
Troubleshooting Common Verizon Camera Issues
Sooner or later, even the most dependable tech hits a snag out in the field. When your game camera on the Verizon network suddenly goes dark and stops sending pictures, the cause is usually pretty simple. The key is to run through a logical checklist instead of immediately getting frustrated.
Nine times out of ten, the problem boils down to one of three things: power, signal, or the data plan itself.
Before you even think about climbing a tree or hiking a mile back to your truck, start with the easiest fixes right from your phone. A quick check of your camera’s app can often tell you the whole story without ever touching the device.
Diagnosing Problems from Your Phone
Your first move should always be to open the camera’s companion app. Modern apps are packed with diagnostic info that can pinpoint the problem in seconds, saving you a ton of wasted time and effort.
Here’s what to look for right away:
- Check Battery Status: The app will show you the current battery level. If it’s critically low (think below 20%), the camera might have enough juice to stay on but not enough to muscle through a data-heavy transmission over the Verizon network.
- Review Last Connection Time: Look for a "Last Seen" or "Last Sync" status. If it was hours or even days ago, you’re almost certainly looking at a power or signal failure. If it checked in recently, the issue might be something smaller, like your trigger settings or just a temporary network hiccup.
- Verify Your Data Plan: This one gets people all the time. Log into your camera account and confirm your data plan is active and hasn't run out of its monthly photo or video allowance. It’s an easy thing to forget, especially near the end of a billing cycle.
Common Issues and Field Fixes
If the app doesn't solve the mystery, it’s time to head out and pay the camera a visit. Here are the most frequent problems you'll run into and how to fix them on the spot.
Problem 1: Failed Picture Transmissions
This is a classic. The camera is taking photos and saving them to the SD card just fine, but they never actually land on your phone. It's almost always a connectivity issue.
Start by forcing a manual connection. Power the camera off, wait a full minute to let the internal guts reset, and then power it back on. This simple reboot forces it to re-establish its handshake with the nearest Verizon tower. While you're there, trigger a test photo to see if it transmits successfully.
The overwhelming majority of transmission failures come down to a weak or spotty signal. Even if Verizon’s coverage map shows service, dense summer foliage or rolling terrain can easily knock that signal down. Sometimes, just moving the camera a few feet higher on the tree is all it takes to solve the problem.
Problem 2: Rapid Battery Drain
You just put fresh batteries in, and a week later, they’re dead. This is almost always because the camera’s settings are too aggressive for its location.
If your camera is pointed at a high-traffic spot (like a busy feeder) and set to "Instant" upload, it’s constantly connecting to the network and absolutely torching your batteries. The fix is easy: switch your transmission settings to a "Batch" schedule, sending photos just once or twice a day. This is the single most effective way to stretch your battery life from days to months.
Cellular trail cameras that run on Verizon's extensive 4G LTE network, which covers 99% of Americans, have totally changed the game for remote monitoring. The trail camera market is projected to grow from USD 852.97 million in 2024 to USD 1,420.95 million by 2032, a boom driven by the reliability that robust cellular networks provide. You can read the full research about trail camera market trends.
Problem 3: No Signal in a Good Coverage Area
This one is frustrating. Your phone shows two bars of Verizon, but the camera just refuses to connect. This usually points to one of two culprits: the camera's antenna or its firmware.
First, check the simple stuff. Make sure the antenna is screwed on tight and pointed straight up. If it's loose or angled weirdly, the signal will suffer.
Next, open your app and check for any pending firmware updates. Manufacturers are constantly pushing out updates that improve network connectivity and squash known bugs. A quick five-minute update can make a world of difference in performance.
Protecting Your Investment with Security Measures
Let's be honest: a high-quality game camera on Verizon’s network isn't cheap. It's a serious investment in your scouting efforts, and leaving it out in the woods makes it a tempting target for thieves. To keep your gear safe, you need to think beyond just the camera's basic lock and build a solid security strategy.
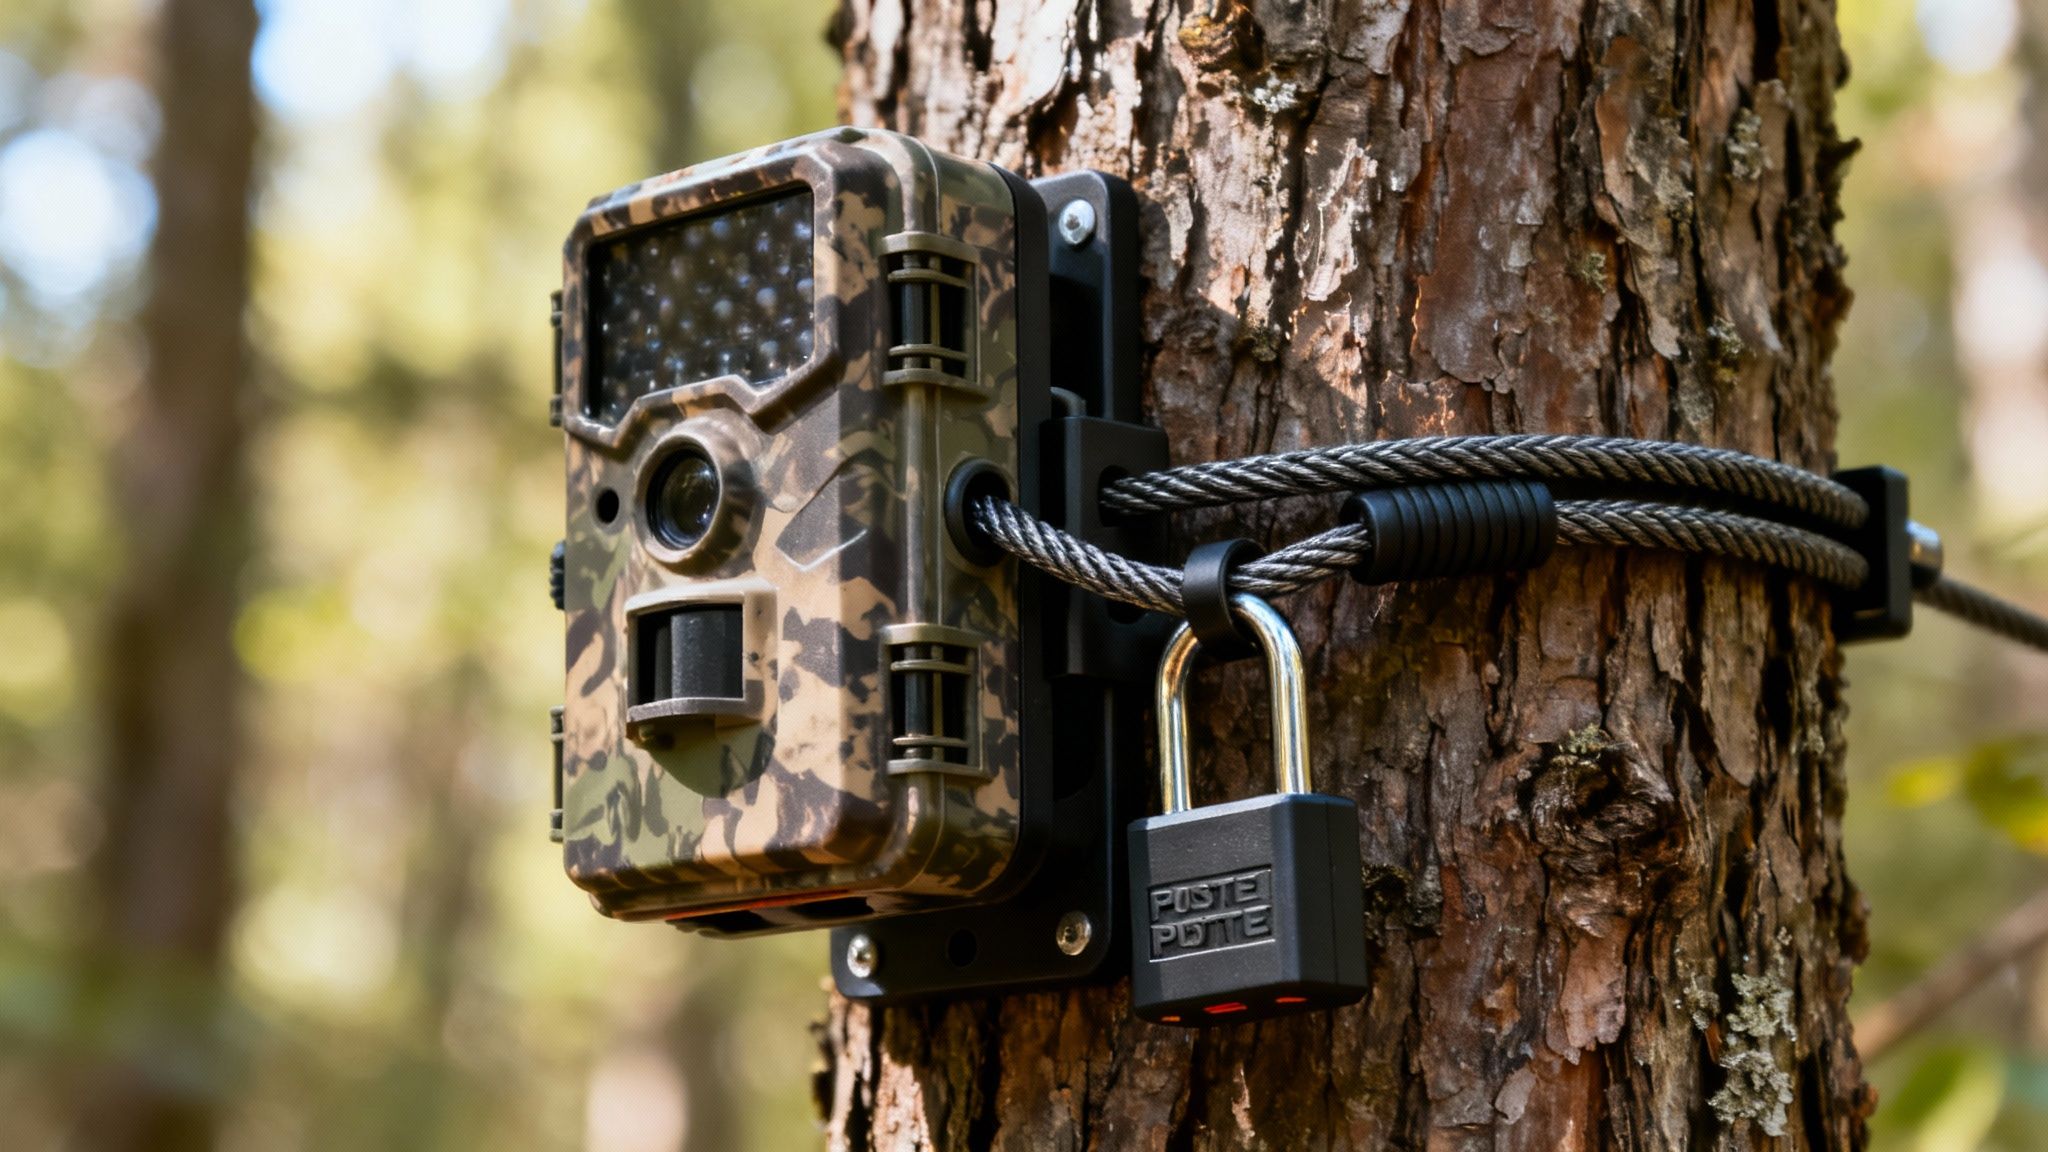
Physical security is your first line of defense. The goal is simple: make your camera so difficult to steal that a thief gives up and moves on.
- Steel Lockboxes: These things are worth their weight in gold. A heavy-duty steel box custom-fit for your camera model will protect it from both two-legged and four-legged threats (yes, I’m talking about bears).
- Python Cables: Don’t just lock the camera's door—secure the whole unit to the tree. A braided steel Python lock is the standard for a reason. Thread it through your lockbox and cinch it tight around the tree.
A quick pro tip: mount your camera higher than eye level and angle it down. It’s less likely to be spotted and much more awkward for someone to mess with.
High-Tech Anti-Theft Features
This is where cellular cameras really shine. Beyond a tough exterior, the best models leverage their connection to the Verizon network to give you powerful anti-theft tools. These features can mean the difference between losing your camera for good and getting it back.
The most critical feature here is GPS tracking. A camera like the Magic Eagle has a built-in GPS chip that reports its exact location to your app. Even if a thief yanks the batteries, many models have a tiny internal battery that keeps the GPS pinging for a while, giving you a crucial window to track it down.
Think of GPS and geofencing as your camera's silent alarm system. It's the digital equivalent of a guard dog watching over your scouting location 24/7, ready to alert you the second something is wrong.
Another game-changer is the geofence. You can literally draw a virtual perimeter around your camera’s location on a map in your app. The moment that camera moves outside your designated zone, you get an instant alert on your phone. This isn't just about recovery; it's about immediate notification, letting you act while the thief might still be in the area. Some of the more advanced cameras will even snap a photo of the culprit when it detects movement after being tampered with and send it straight to you. Now that's what I call evidence.
Common Questions Answered
Even with the best game plan, you're bound to have questions when you're out in the field getting a game camera Verizon setup running. Here are the straight answers to the things we get asked most often by hunters and property managers.
Can I Just Add Any Game Camera to My Verizon Phone Plan?
Not quite. It’s a common misconception, but you can’t just add a random trail camera to your existing family plan like you would a new phone or tablet.
Older cameras often forced you down a frustrating path. You’d have to find a model specifically certified by Verizon, then try to get a separate "Bring Your Own Device" data plan activated for it. It was a real headache.
Thankfully, modern all-in-one cameras have completely solved this. They come with integrated multi-carrier SIMs that are smart enough to find the strongest signal in the area—be it Verizon, AT&T, or something else—and connect automatically. You never even have to talk to a carrier.
How Much Data Does a Verizon Game Camera Actually Use?
This one comes down entirely to how you use it. Your data consumption is a direct reflection of your camera's settings. If you’re pulling down high-resolution photos and full videos every day, you’ll chew through data much faster than someone just getting low-res thumbnails.
As a solid rule of thumb, a camera sending a few dozen medium-resolution photos a day will probably land somewhere between 1-3 GB a month. But if you're a power user—hitting that live-stream button or requesting HD videos on demand—make sure your plan has enough breathing room. The last thing you want is a surprise overage bill or your camera going dark right before the rut.
What’s the First Thing to Do If My Camera Has a Weak Verizon Signal?
Don't panic—the fix is usually simpler than you think. Before you do anything else, just try moving the camera.
Sometimes, just climbing a few feet higher up the tree or shifting to a spot with a clearer view of the sky can make a world of difference. Dense leaves and hills are signal killers.
If a new spot doesn't cut it, the next logical step is a cellular booster antenna. These external antennas are far more powerful than the tiny one built into your camera and are designed specifically to grab and amplify weak signals. And finally, always make sure your camera’s firmware is up to date through its app. Manufacturers are constantly pushing out updates that improve network performance and stability.
Ready to stop guessing and start scouting smarter? The Magic Eagle EagleCam 5 delivers the reliability you need with automatic network selection, GPS anti-theft protection, and powerful AI species recognition. Get the clear, real-time intelligence you need to make this season your best one yet. https://magiceagle.com